Campaigns
Introduction
Campaigns allow you to roll out changes in your engineering organization that require orchestrated effort across multiple teams (ex. paying off technical debt, planning migrations or upgrades to projects, incremental work to improve service maturity, etc.). Rolling out these types of changes in a growing engineering organization involves a lot of managerial effort, including things like:
- Defining the changes and actions required
- Identifying the teams required to make these changes
- Communicating the details of what actions are required to these selected teams
- Measuring the progress of this initiative across the organization and driving progress forward via ongoing communication
Fortunately, Campaigns enables you to take control of the management of these changes from within OpsLevel:
- The required changes are defined in an explicit and measurable manner by creating checks that must be completed as part of the campaign by the relevant service owners
- The services in-scope for a campaign can be identified using a filter
- Once setup, the campaign can then be scheduled with a start and target date
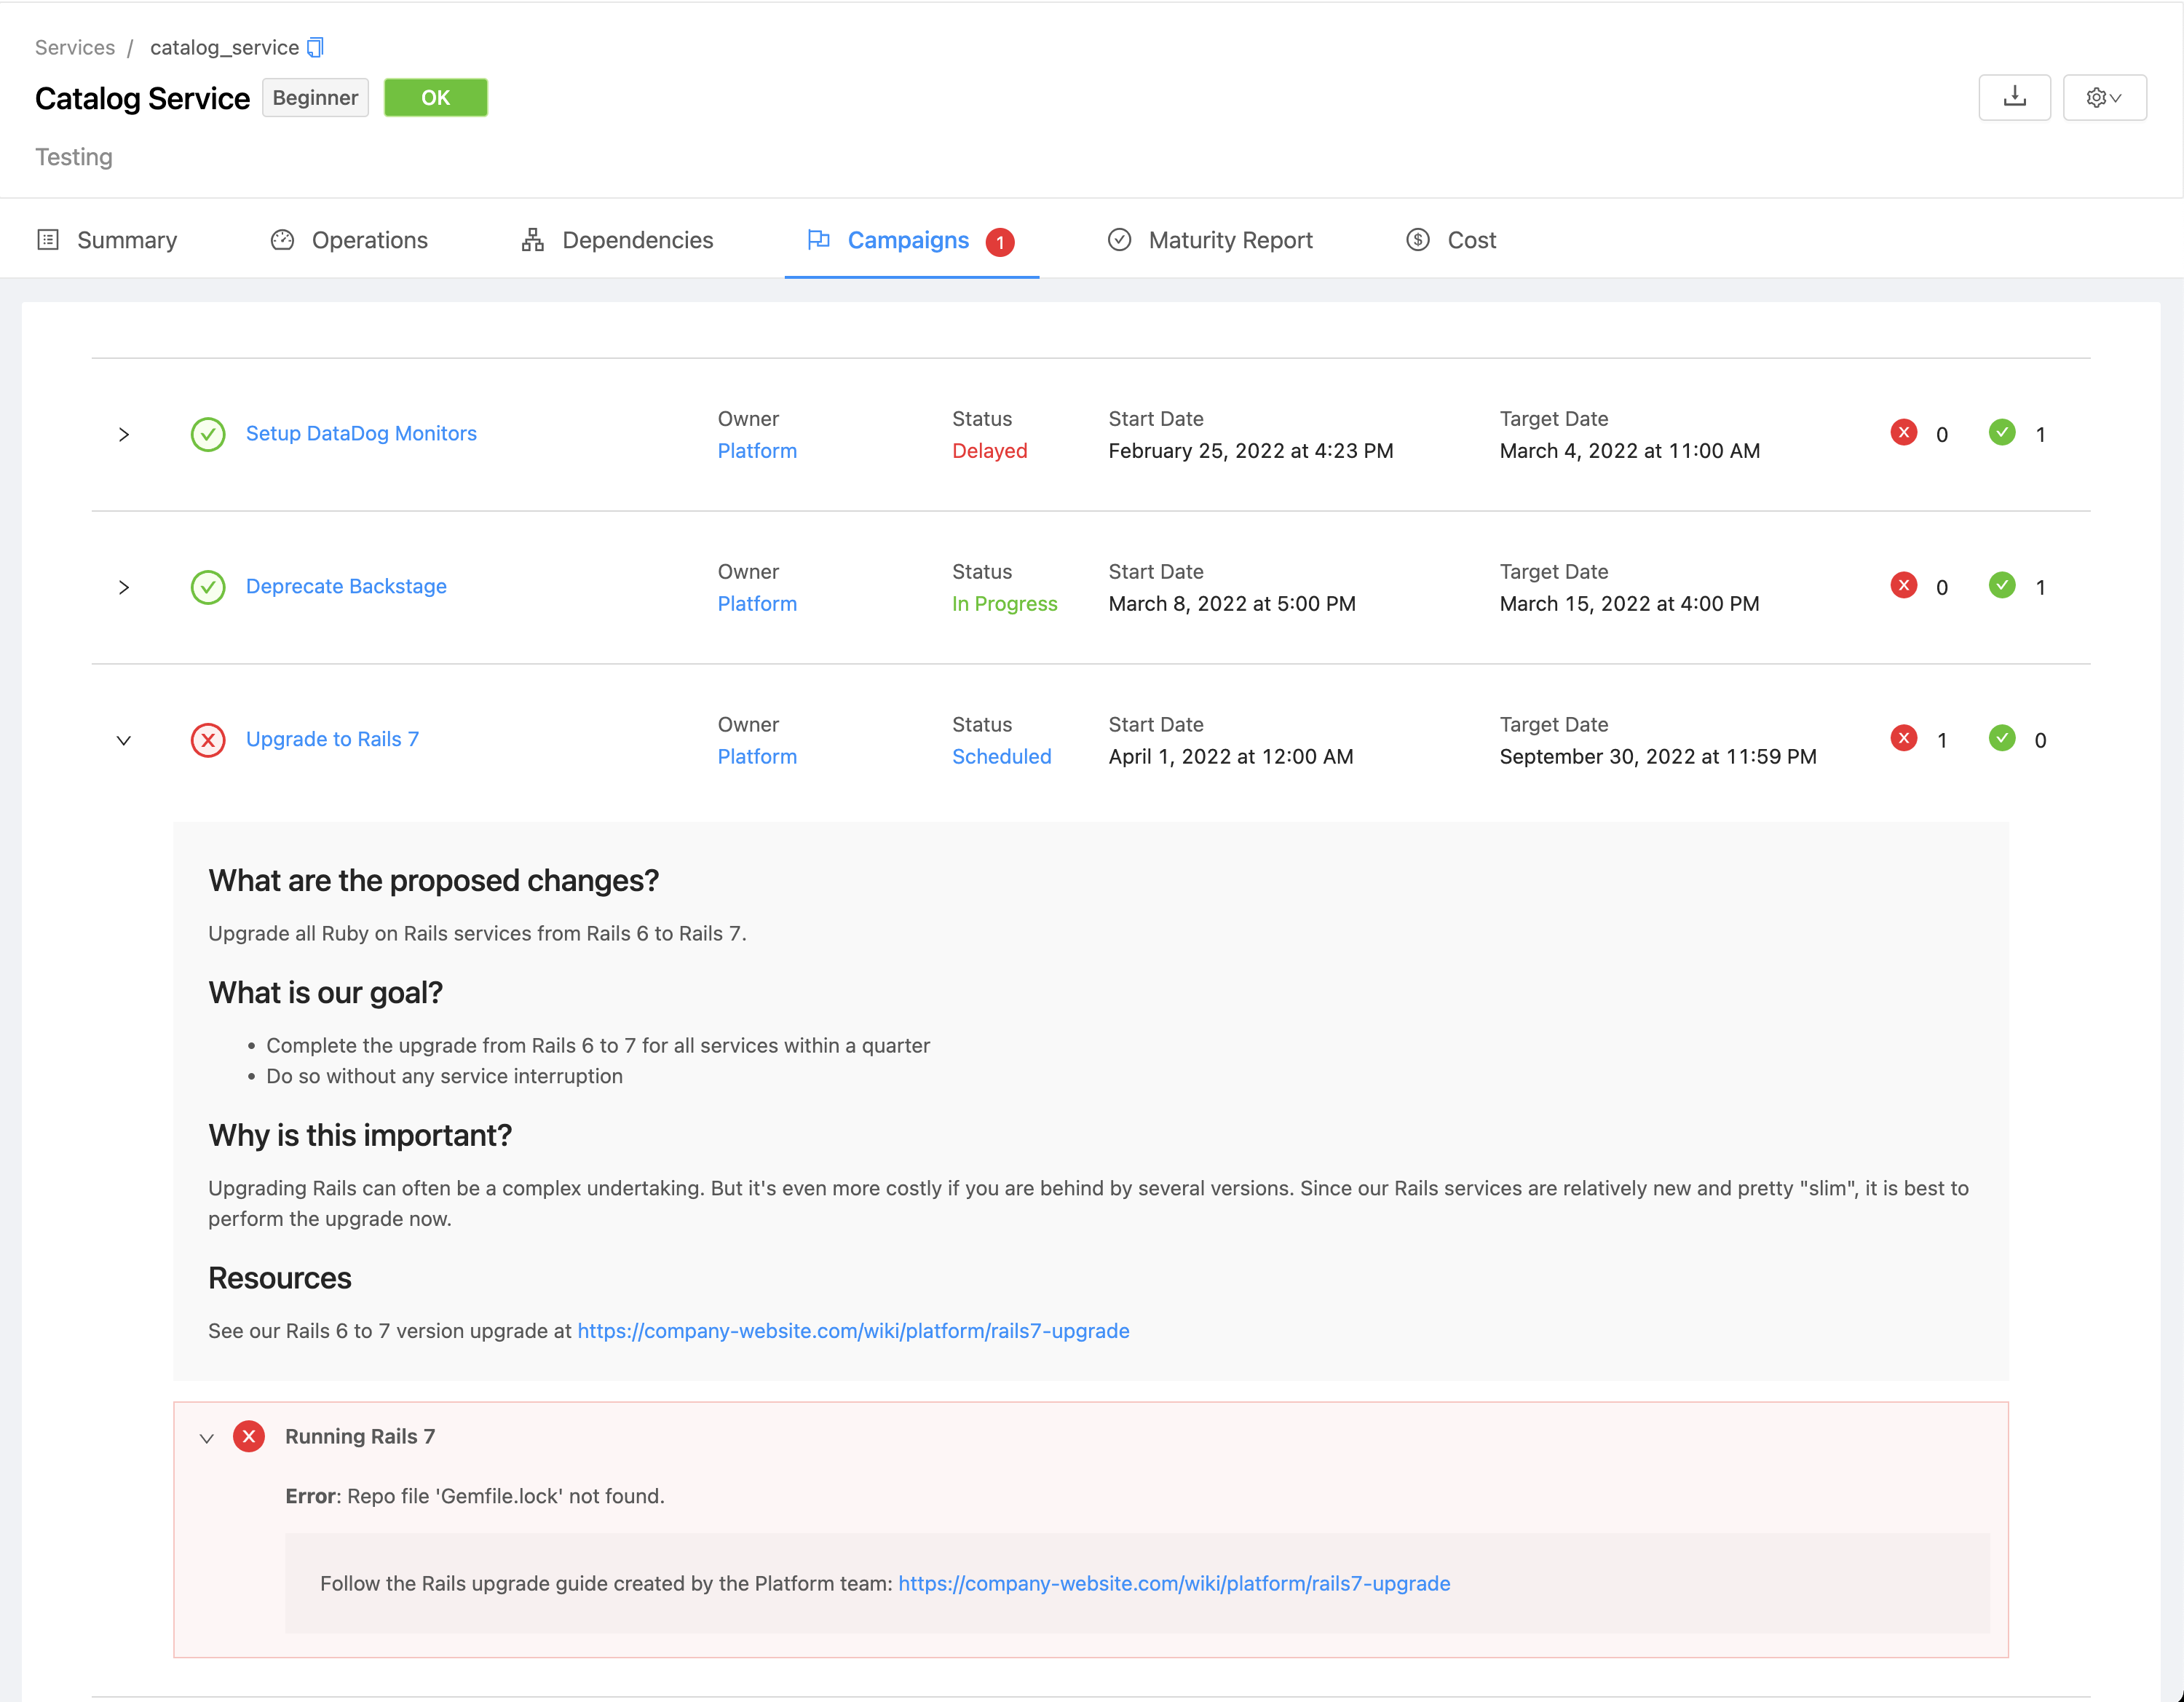
- Service owners will be able to see how they’re progressing against the campaigns linked to their services from the individual service pages
- Campaign owners will be able to monitor progress of the campaign across all services from the campaign page
- Campaign owners can also send out ad-hoc reminders via Slack or email to teams that have not yet completed the campaign
- Finally, when a campaign is ended, campaign owners have the option of moving the associated checks to the Rubric, establishing them as an ongoing standard for the organization
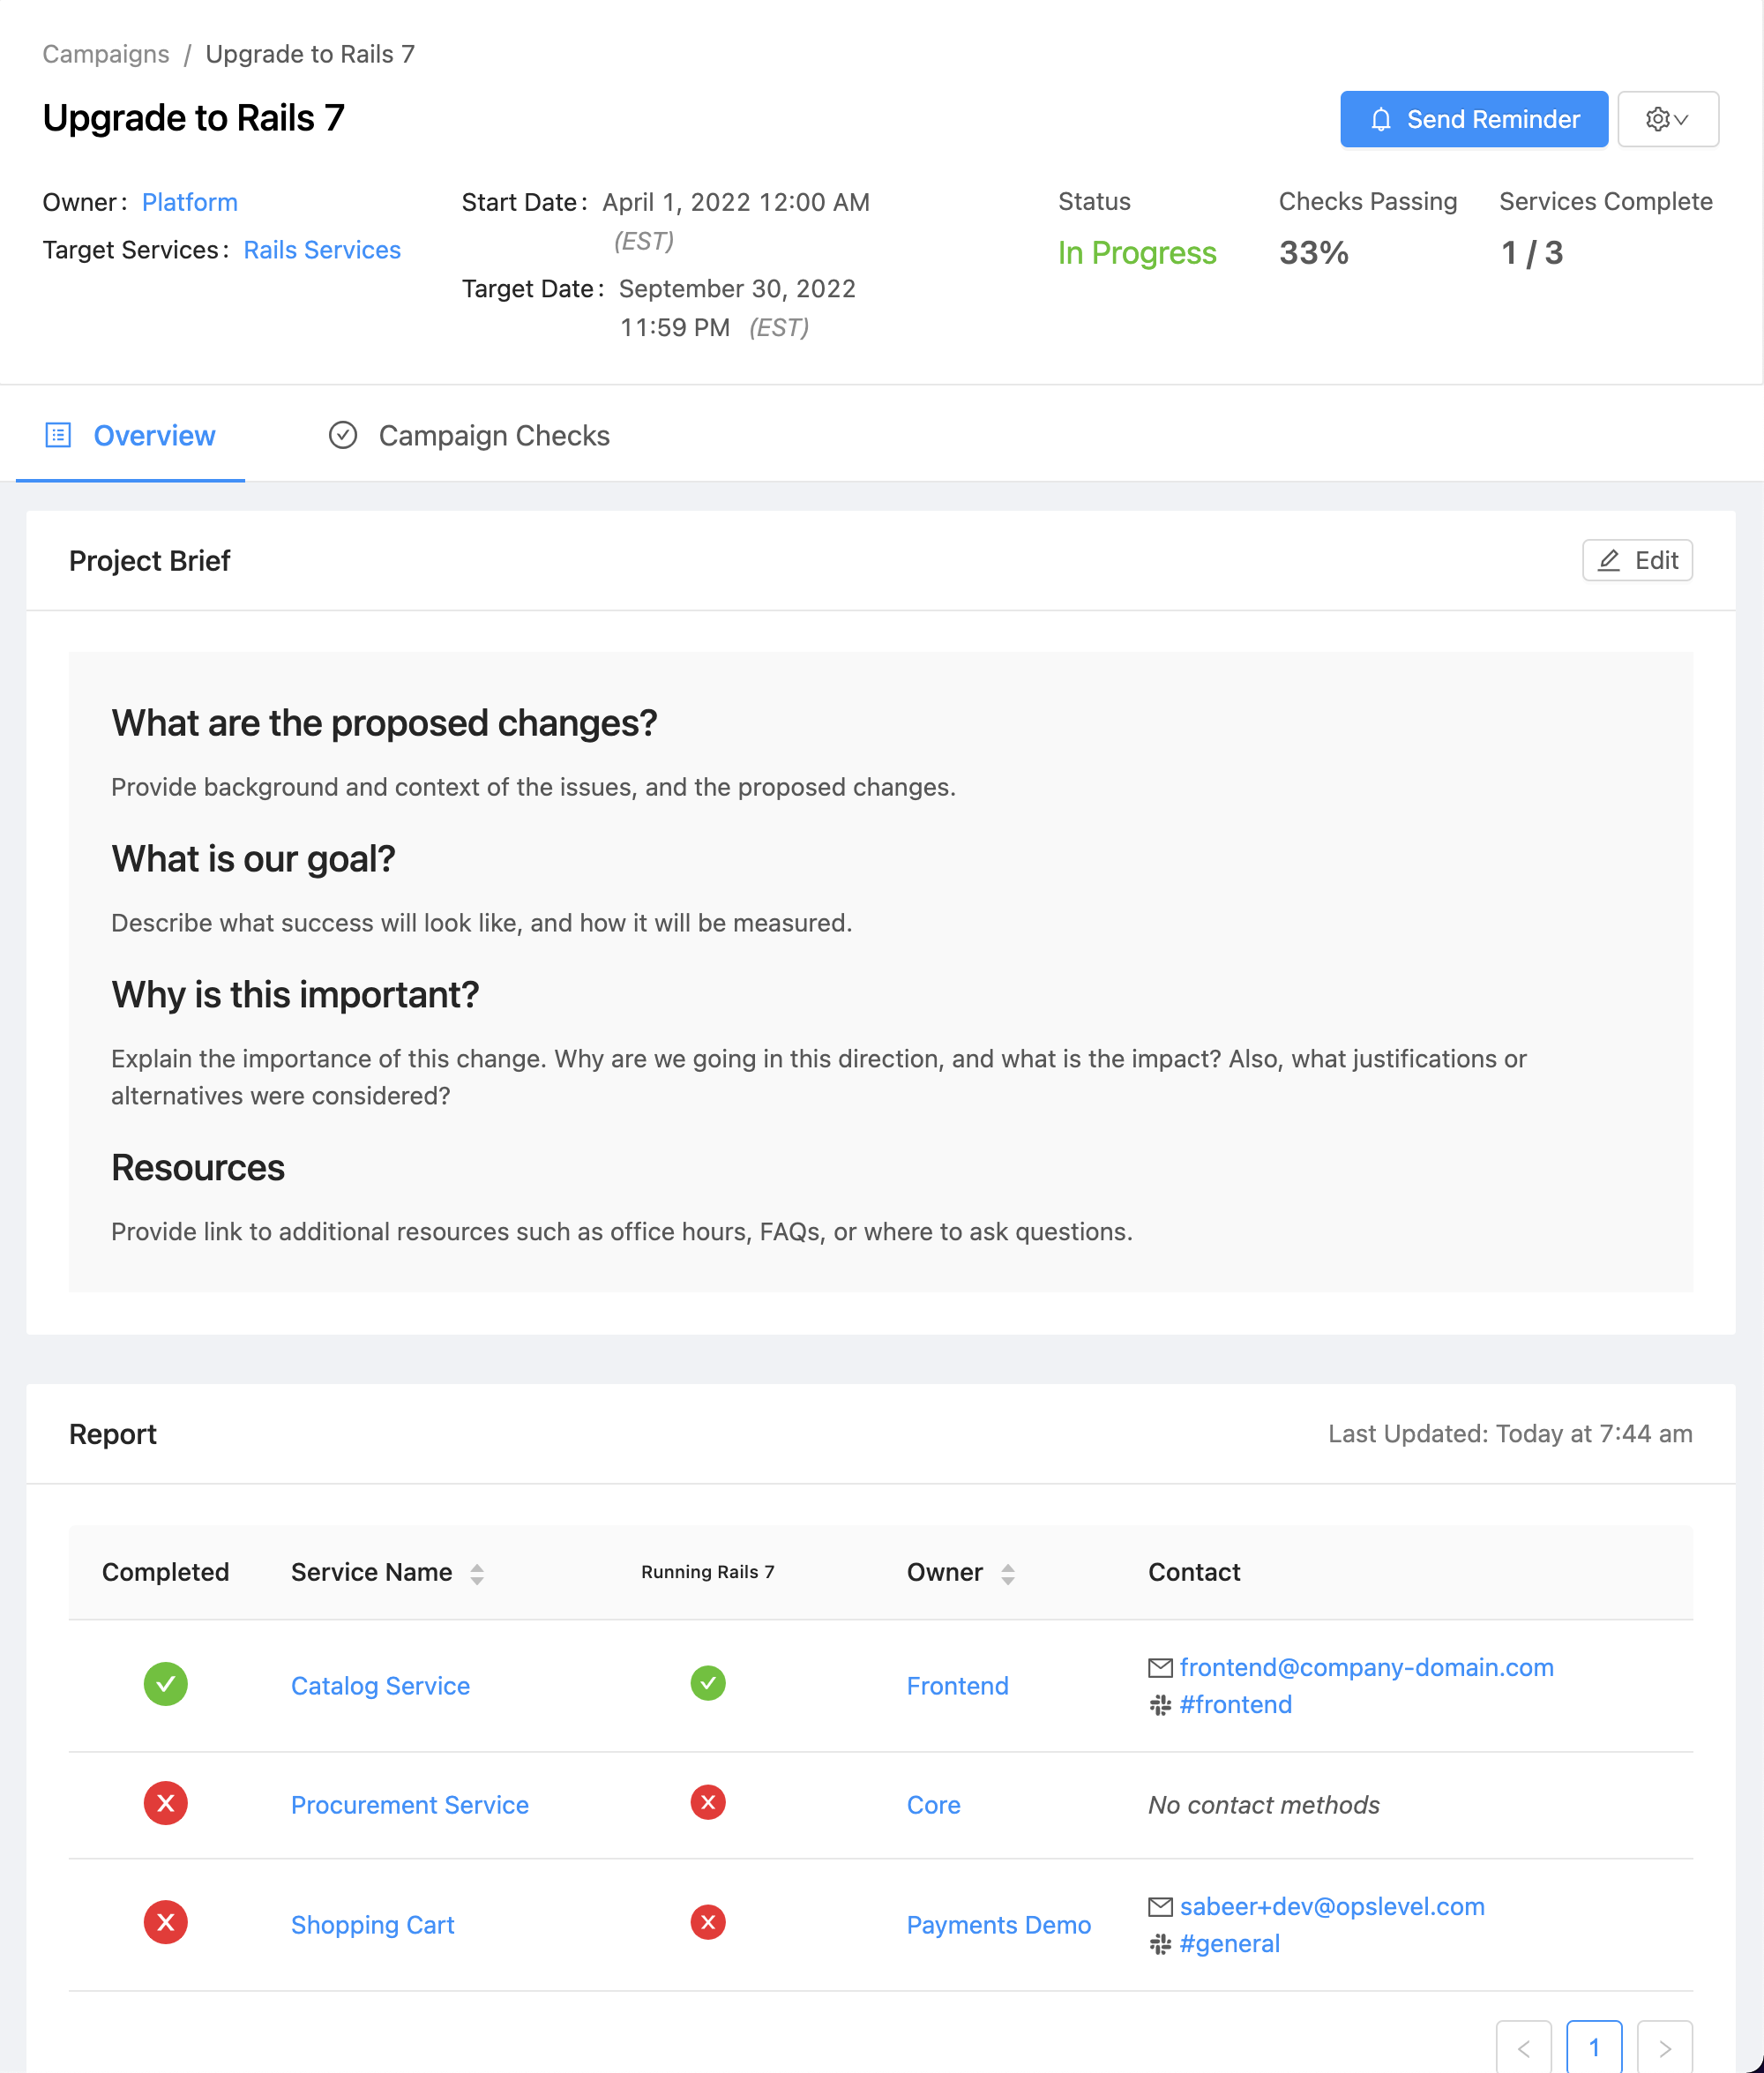
Here is a preview of what a campaign looks like:
Getting Started
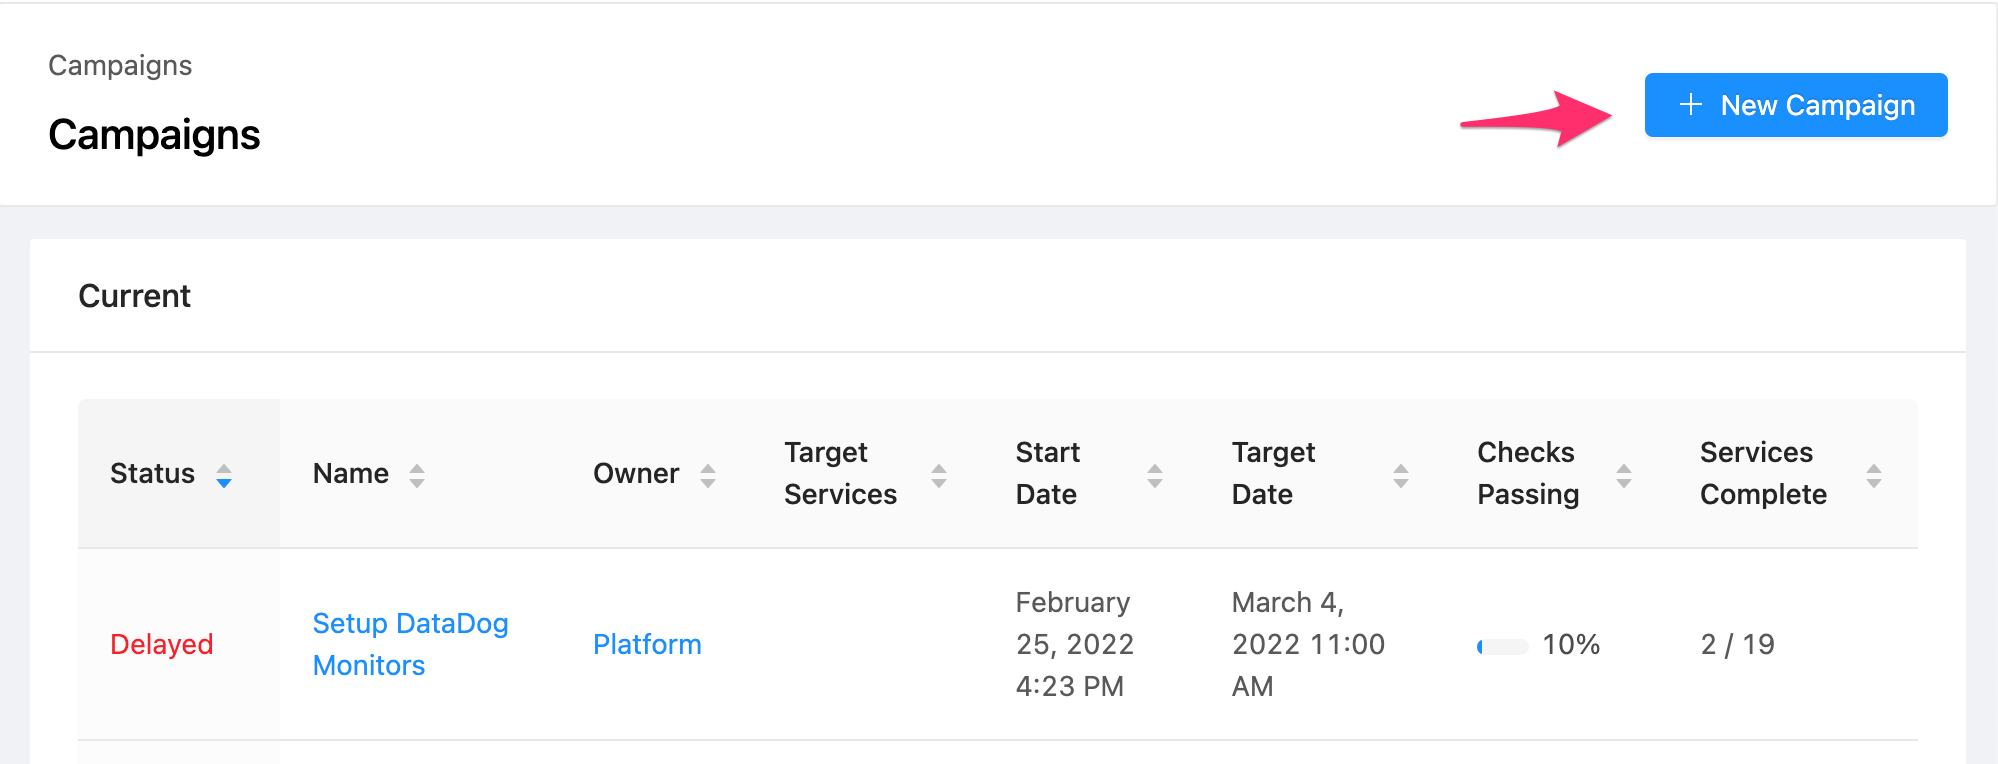
Create a new campaign draft
You can create a new campaign by navigating to the Campaigns page and clicking on the “New Campaigns” button.
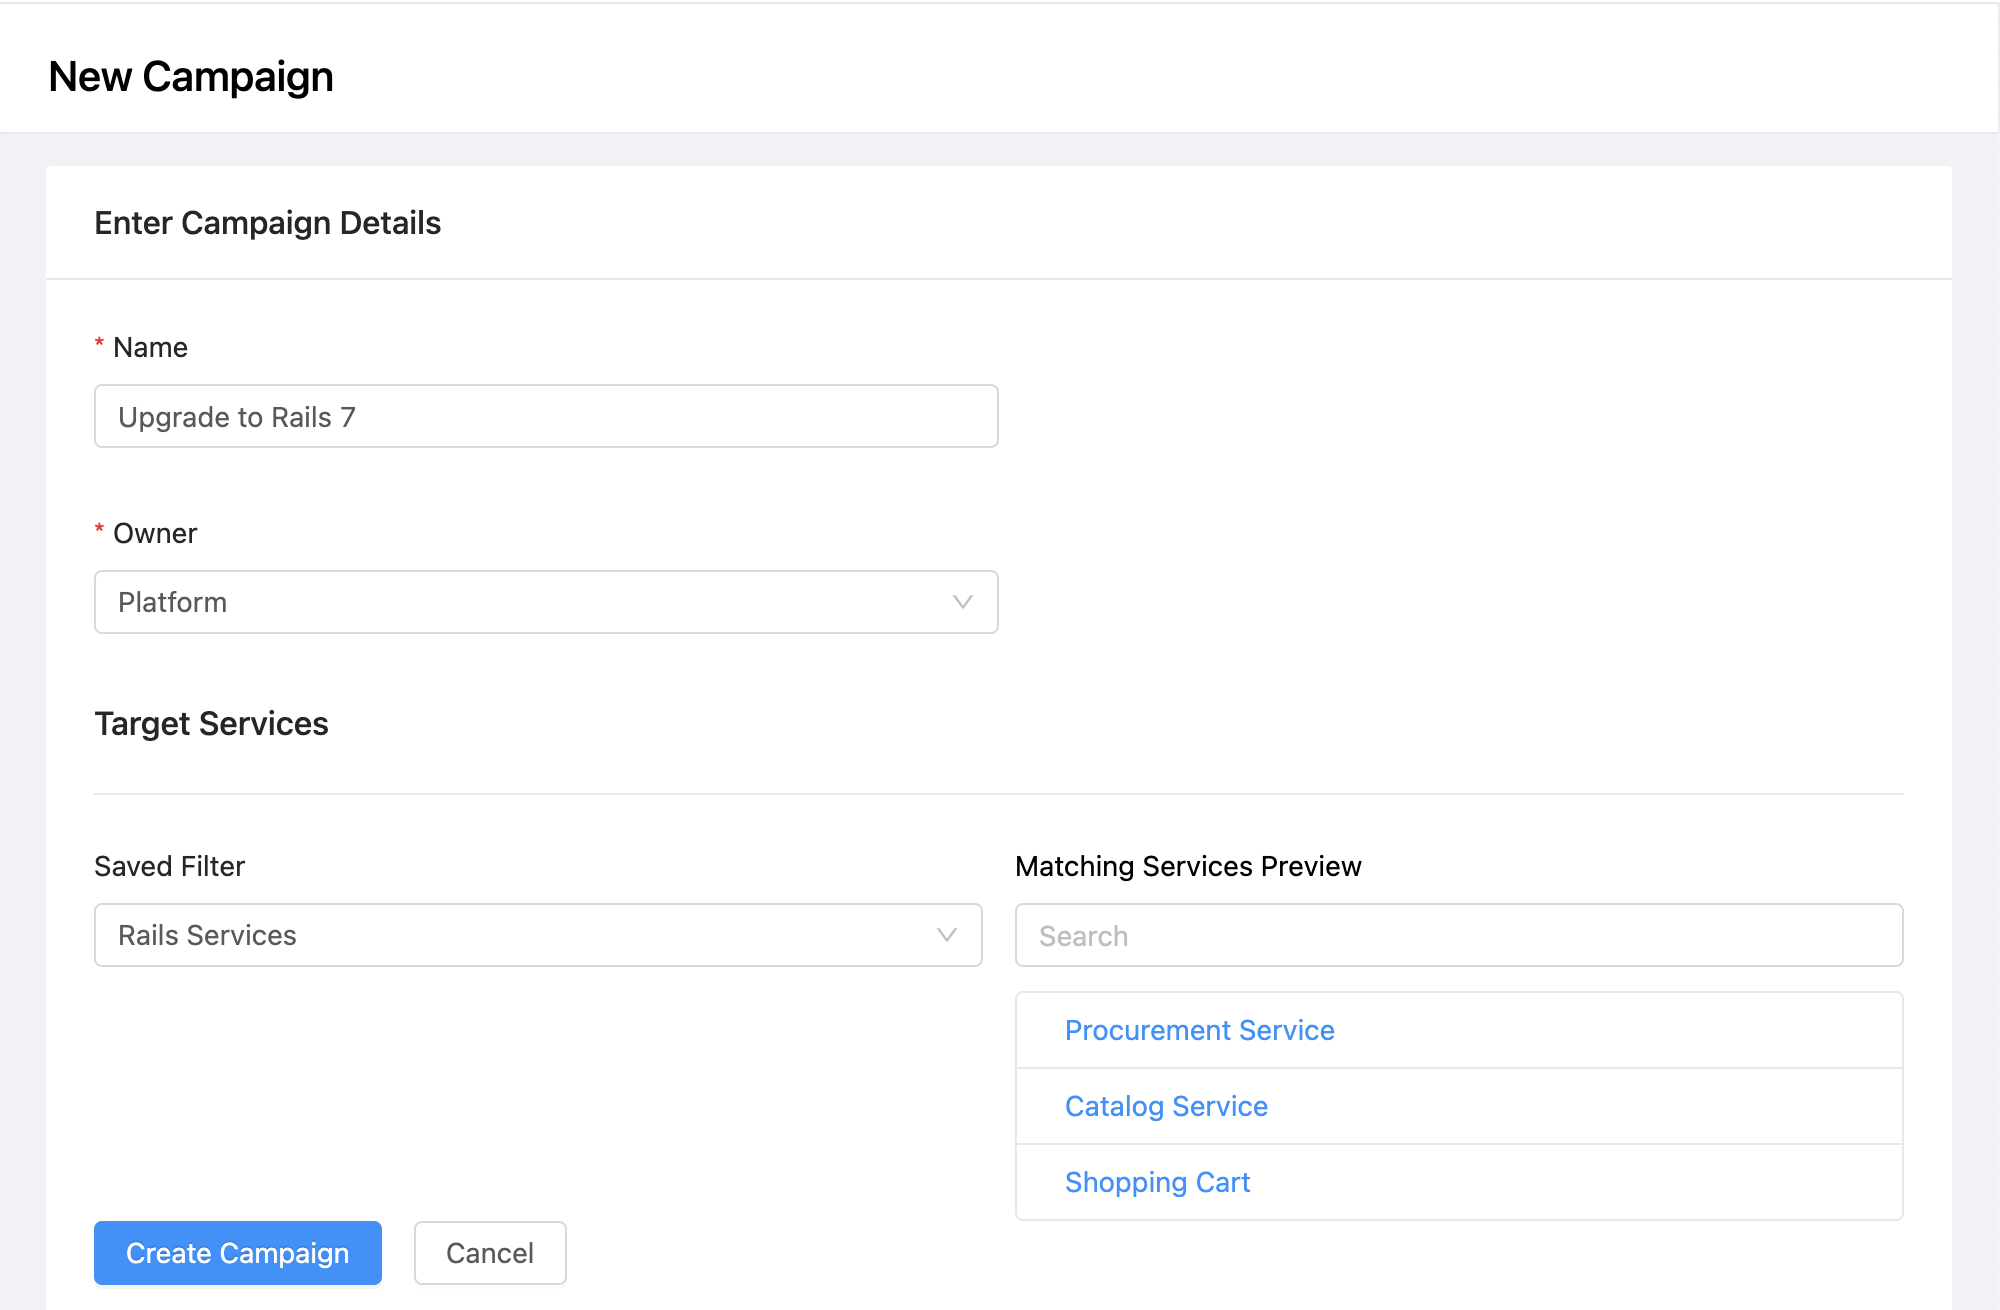
The only required fields at this stage are the name of the campaign, and the campaign owner. The campaign owner is the team in charge of rolling out this change for the organization. For example, it can be the Security team pushing security patches to software dependencies or the Platform team rolling out a major language/framework upgrade like upgrading everyone’s version of Python or Rails.
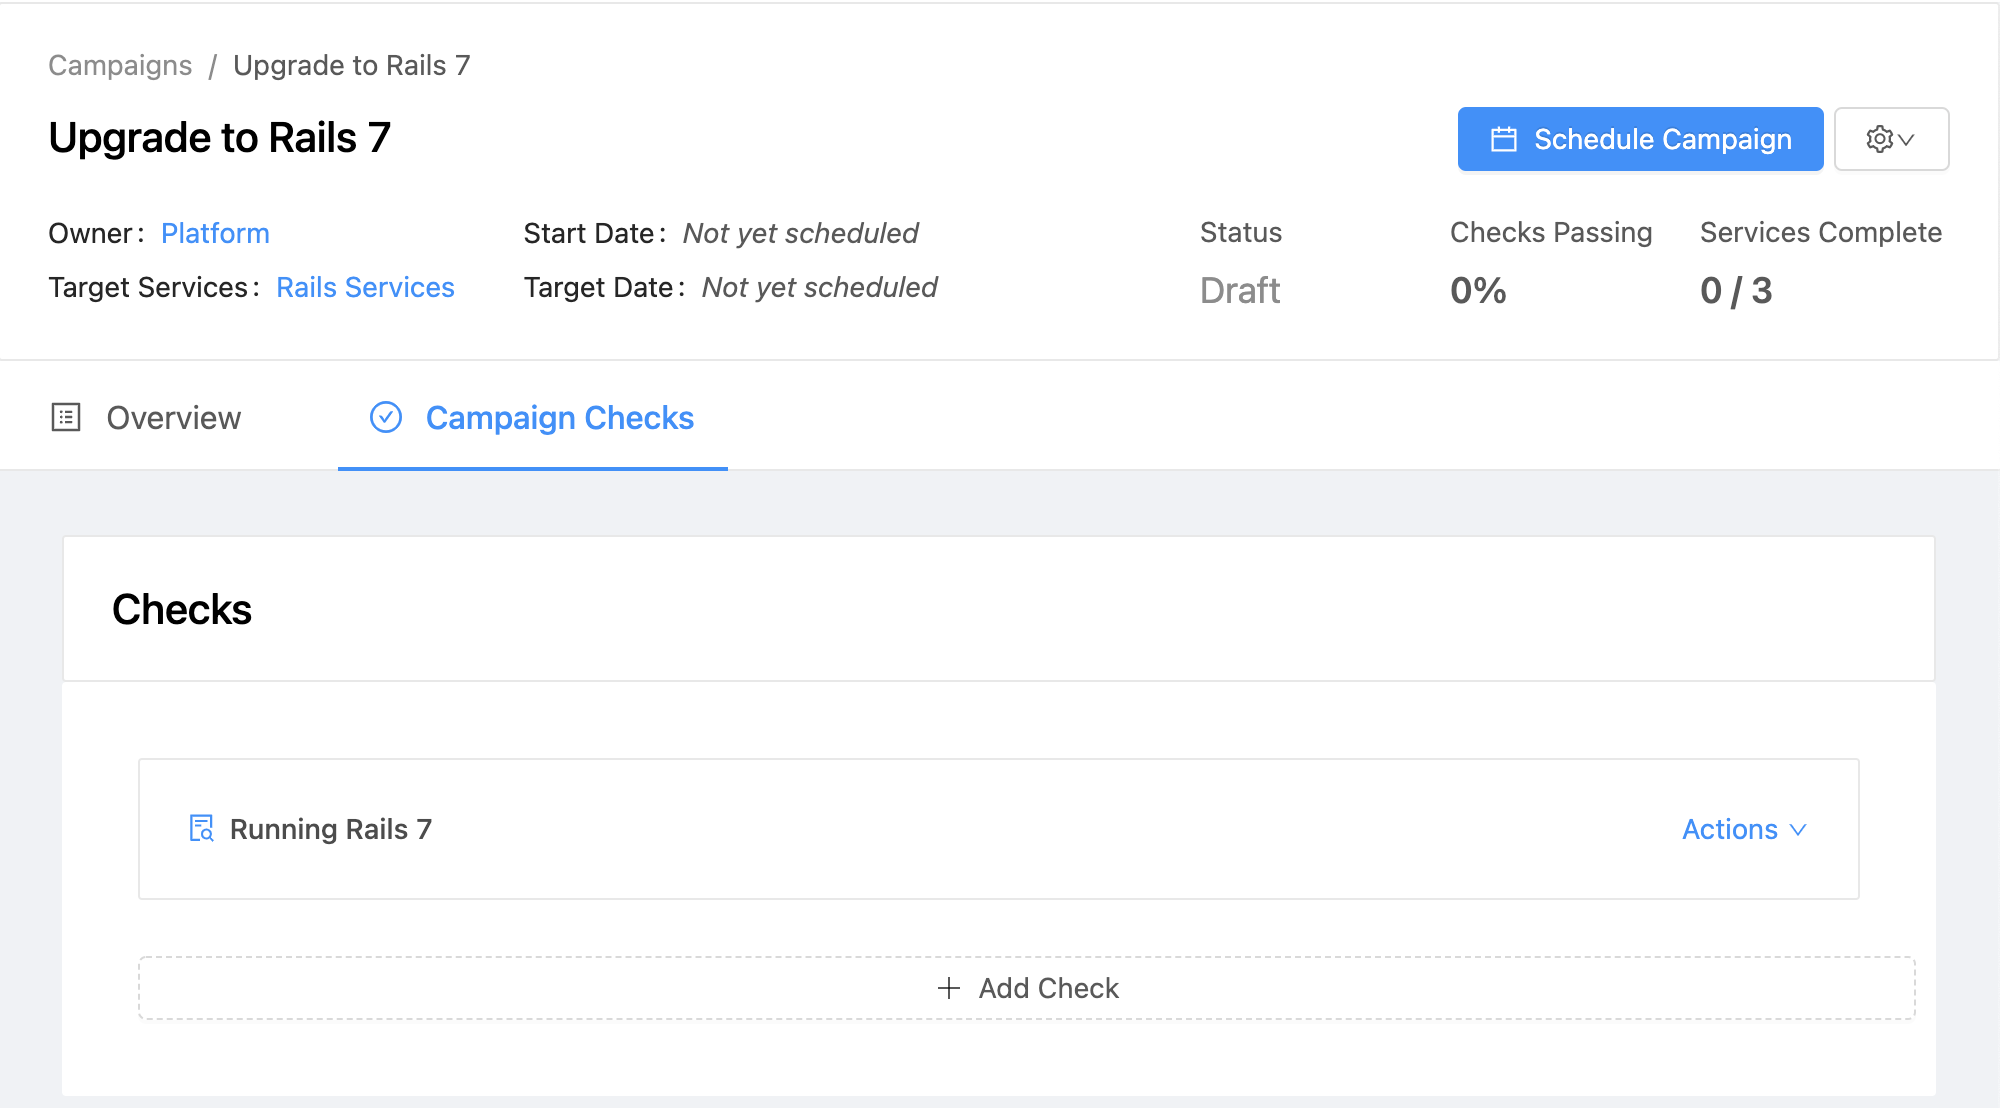
In addition to these two required fields, you are also able to filter down the specific set of services for which the campaign would apply. If there is already a pre-existing filter that narrows down the set of applicable services, you can select it here and see the list of services it would match. You can also associate a filter with the campaign later by editing the campaign. By default, when no filter is associated, the campaign will apply for all services. The example in the screenshot below is using an already defined filter for “Rails services” to target the “Upgrade to Rails 7” campaign being rolled out by the Platform team.
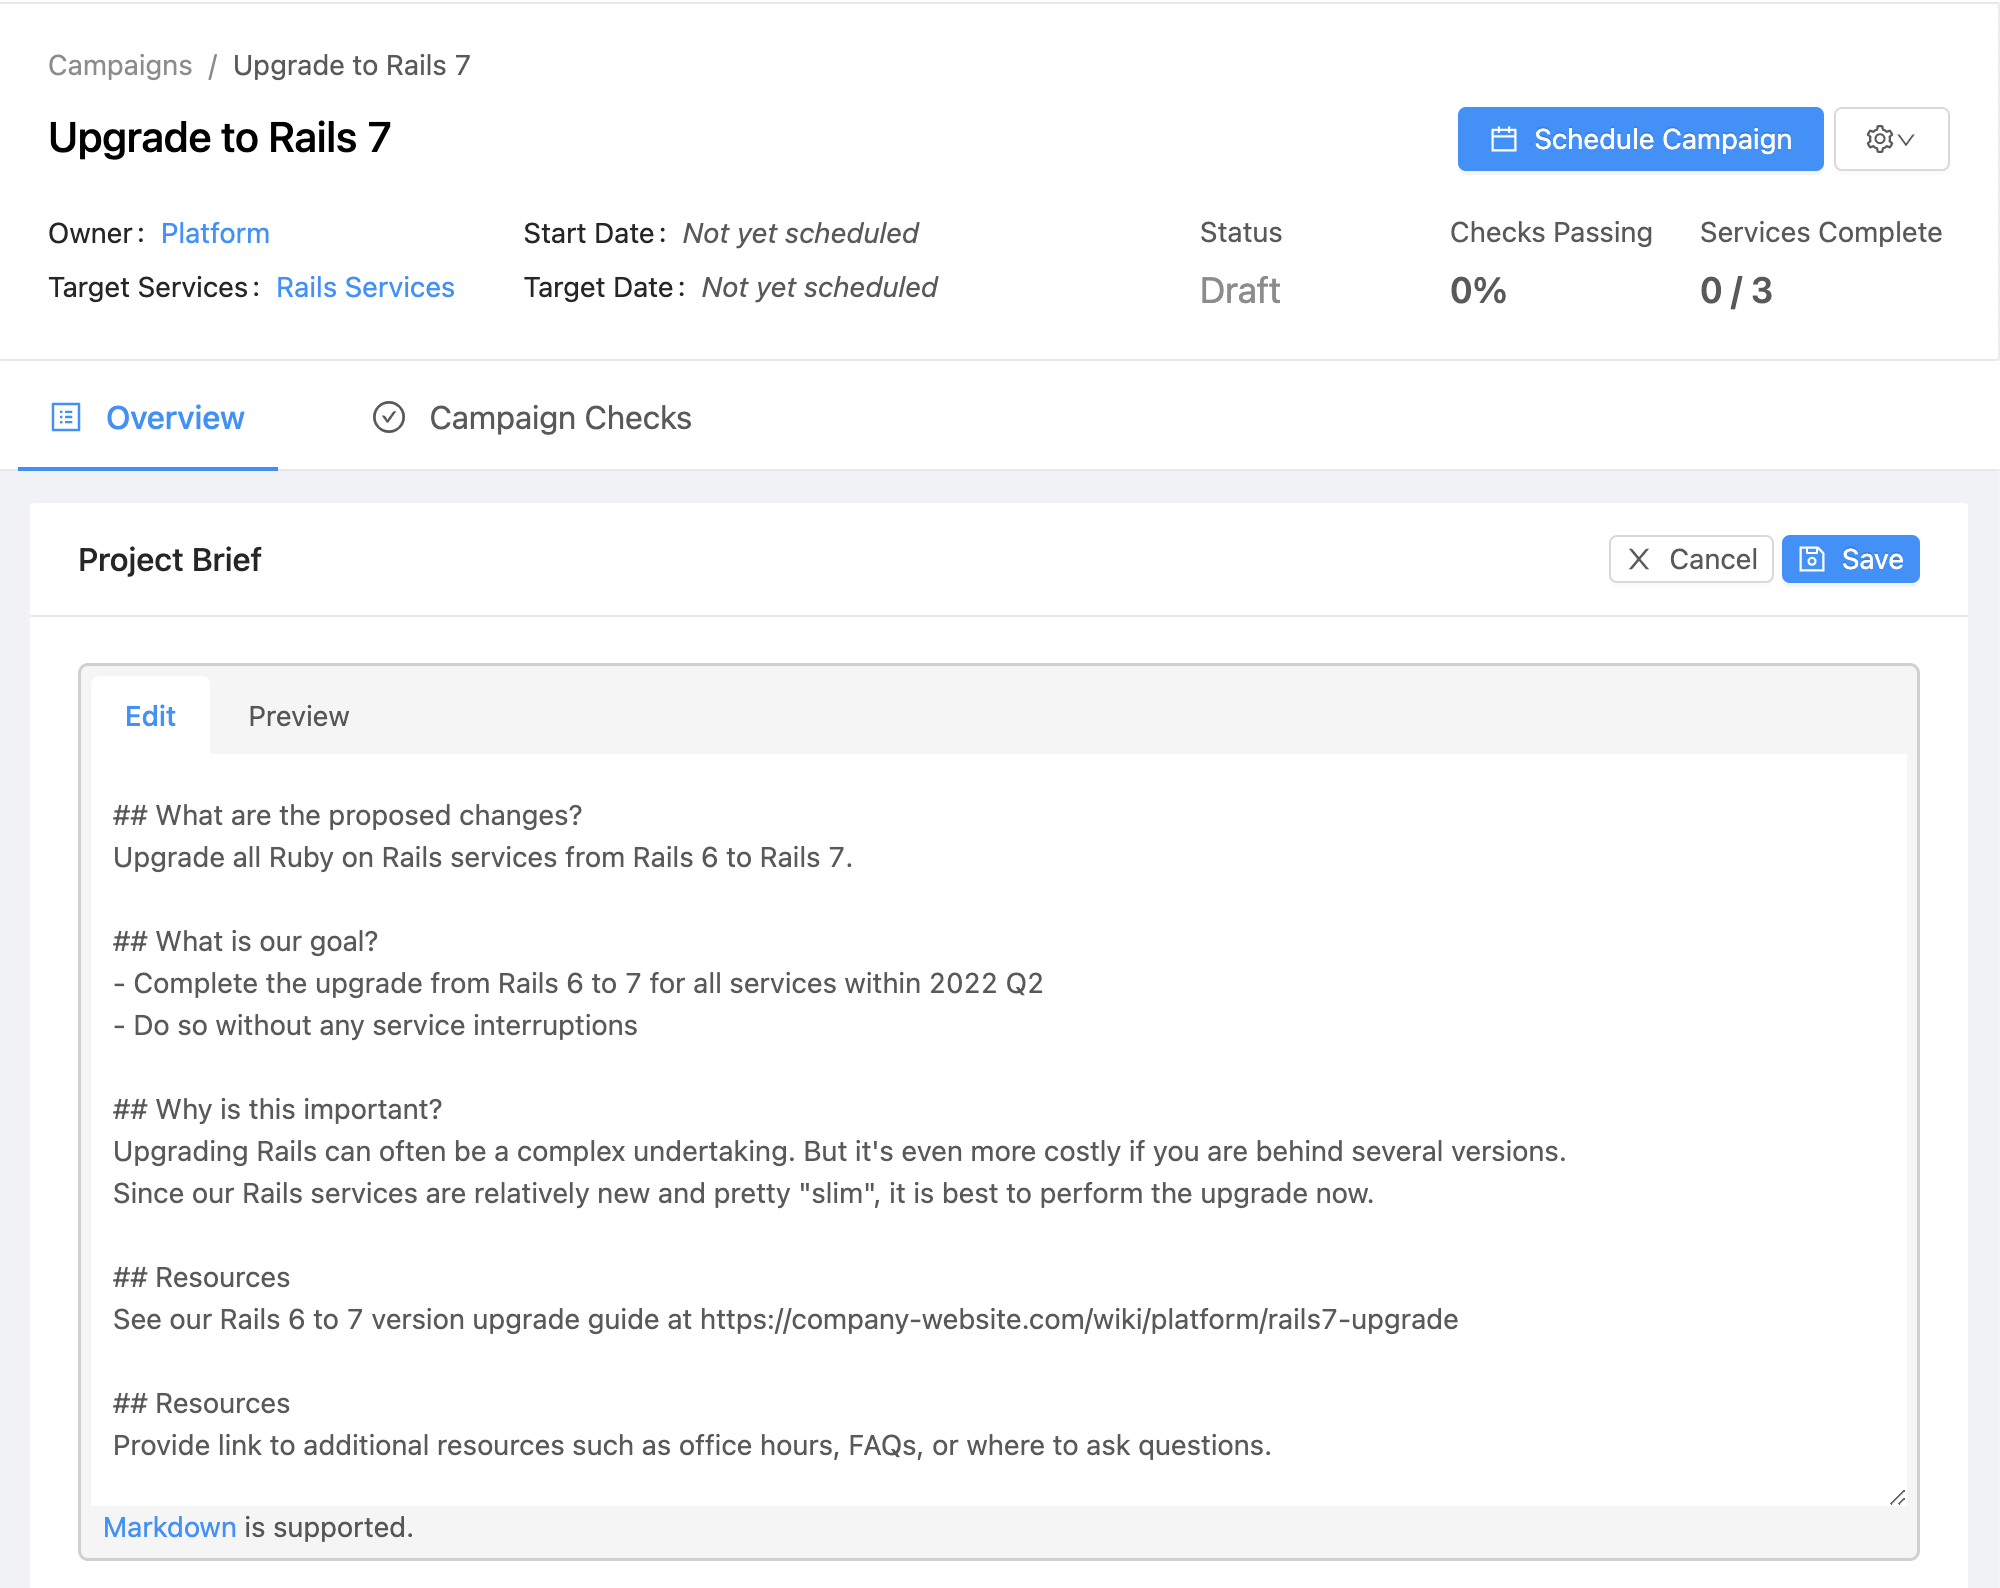
The initial campaign created is in the “Draft” state. While in this state, the campaign owner can start fleshing out the “Project Brief” to communicate information about the campaign, and start defining the checks that will help track completion of the campaign per service.
Define Project Brief
The project brief is a summary about your campaign to communicate to service owners any pertinent information about it (the why, what, how, etc. of the changes being rolled out). It is written in Markdown in the editor and the formatted version will be shown to service owners in the main campaign page as well as in other places such as the Campaigns tab in the service page.
The Project Brief in a new campaign draft is pre-populated with a template with prompts to help the campaign owner get started writing the brief.
Define checks
The campaign owner can express the “completion criteria” of the campaign in the form of checks: these checks will define what you want to be true about a service to fulfill the objectives of the campaign. You can not schedule a campaign without any checks defined because there would be no means to evaluate completion against it.
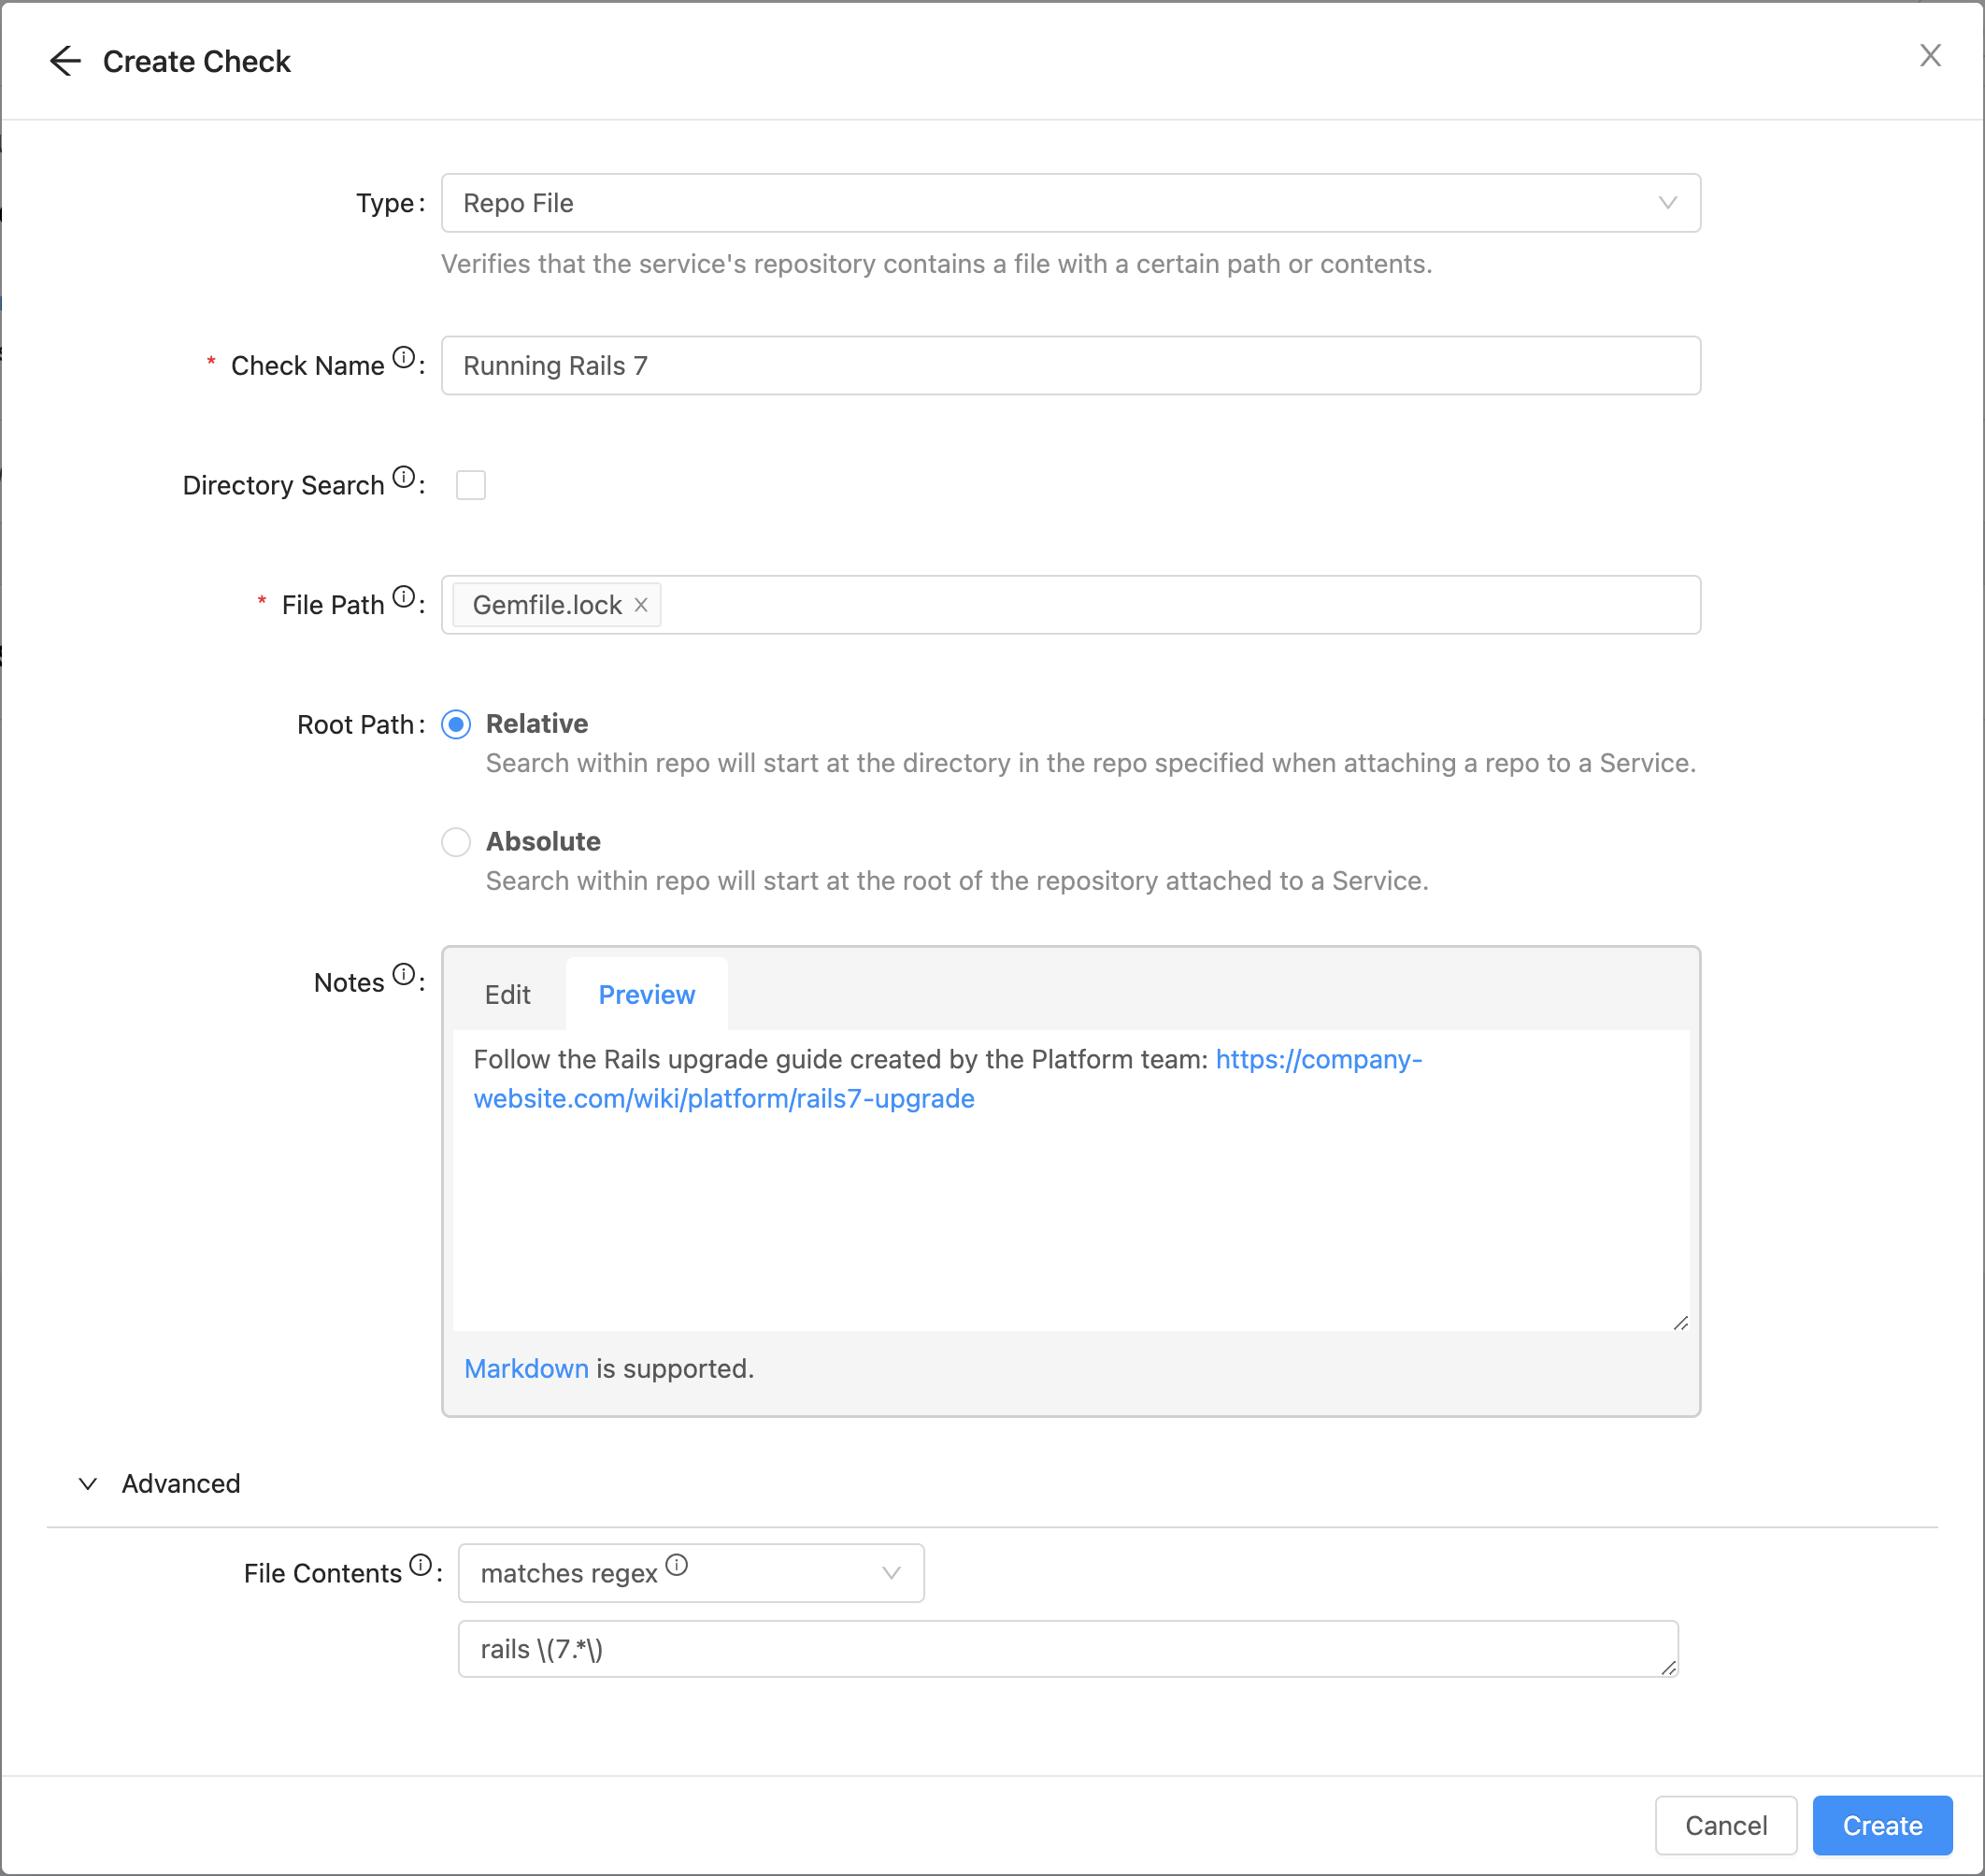
For example, for our “Upgrade to Rails 7” campaign, the check can be a Repo File check that looks for the correct version number.
A campaign’s checks are listed in the Checks tab on the campaign’s main page, where existing checks can be edited/deleted or new ones added.
A campaign’s checks behave the same as checks in the Service Maturity Rubric. The main differences are that campaign checks are only associated to the campaign and apply to services only while the campaign is in progress.
By this step, the campaign owner has now finished setting up their campaign - i.e., they’ve summarized essential information for service owners in the project brief, they’ve linked the services that should fulfill the campaign’s checks using a filter (or no filter if it applies to all services), and they’ve defined checks to track completion of the campaign criteria. At this stage, the campaign owner is ready to roll out the campaign to the organization by scheduling it!
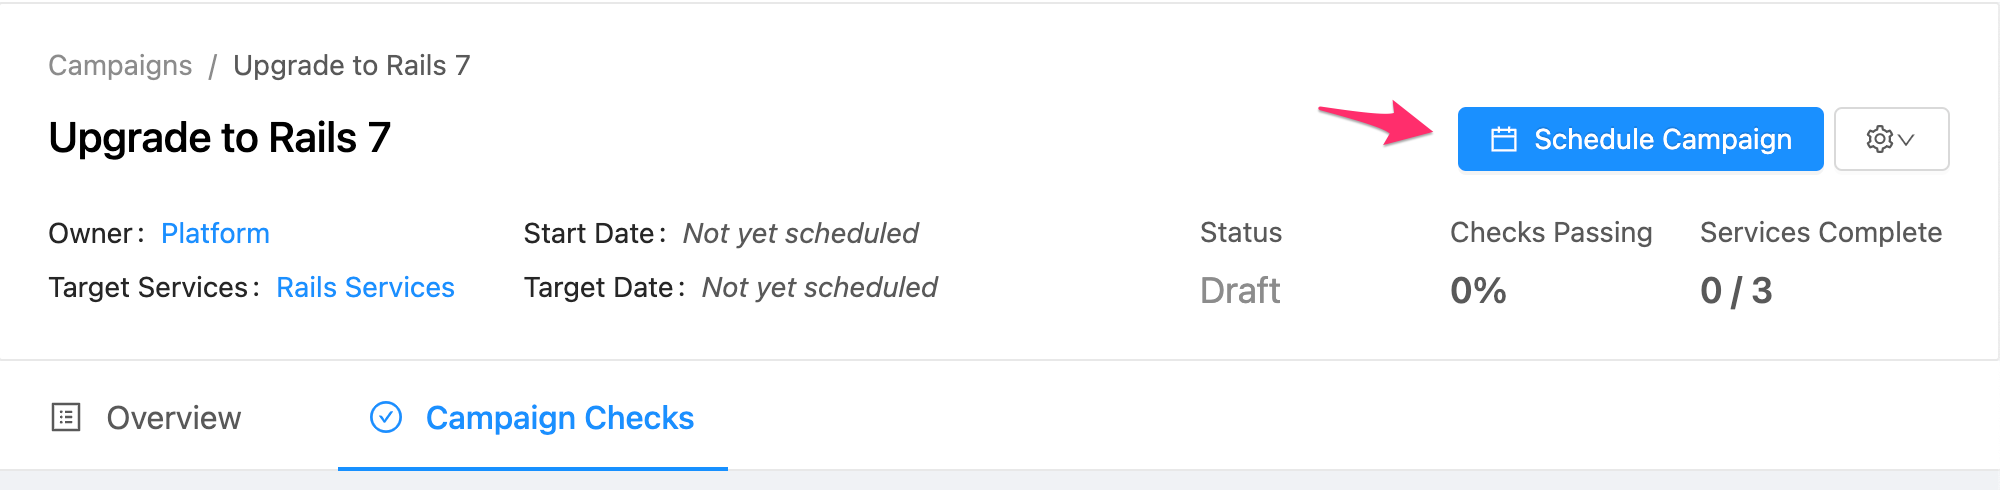
Schedule the campaign
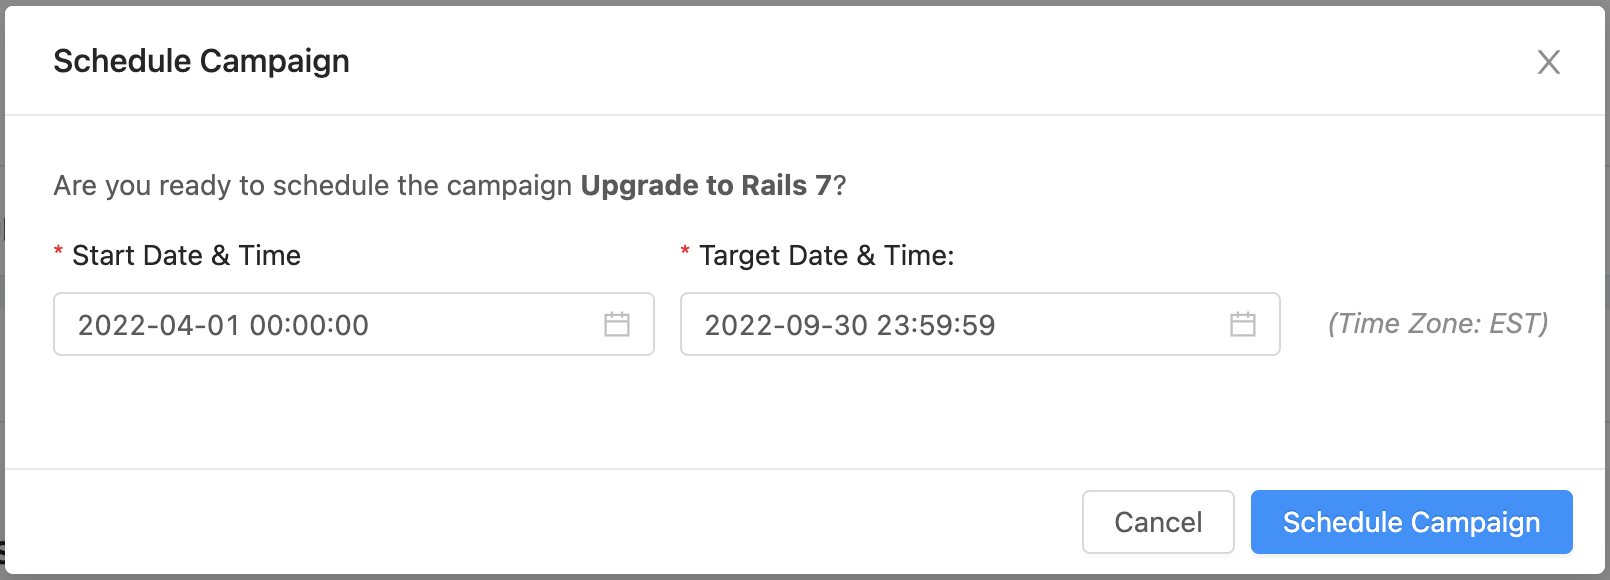
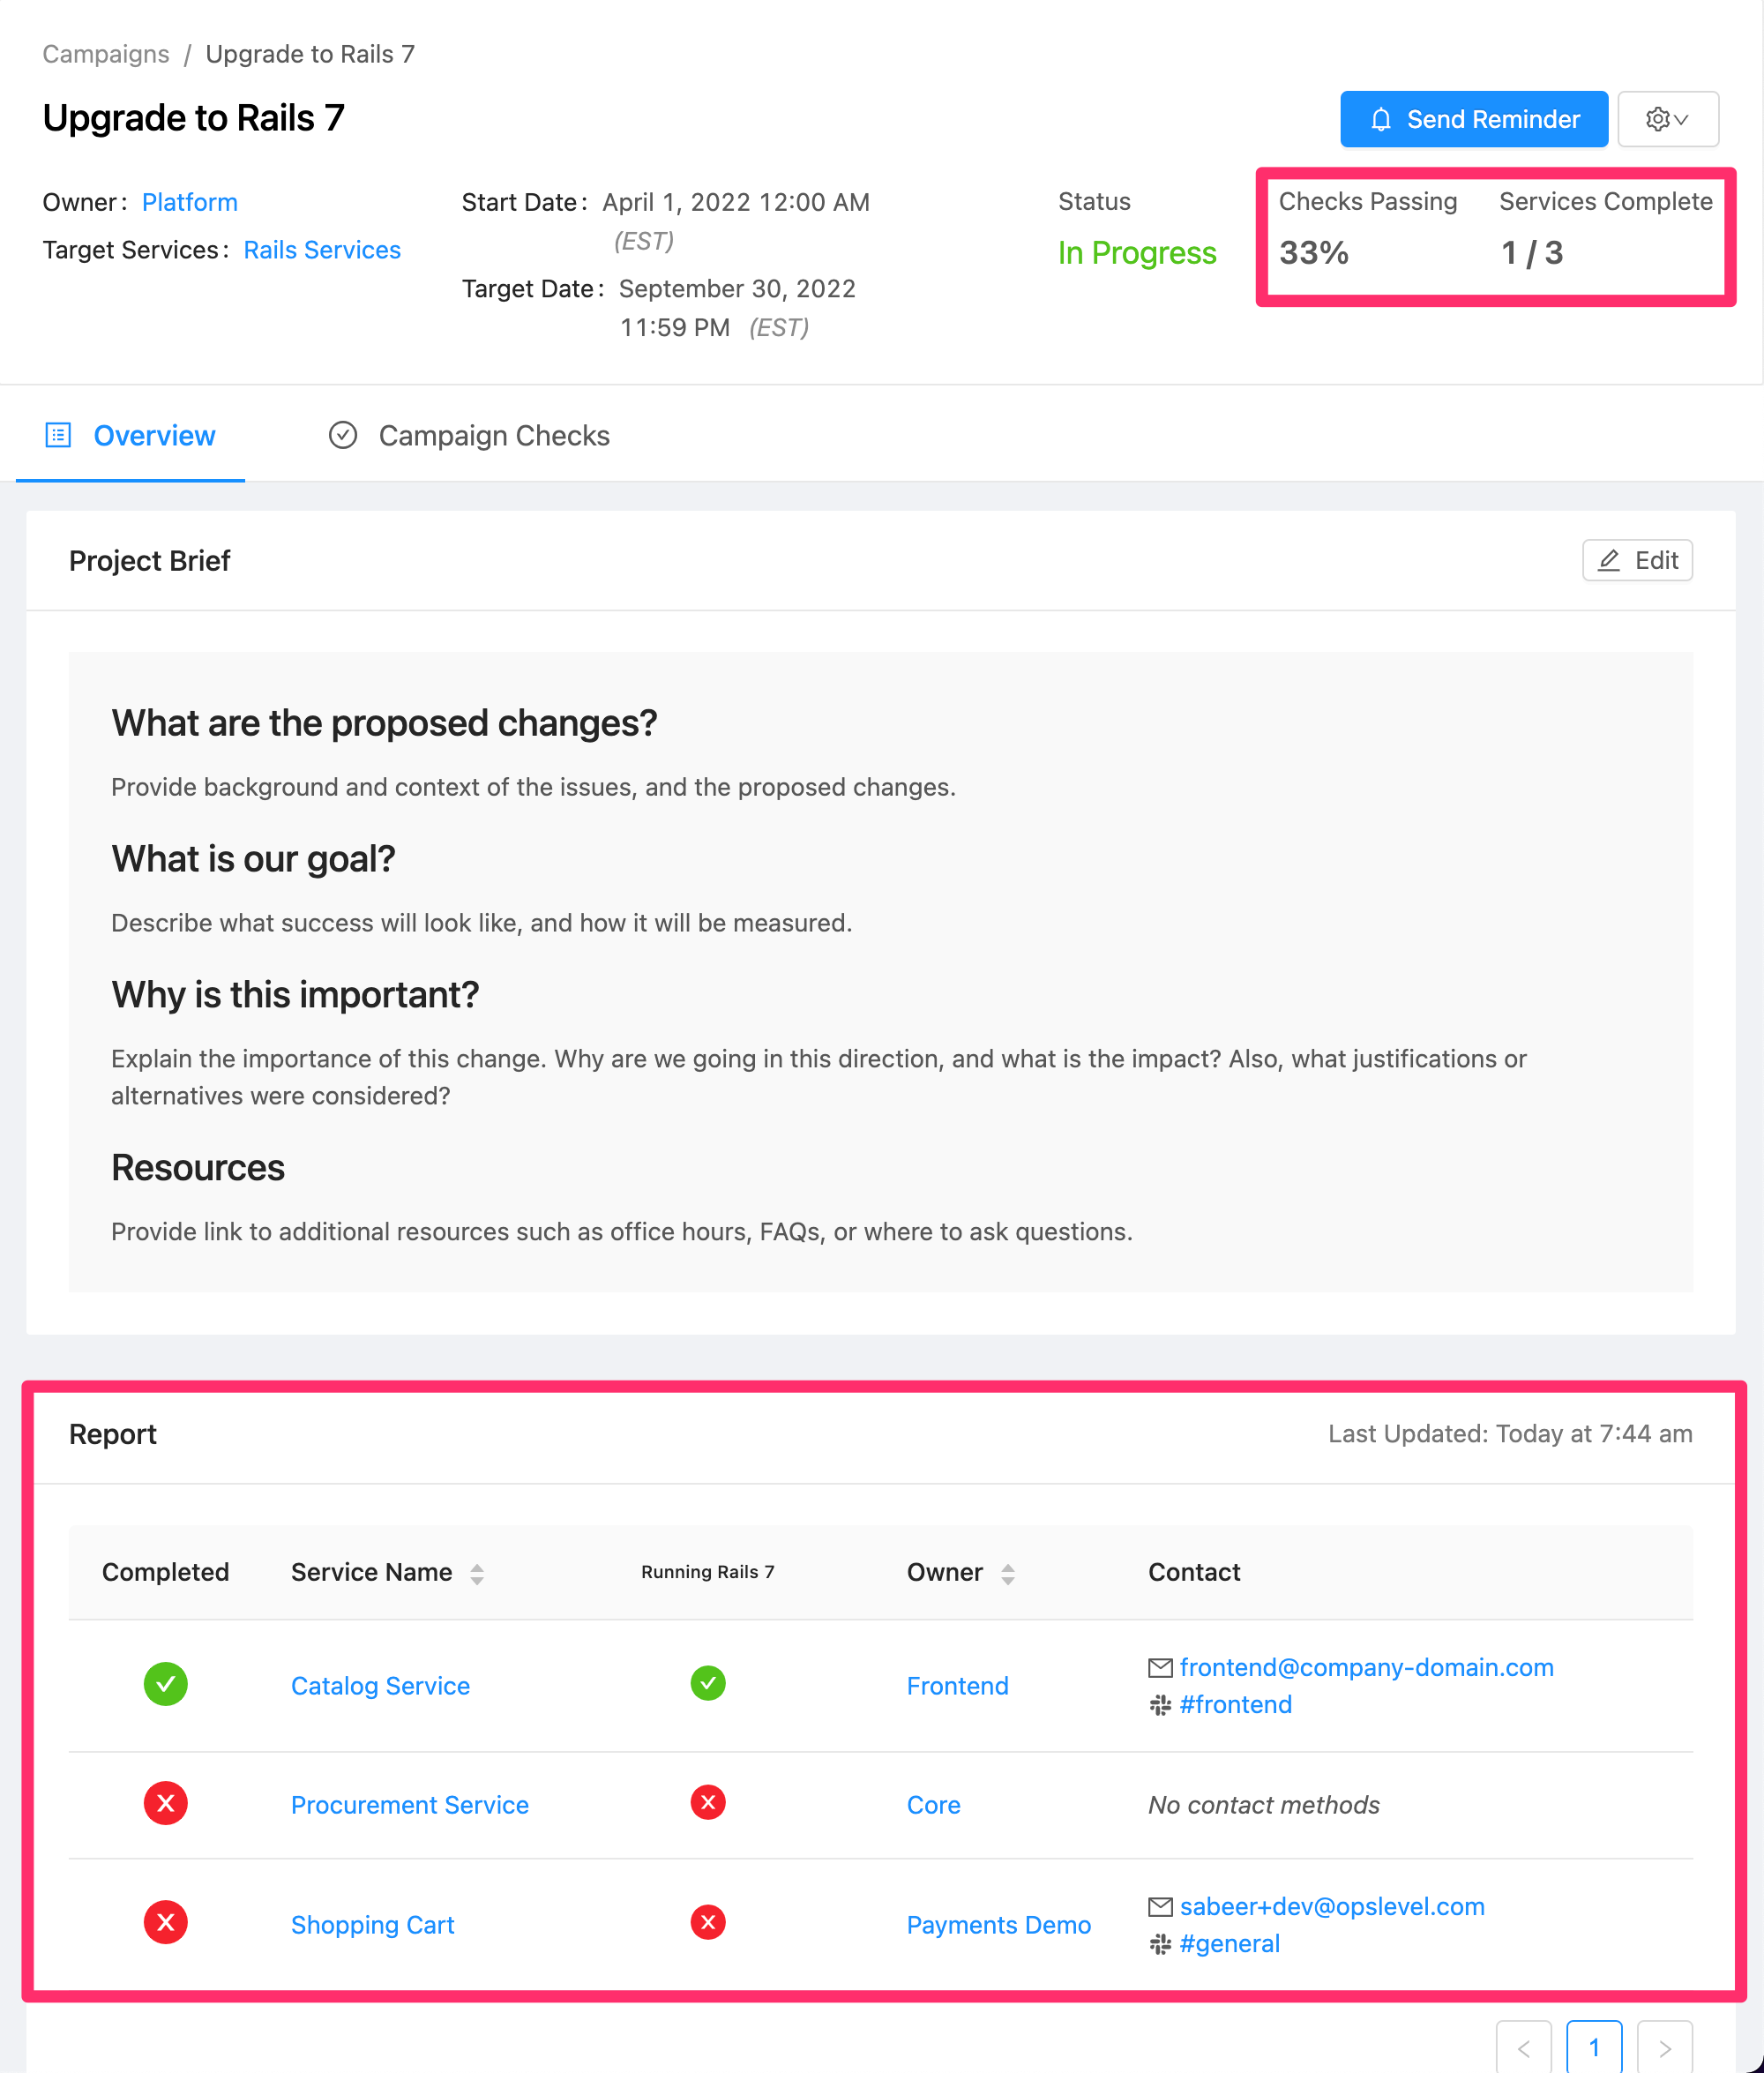
Scheduling a campaign involves defining the targeted timespan for rolling out the changes in the organization by setting the start and end dates. For example, our “Upgrade to Rails 7” campaign may be one that the Platform team is aiming to start in 2022 Q2 and complete within two quarters (i.e., by end of 2022 Q3). The campaign could be scheduled with these dates using the “Schedule Campaign” button the campaign’s main page.
Note that once the campaign’s target date has passed, it doesn’t automatically end - the status will simply change to “Delayed”. A campaign has to be explicitly ended by the campaign owner. See Lifecycle of a Campaign to read more about a campaign’s lifecycle including the delayed and ended states.
What service owners see
Once a campaign is scheduled, it will be exposed to service owners in the campaigns tab for their specific services, where they can see details of the campaign as well as how their service is performing against the campaign’s checks.
Tracking campaign progress
Campaign owners can see all campaigns from the main Campaigns page with a summarized view of their progress, and then see the detailed progress of the individual campaign on each campaign’s page.
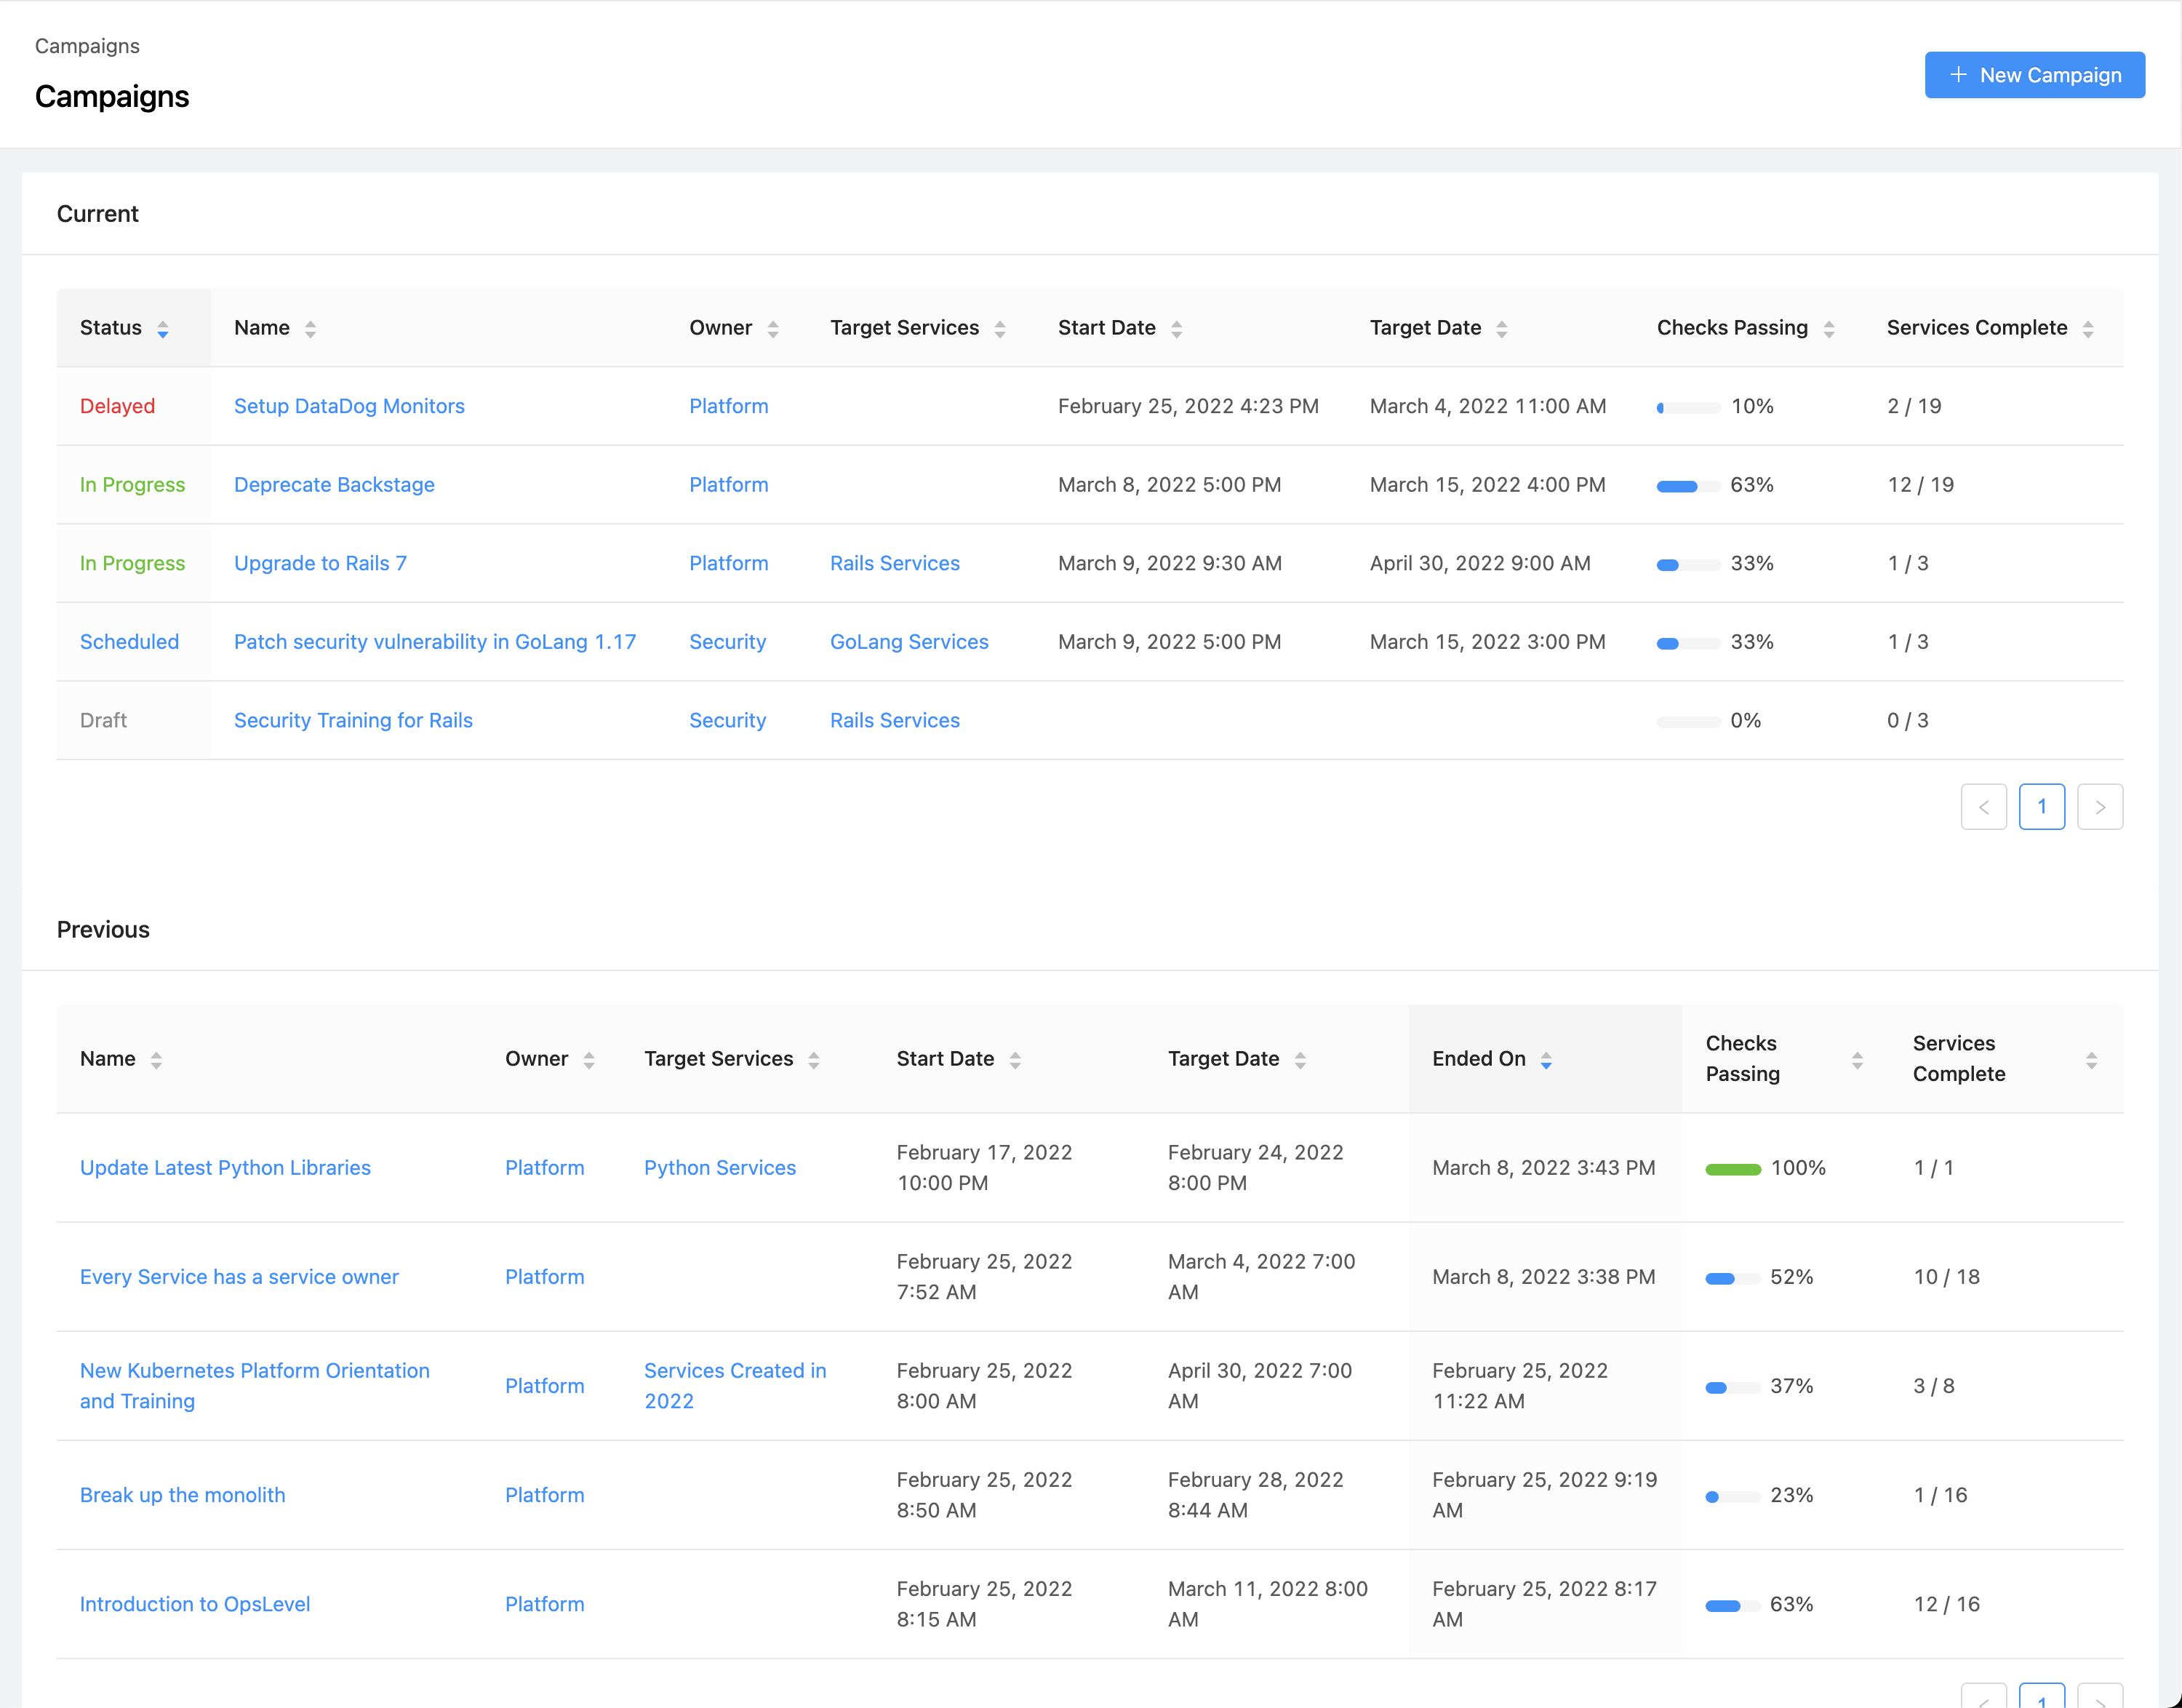
The individual campaign’s page will list all the services linked to the campaign, and how they’re performing against each campaign check. Additionally, they have summary statistics of percentage of checks passing and the proportion of services that have completed the campaign so far.
Send notifications about a campaign
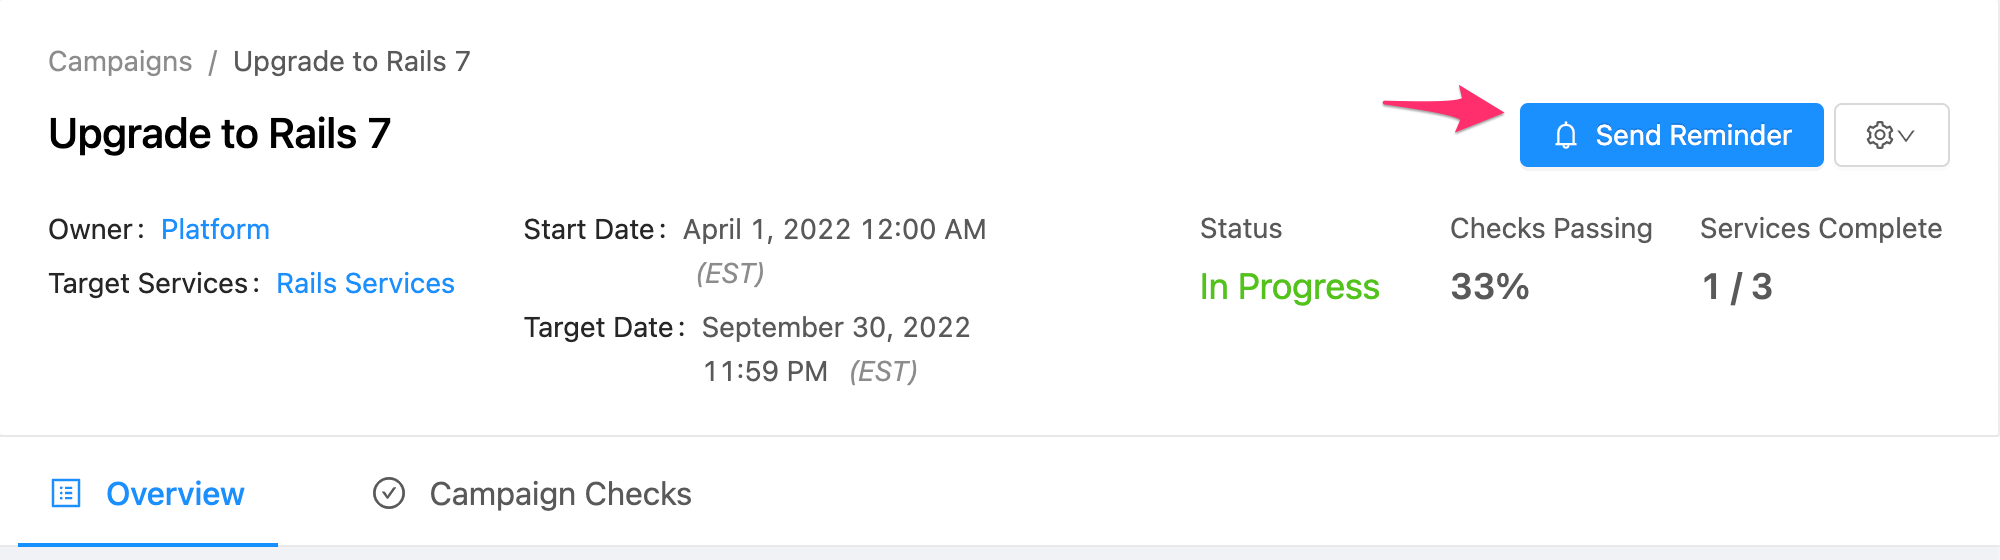
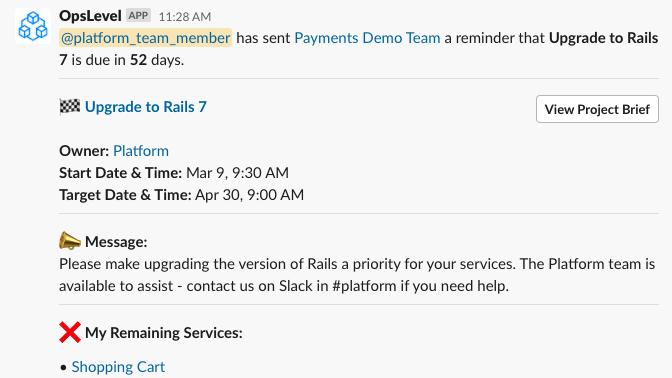
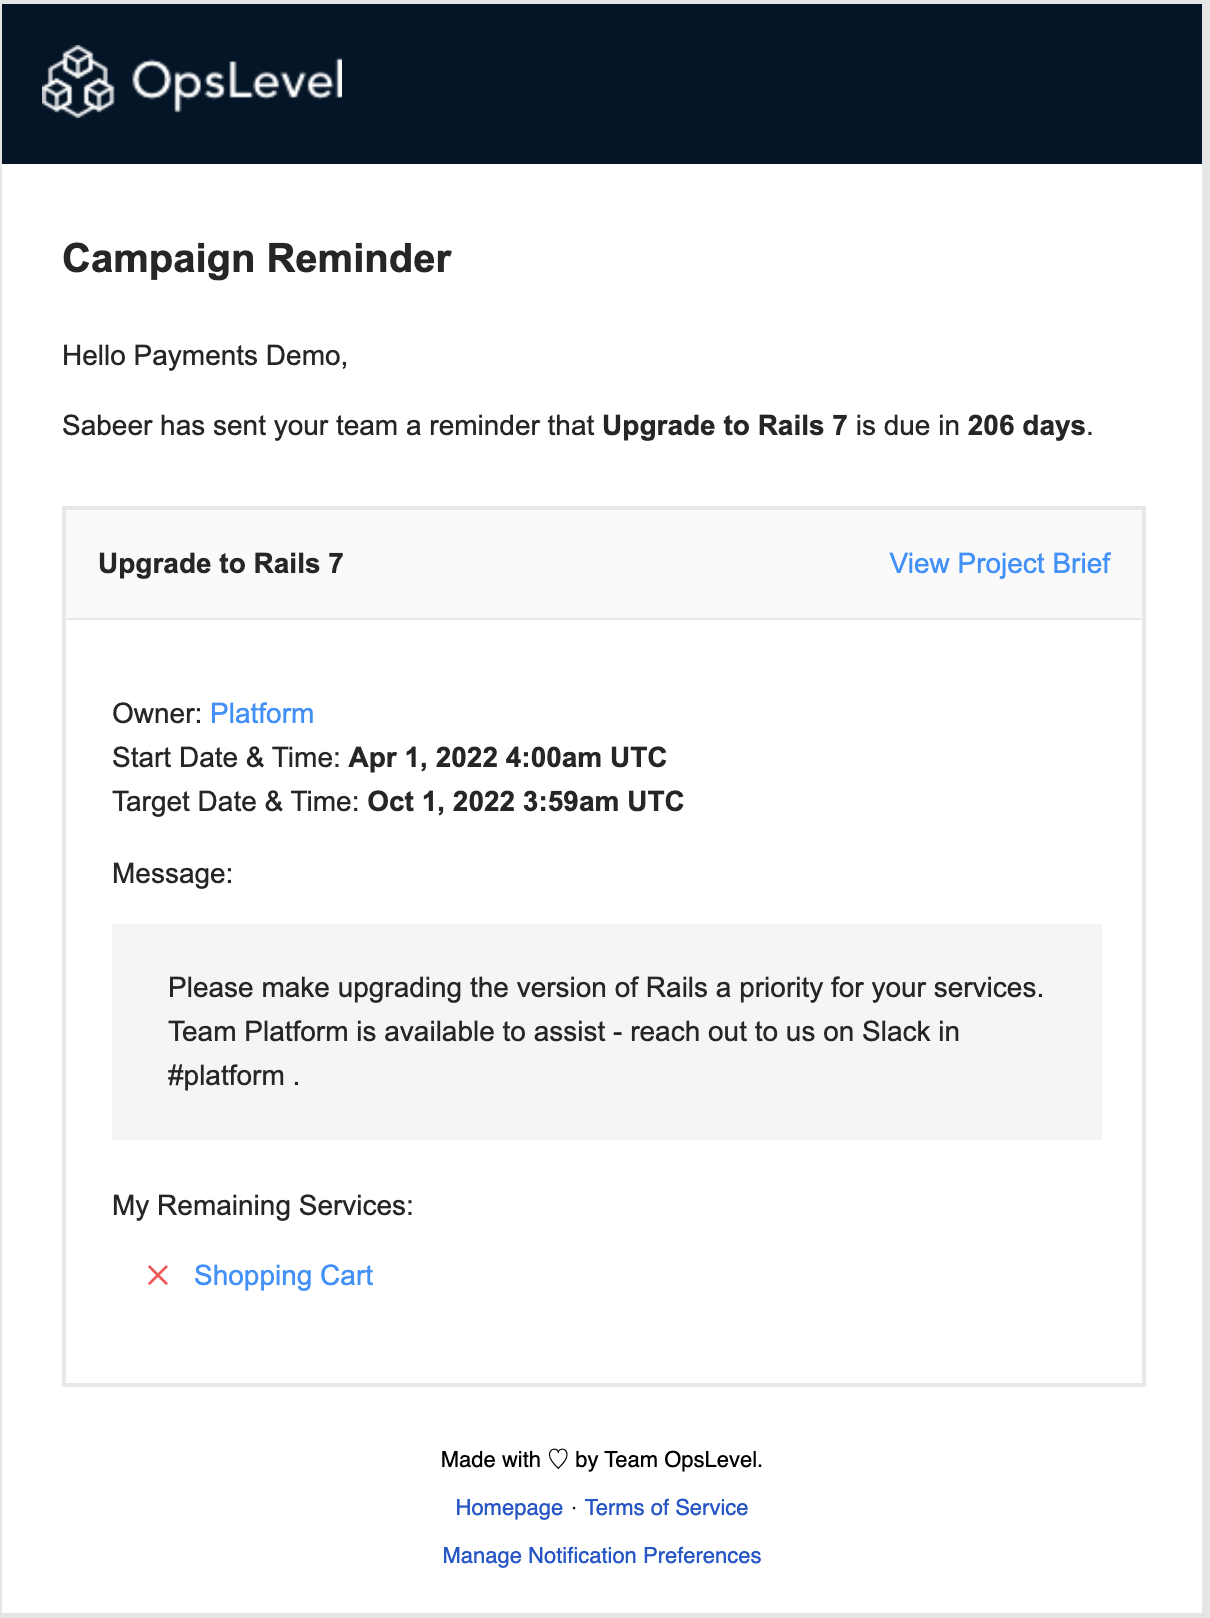
The campaign owner is able to send ad-hoc notifications via Slack or email to service owners at any stage after scheduling a campaign. The “Send Reminder” button on the campaign’s main page allows the campaign owner to send out notifications to all service owners whose services haven’t yet fulfilled the campaign checks with a custom message. Note: Reminders can only be sent out to service owners that have defined a Slack and/or email contact method in OpsLevel.
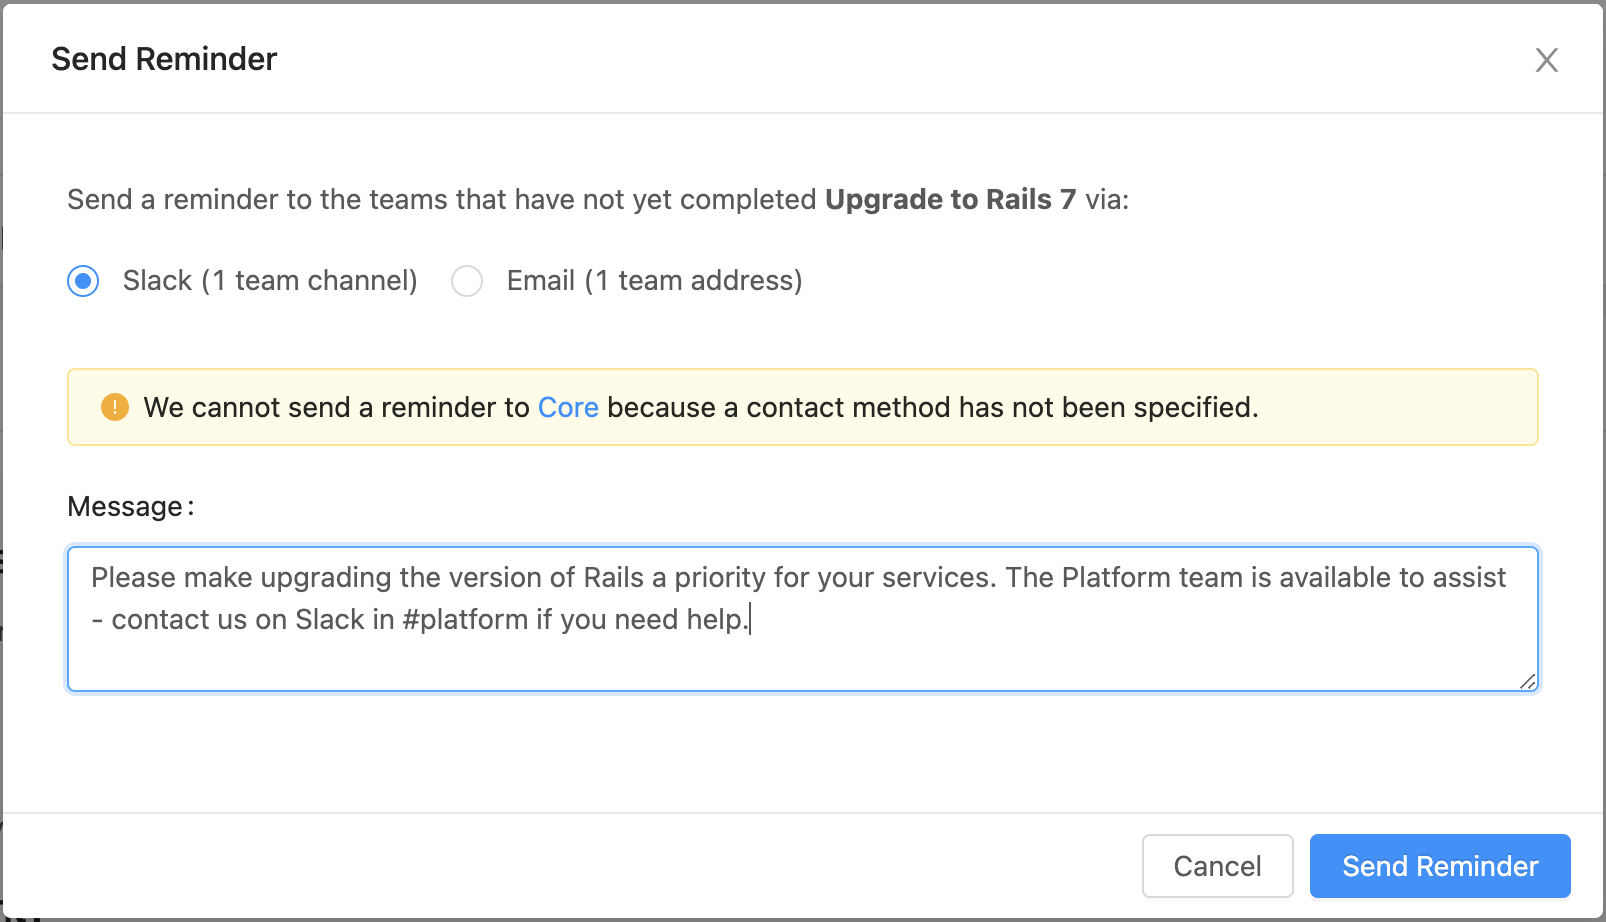
Service owners will receive a message that includes a custom message from the campaign owner as well as summary information about the campaign and which of their services have yet to complete the campaign.
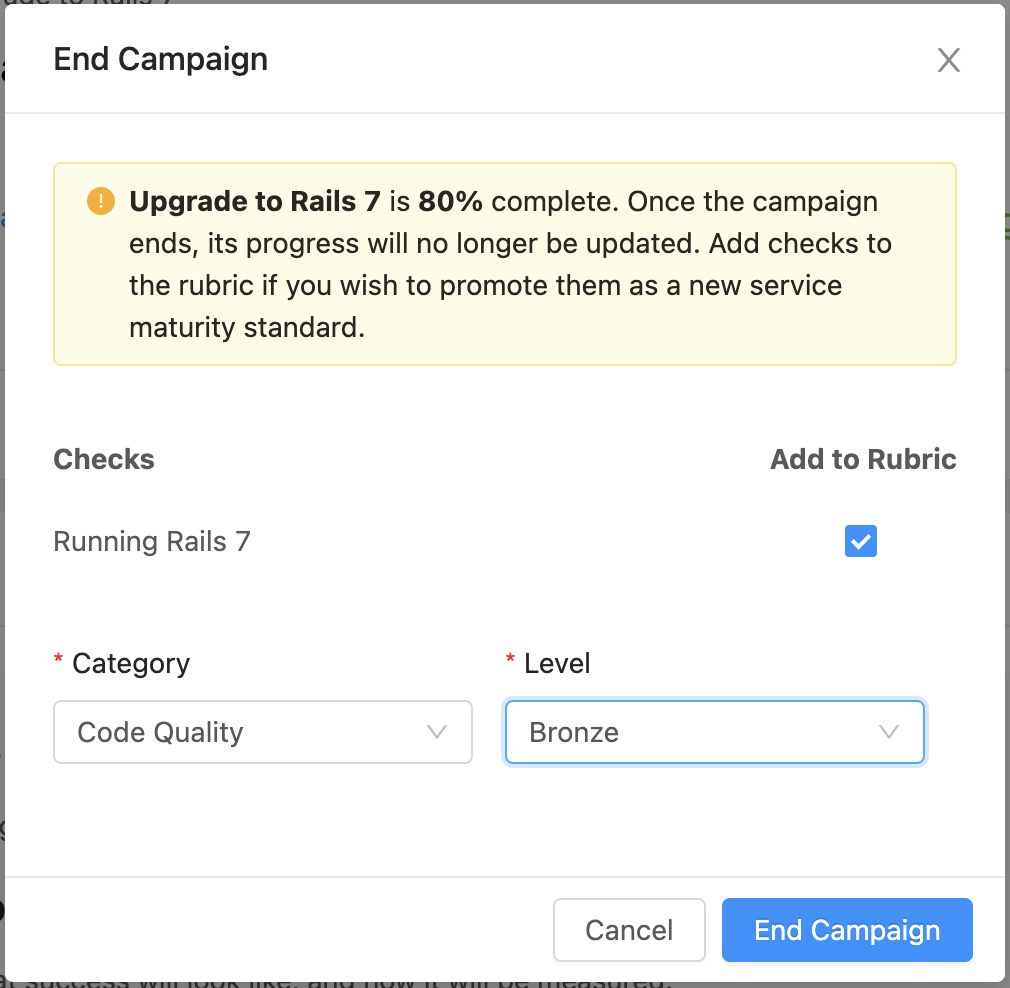
End a campaign
Once a campaign is considered completed, the campaign owner can end the campaign. For our example “Upgrade to Rails 7” campaign, perhaps 80% of the targeted services have completed the upgrade, and that is sufficient for the Platform team to end the campaign.
To end a campaign, click “End Campaign” from the settings dropdown menu on the campaign page.
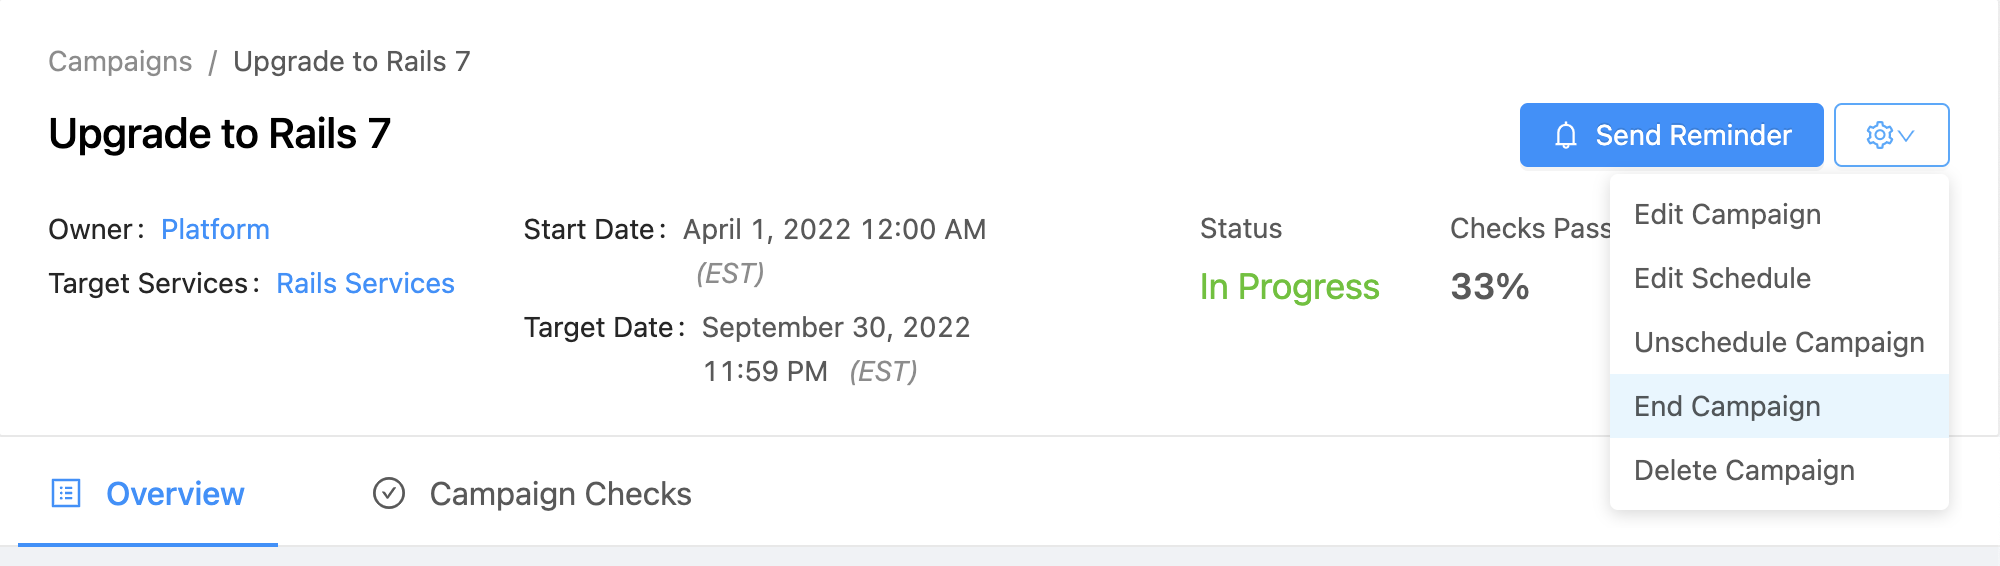
When ending a campaign, the campaign owner has the option of copying any of the campaign’s checks to the rubric. For example, the check for running Rails 7 in Rails Services can be made part of the organization’s ongoing standards by adding it to the rubric.
For more detailed information about ending campaigns, see Lifecycle of a Campaign.