Overview
OpsLevel has chosen to partner with Replicated to provide a superior installation & support experience for self-hosting a copy of the OpsLevel application.
Prerequisites
- A license file provided by OpsLevel
- A place to host the application (VM or Kubernetes cluster)
- Admin access in various third party software to setup integrations
Application Architecture
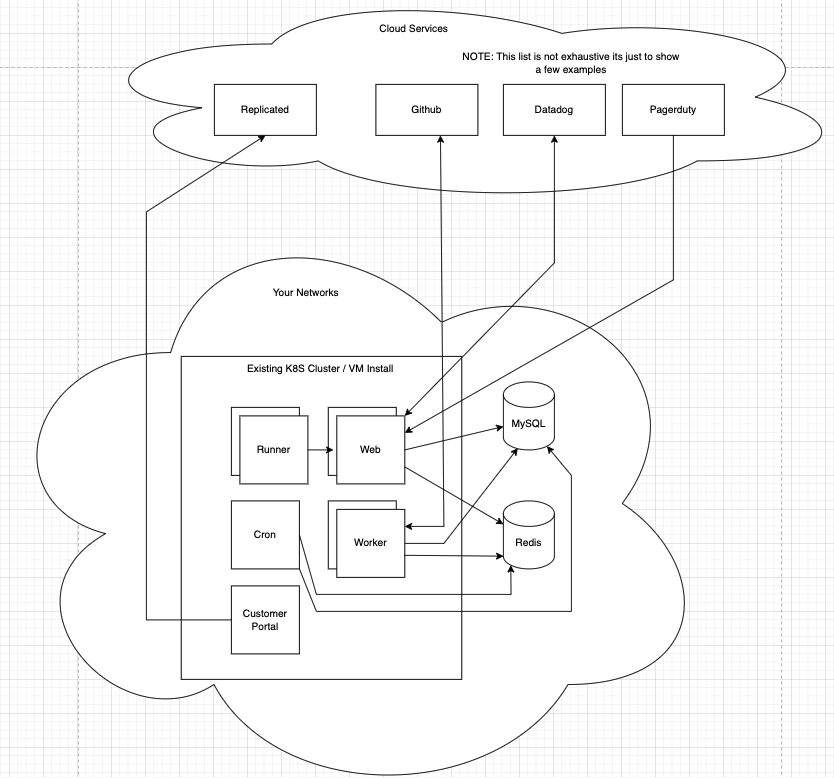
Install
Your OpsLevel account manager will provide your license and instructions for how to perform the installation depending on if you are using a VM or a Kubernetes cluster to host the application.
If you would like to know more about the installation methods you can read about them over at Replicated.
Replicated provides you with a Customer Admin Console to manage the lifecycle of the self-hosted OpsLevel application.
Configuration
Once you have performed the installation and you have logged into the customer admin console, you will be asked to provide your license file before you can begin any of the configuration.
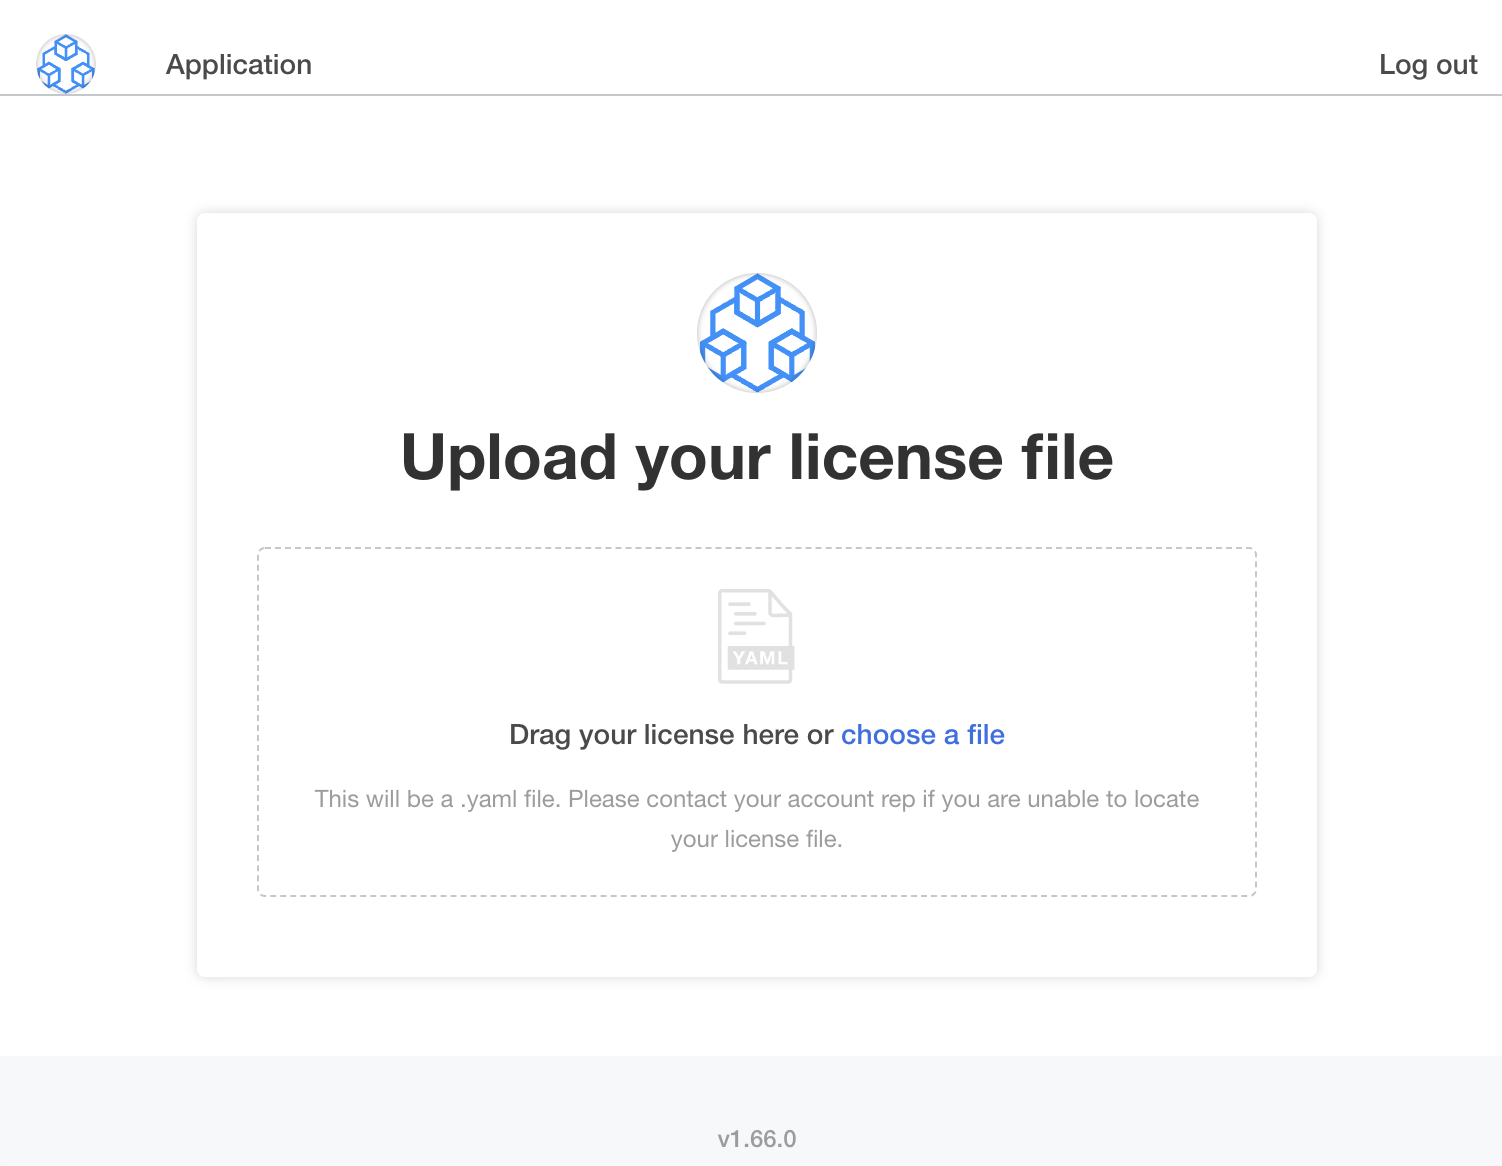
If you have provided a valid license you will then be prompted with a configuration screen to supply any additional configuration for connecting to an external MySQL DB or integrating with third party software like GitHub, Jira, PagerDuty, etc.
Standard defaults have been provided, so you do not need to adjust anything other than the Account Configuration. Note: certain integrations will be unavailable within the app if the configuration is not provided.
Each configuration section is described in greater detail below.
Ingress
This section provides you with an easy way to generate a Kubernetes ingress manifest, which exposes the application frontend through your cluster’s ingress controller.
The Ingress Subdomain and Ingress Domain are used to configure the Kubernetes ingress resource and to allow the application to perform link generation for emails.
The Ingress Annotations section must be in YAML format and will be applied to the Kubernetes ingress. There are two default annotations that we recommend to help protect the application from large payloads that could cause the application to consume excessive memory. If you do intend to send larger payloads, then please increase this amount.
MySQL
By default, the installation creates a MySQL container alongside the application for getting started quickly.
This is not recommended for production and as such, this section provides you with the detailed configuration needed to allow the application to connect to an “external” MySQL database that has been hardened for production and is monitored by you.
The MySQL database is where all of the data of the application is stored. If this database is destroyed, all of the data within OpsLevel is also destroyed. We recommend you setup regular backups.
There are a handful of MySQL parameters that need to be set that we have enumerated here, but do also note that we have configured preflight checks to ensure the database OpsLevel connects to will work properly.
    [mysqld]
    init_connect='SET collation_connection = utf8mb4_unicode_ci,NAMES utf8mb4'
    character_set_server = 'utf8mb4'
    collation_server = 'utf8mb4_unicode_ci'

    [client]
    default_character_set = 'utf8mb4'
Our application is configured to perform any pending migrations on this database at startup. Please be aware that this is not an “online” process, and as such may lock the database for a period of time while the migrations complete, thereby preventing use of the application. Note: this is something we are looking into changing in the future.
Redis
By default, the installation creates a container of Redis alongside the application for the purpose of getting started quickly. This is not recommended for production and as such, this section provides you with the configuration needed to allow the application to connect to an “external” Redis database that has been hardened for production and is monitored by you.
The Redis database is used to store pending asynchronous jobs waiting to be processed. If this database is destroyed all that is lost is pending jobs. For the most part many asynchronous tasks will be re-enqueued at a later time, but there are a few cases where losing the job means that specific data that was ingested will never be processed.
This section allows you to configure SMTP settings so that the application may send emails. It is recommended that you give the application access to send email so you may receive the following types of emails:
- User Invite
- Password Reset
The following third party integrations will require that the application is exposed to the Internet so that the third party software can send data to the application (usually in the form of a webhook).
GitHub Cloud
If you use GitHub Cloud and would like to use the GitHub integration within the application you will need to create your own GitHub App.
To create a GitHub App follow these instructions. Then provide the configuration options which can be found on the settings page of the created GitHub App.
Gitlab Cloud
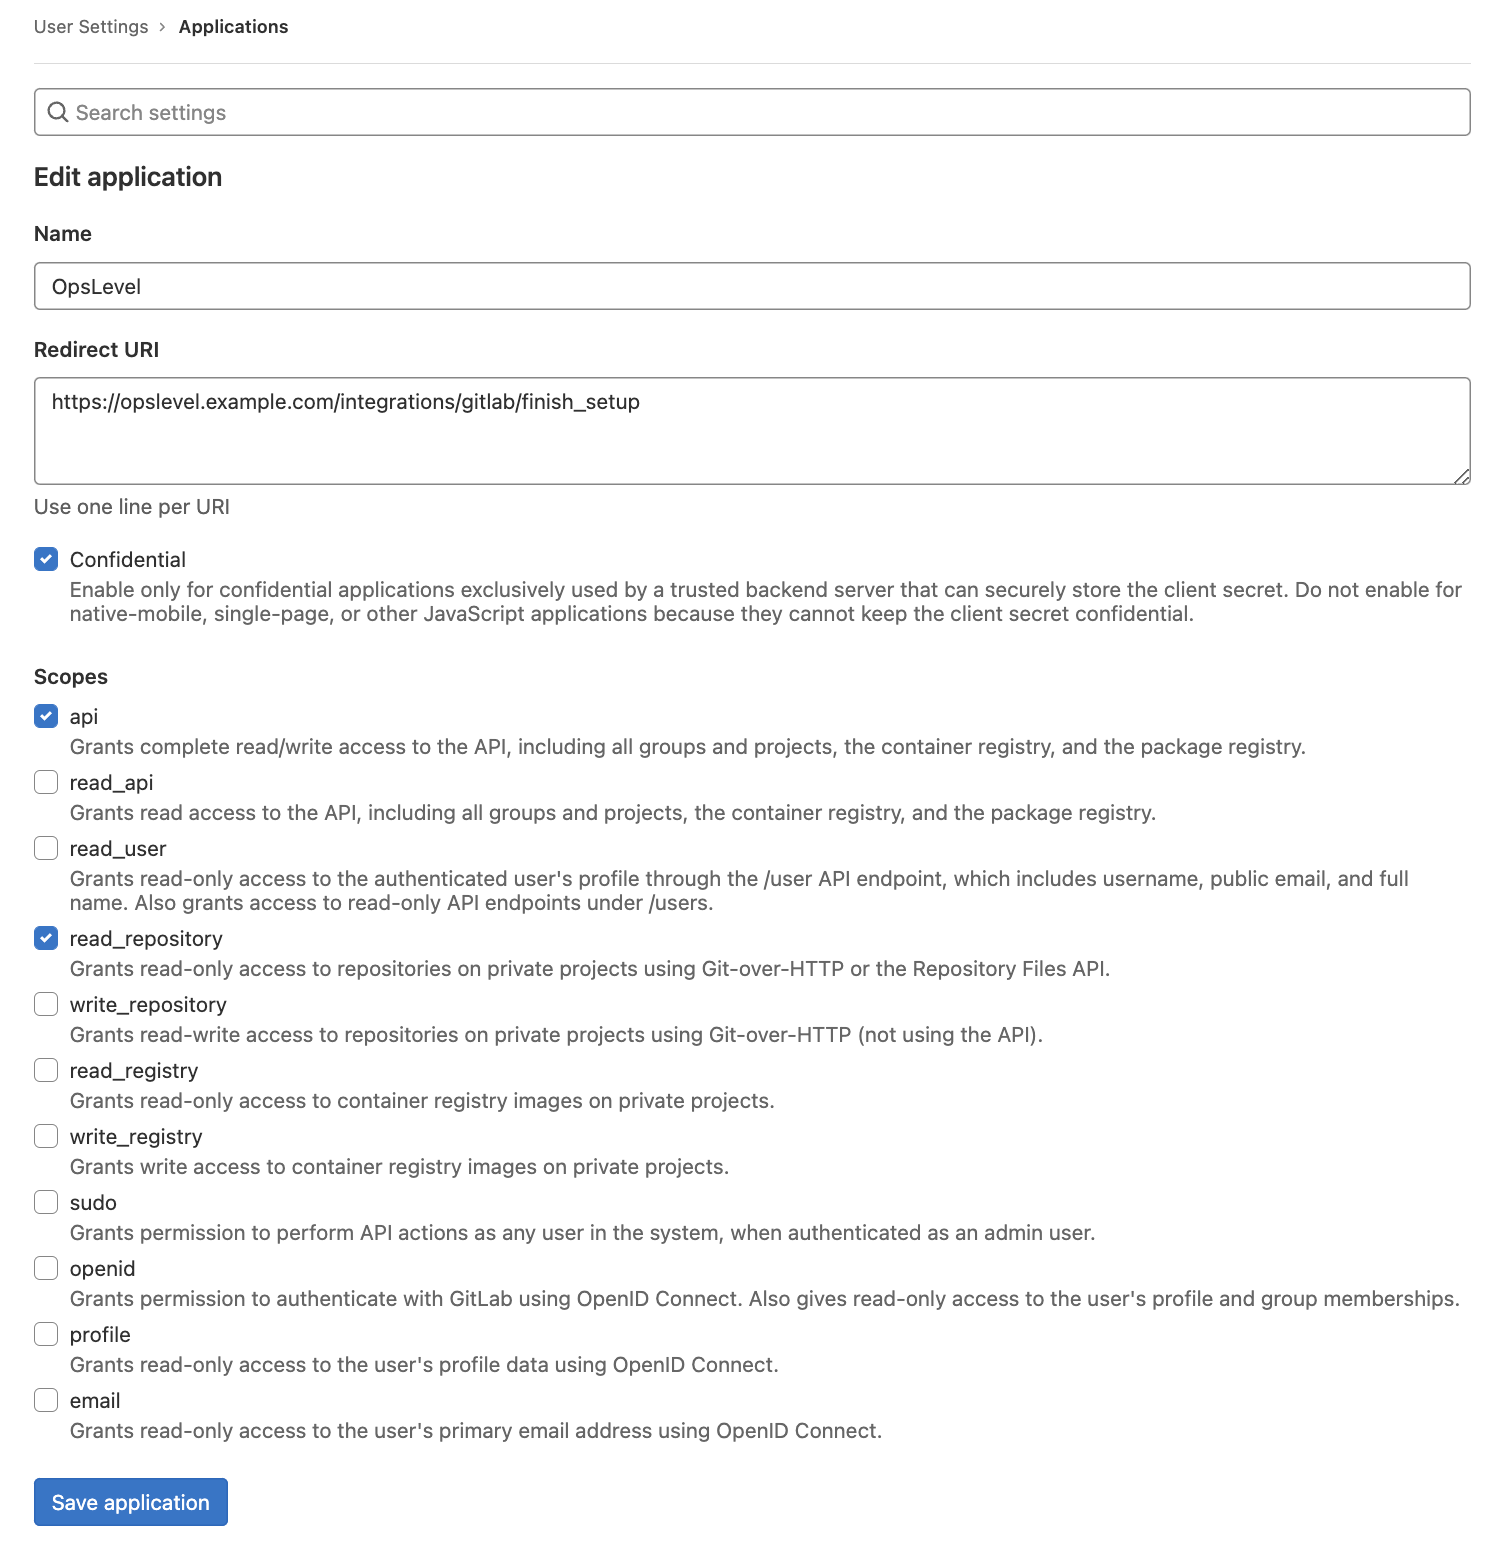
If you use Gitlab Cloud and would like to use the Gitlab integration within the application you will need to create a User Owned App.
To create a User Owned Gitlab App follow these instructions. You will need to ensure that /integrations/gitlab/finish_setup has been added to the redirect uri, and has the scopes api and read_repository as seen in this example:
Bitbucket Cloud
If you use Bitbucket Cloud and would like to use the Bitbucket integration within the application you will need to create a Bitbucket Webhook
To create a Bitbucket Webhook follow these instructions.
PagerDuty (US)
If you use PagerDuty and would like to use the PagerDuty integration within the application you will need to create your own PagerDuty App.
To create a PagerDuty App follow these instructions to setup the application.
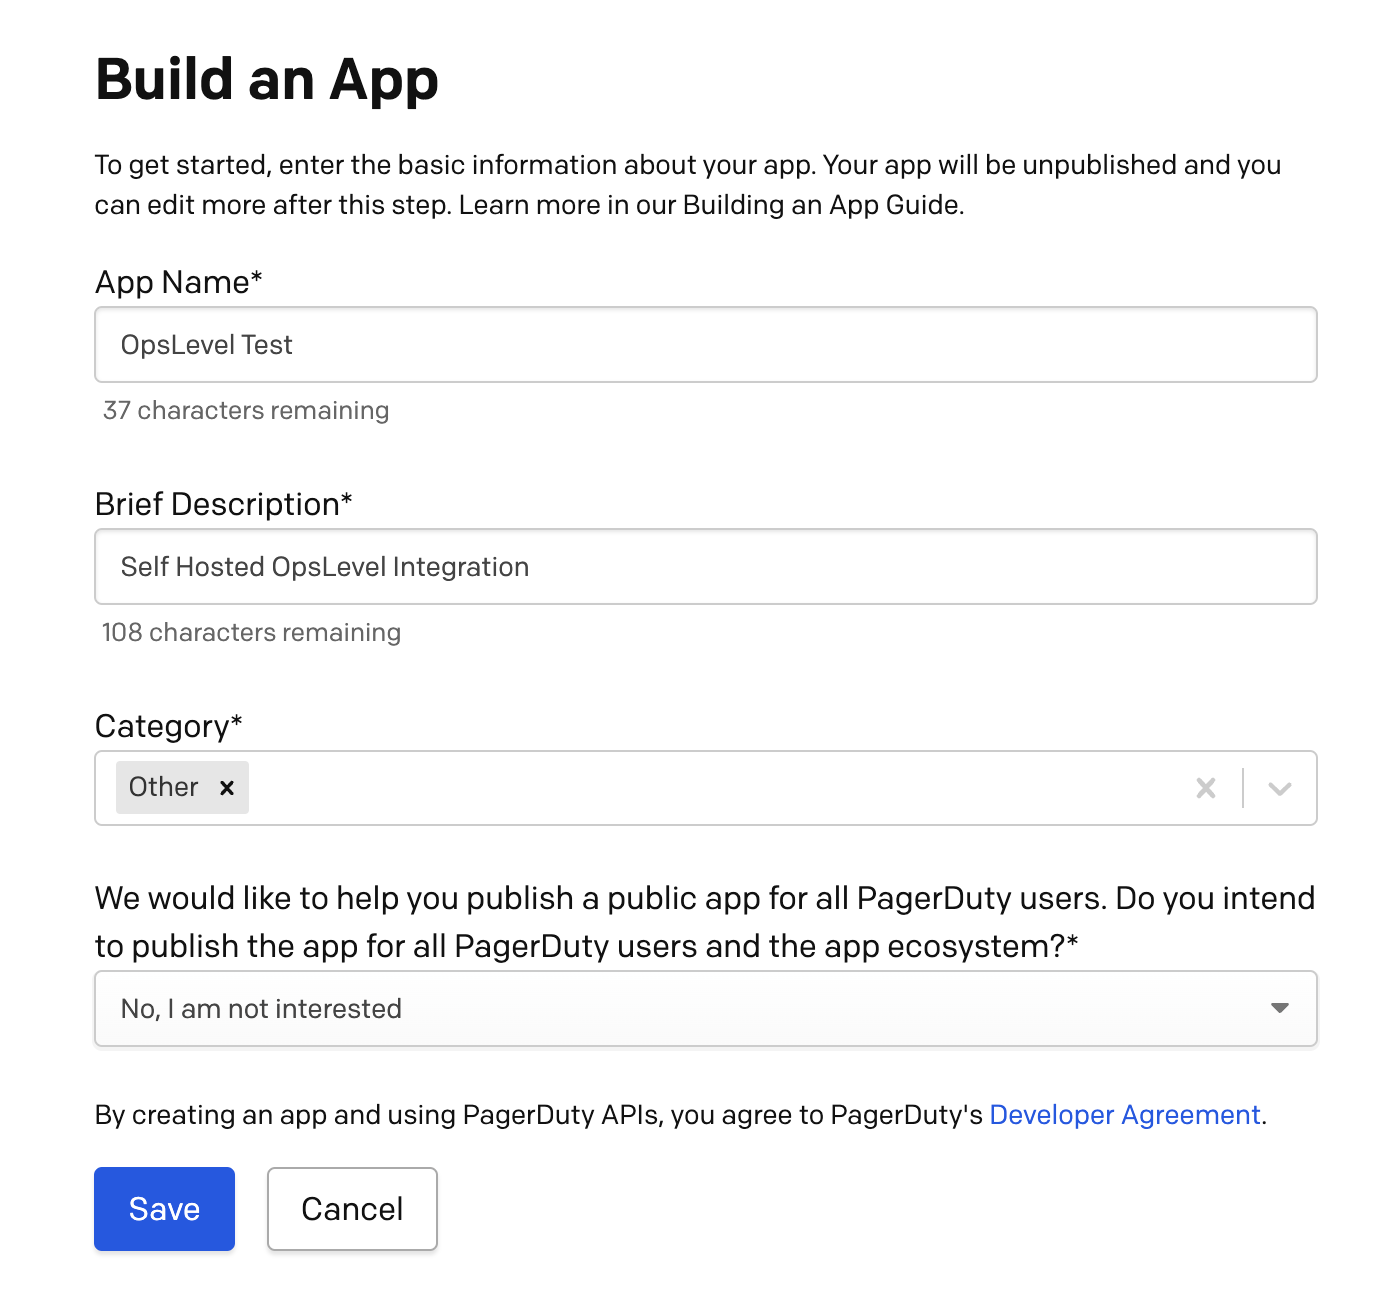
Once the app is created you’ll need to add OAuth2 functionality. Enter the callback url of your exposed OpsLevel application and click save. Copy the Client ID and Client Secret and set them in the configuration.
Preflight Checks
Once you have completed all the needed configurations you can click next and the preflight checks will begin to run. The purpose of these checks is to ensure the provided configuration and application hosting location have the best chance of starting up correctly. If any of the preflight checks fail you will need to fix them before completing the installation.
Complete
At this point you should now have a running self-hosted OpsLevel application.
If you are having trouble setting up your self-hosted OpsLevel in any way, send us an email at info@opslevel.com and we’ll be happy to help debug and diagnose any issues.