Setting up a new service can be a very daunting and time-consuming task for developers. Developers excel at writing software, but setting up the scaffolding and infrastructure for a brand new service involves operations and decisions that are more in the infrastructure-focused platform and/or SRE teams’ wheelhouse. Depending on how the organization is set up, there are a number of tasks involved with service scaffolding that take developers away from delivering software: long sequence of manual operations to go through, waiting on time/support from the resident platform team, etc.
This is the problem that Service Creation solves. With Service Creation, Platform/SRE teams are able to define reusable templates that contain all the necessary scaffolding to set up a new service. Developer teams can then use these templates by entering in template variables to configure their service. This accelerates the pace at which developer teams can get started, while allowing platform teams to encode best practices and organizational standards into the services right from initial creation.
Cookiecutter
There are various tools out there that enable you to create code templates. One of the more popular ones is Cookiecutter.
At a high level, the Cookiecutter workflow looks like this:
- It allows you to use Jinja templating syntax to compose templated code
- There is a
cookiecutter.jsonfile that lists all the variables used within the template. The JSON files include default values and/or options for each of those variables. - It provides a command-line interface that either interactively prompts you for inputs for those variables or you can feed a preset list of variable values, and it uses those with the templated code to generate the specific set of files relevant to your particular project
- It even allows you to define actions to take before or after the template files are generated in the form of pre- and post-generate hooks, which are essentially Python scripts to run before and after template generation respectively
OpsLevel supports the use of Cookiecutter templates for service creation. It accepts template input values from the developer then generates the new service by writing out the files to a new service repository and adding the entry to service catalogue in OpsLevel.
See the official Cookiecutter documentation to learn how to create your own Cookiecutter templates.
Importing a template
Users need to have the
Adminrole to be able to import templates. Regular users will only be able to view already-imported templates and use them to create new services.
To get started, you will need to first have a cookiecutter template ready to use, saved in a repo in your private git forge or in a public GitHub repository. You can view popular cookiecutter templates from the community here. The following steps use this template for spinning up Python services using the Flask framework.
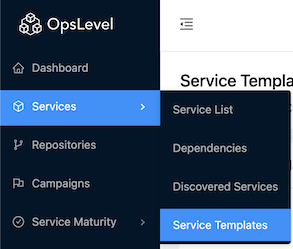
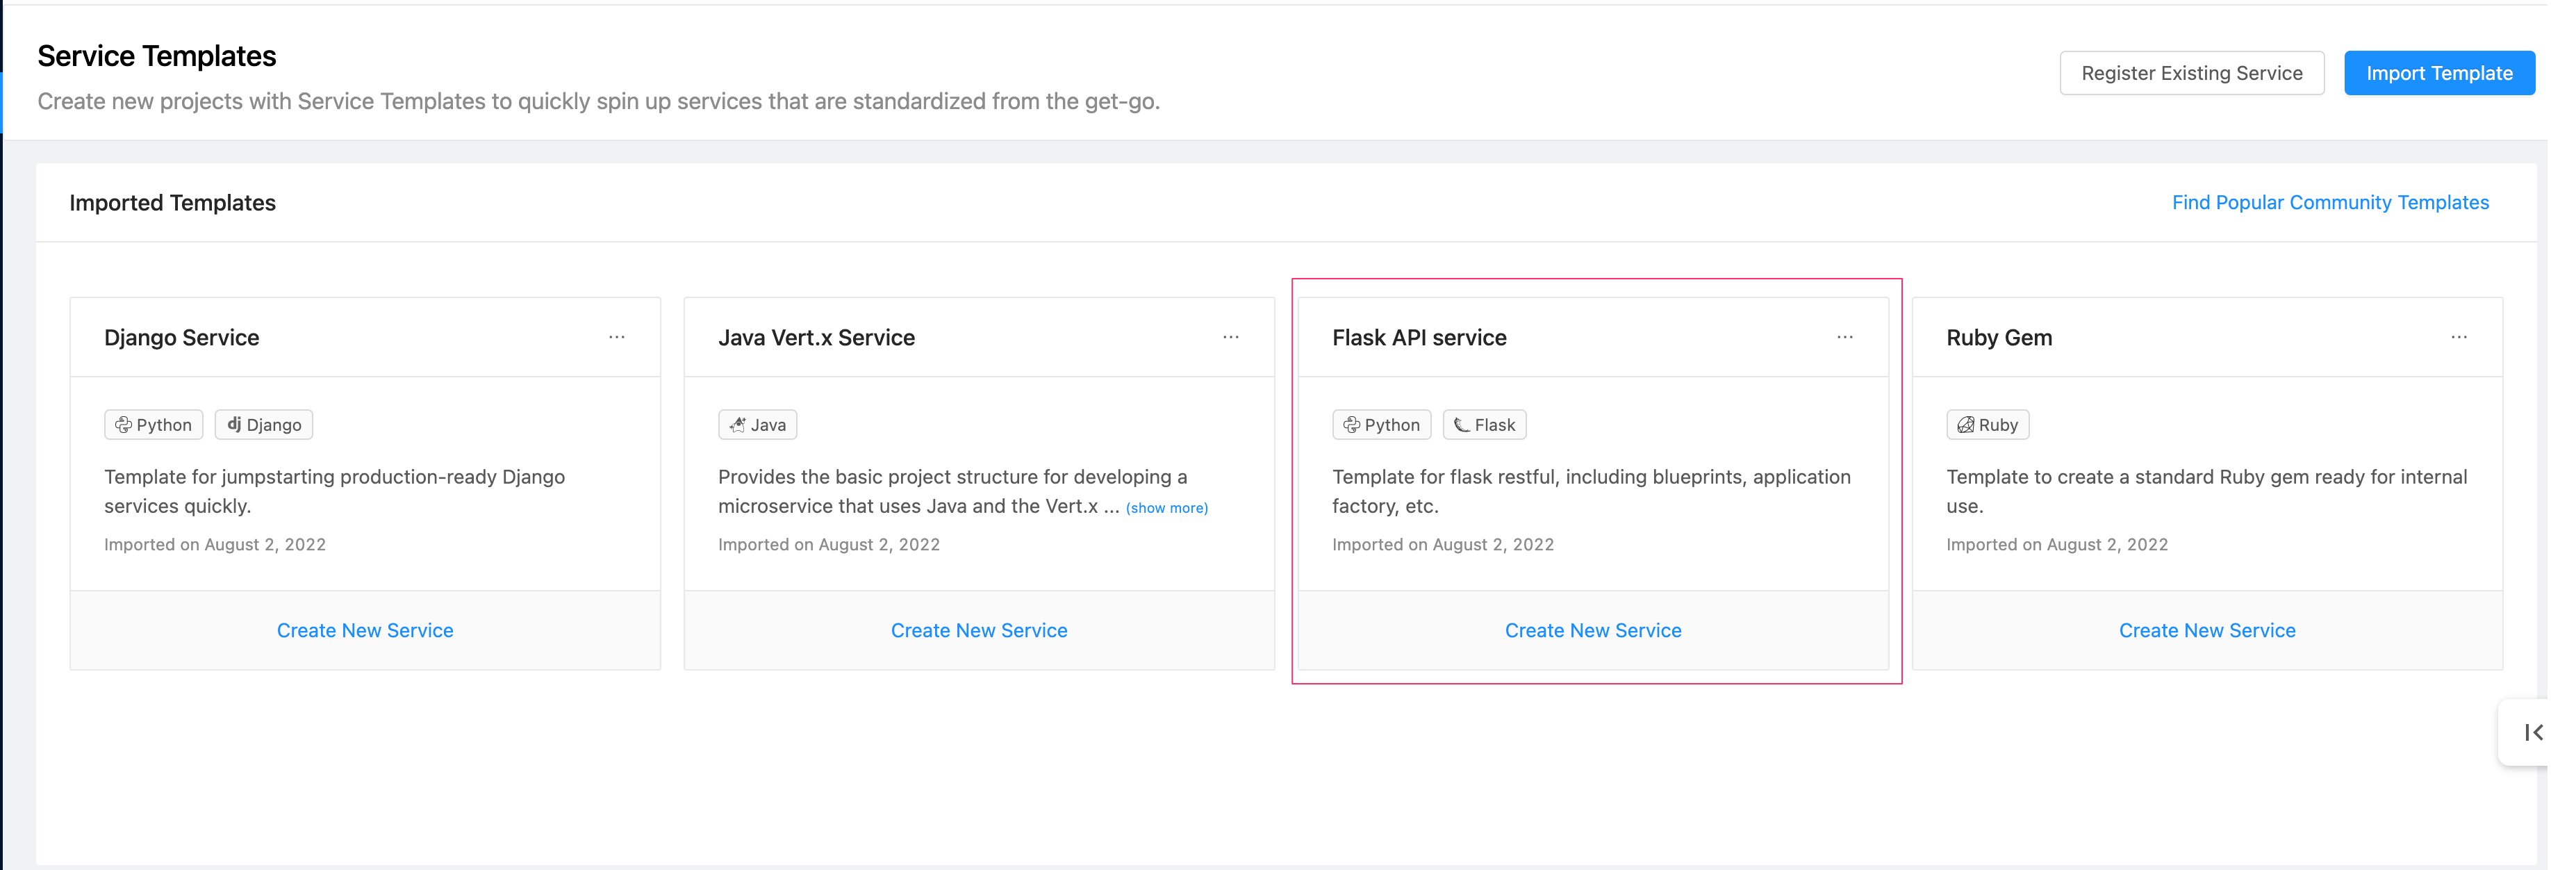
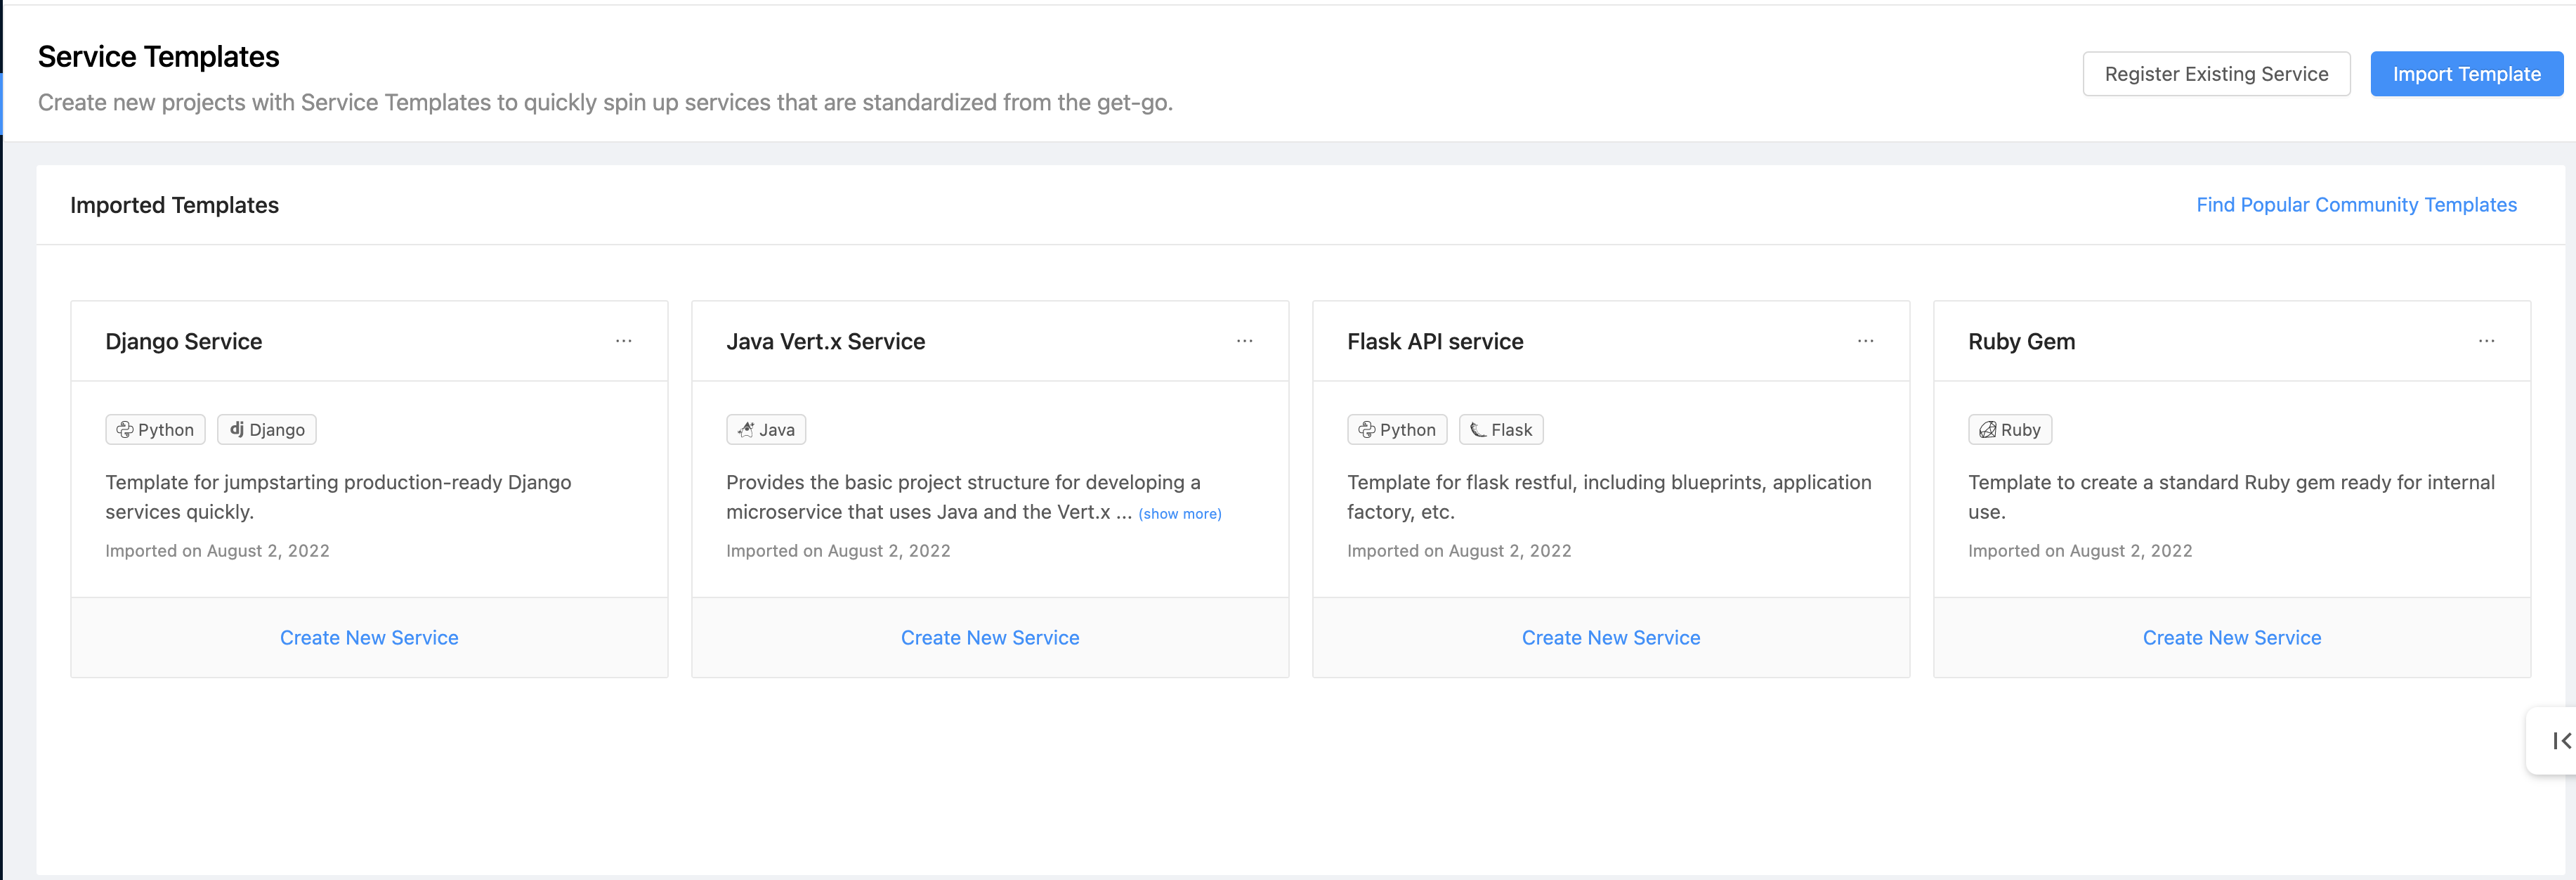
The first step is to import the template you want to make it available for reuse in your organization. You can navigate to the gallery of available templates by selecting “Services > Service Templates” from the main menu as shown below:
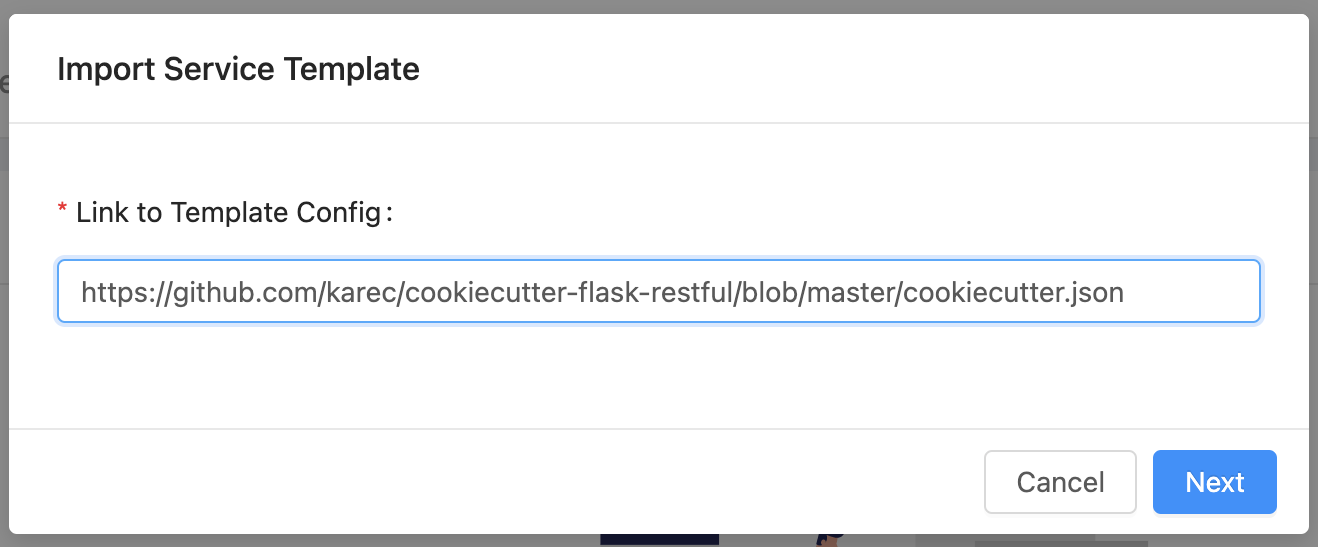
To import a new template, select the “Import template” from the top-right hand corner. This will bring up a modal requesting the URL to the cookiecutter.json file of the Cookiecutter template you wish to import. Please be sure to enter the URL to the actual cookiecutter.json file and not just the template repo URL.
You can import templates that are stored in a private repository in a git forge that you have integrated with your OpsLevel account, or from any public GitHub repository.
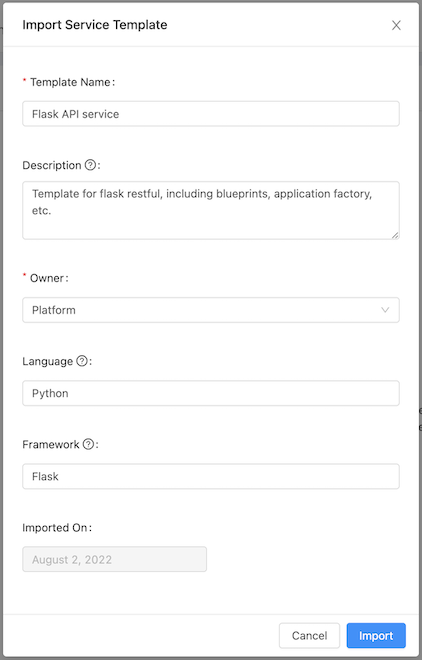
Once a valid cookiecutter.json filepath has been entered, you are asked to enter metadata about the template such as name, description, language and framework. This information will be shown when listing the imported template in the template gallery.
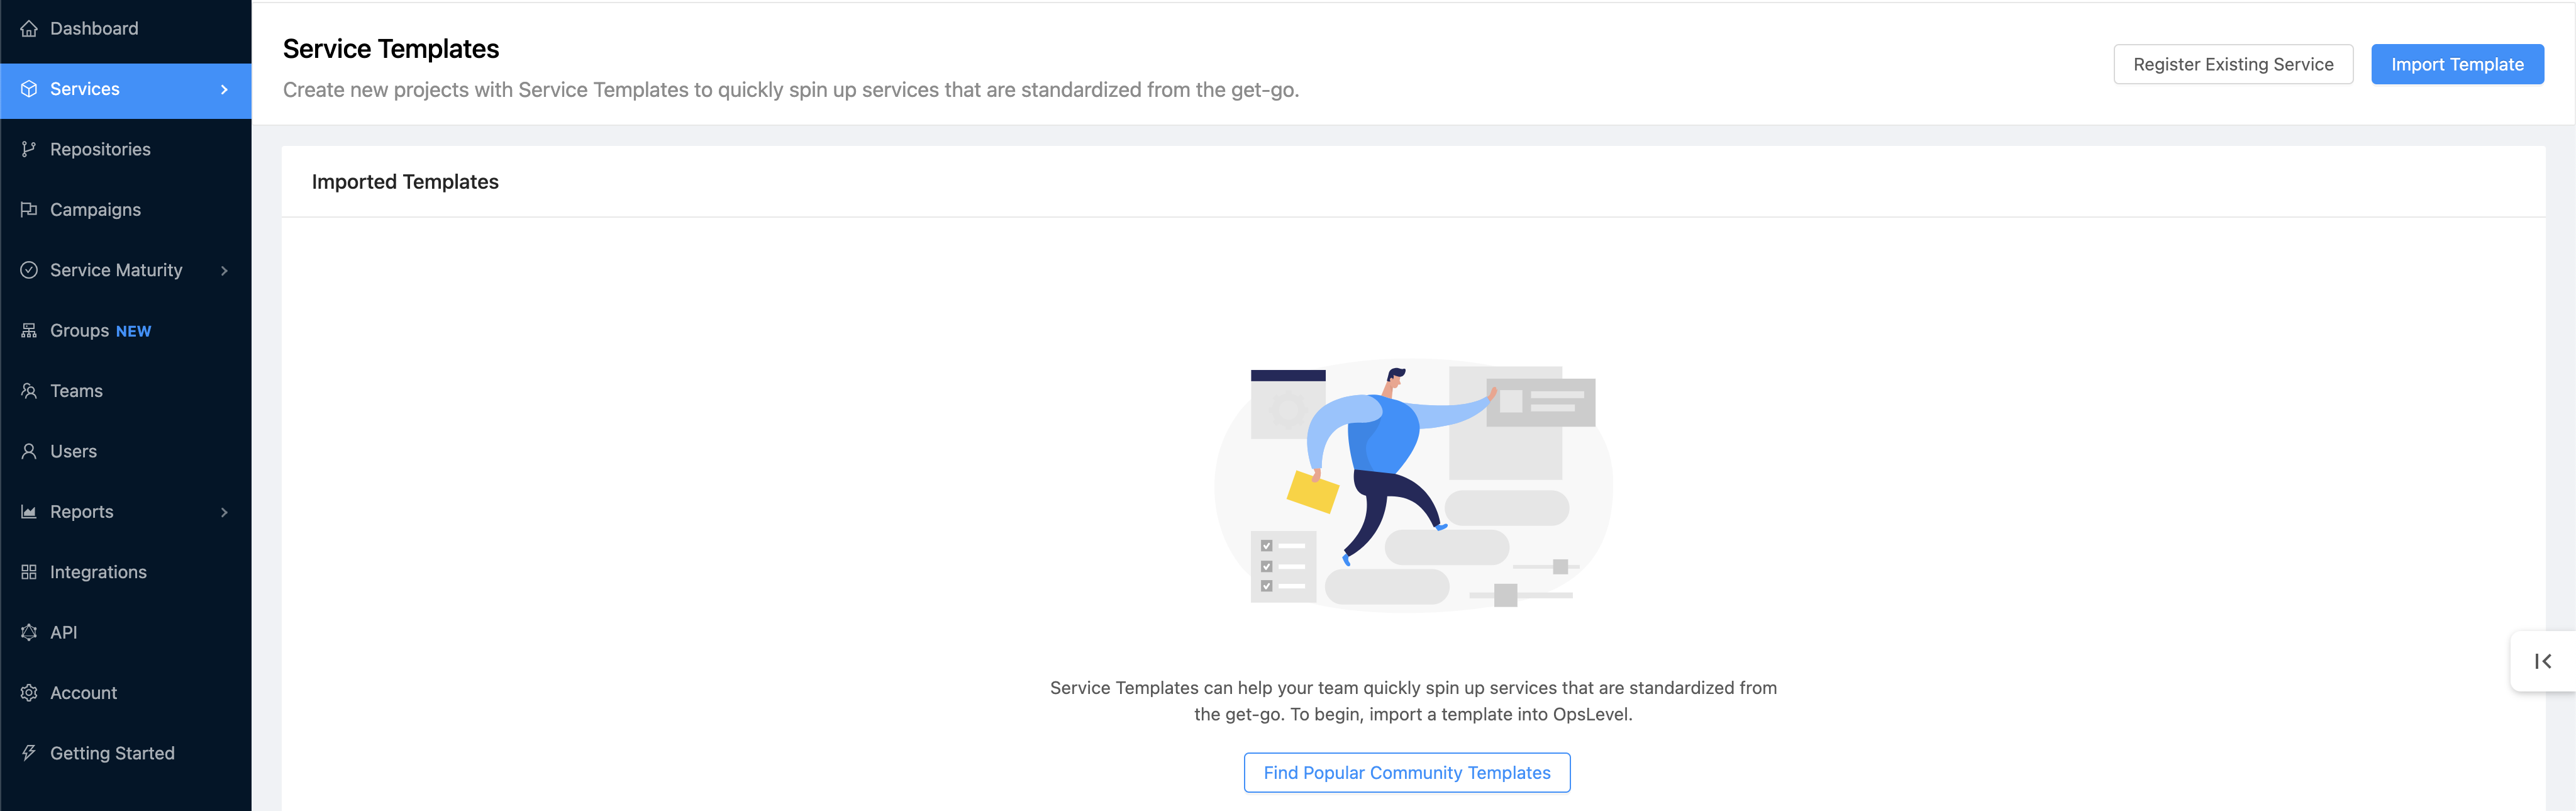
Once imported, you and others in the organization will be able to see the template in the Service Templates gallery.
The template is now ready for others to use to spin up a new service.
Creating a new service from a template
We presently support two flows for service creation:
- Directly write new service repository to your git forge (GitHub supported, GitLab support coming soon)
- Allow download of service files generated using the template, requiring manual creation of the service repository by the user
Eventually, we will directly write to all git forge integrations, and the download of files will no longer be required. But until then, we will support the first flow and fall back to the second depending on what your organization is set up for.
Choose service template
The first step is to choose the service template from all the templates imported into the account by your account administrators. You can view these by navigating to “Services > Service Templates” from the main menu.
Once there, you will be able to see all the imported templates along with their names, descriptions and any other language/framework details that have been provided. From this page, click the “Create New Service” link on the template you wish to use.
Directly create new service repository (GitHub only for now)
This section applies only for accounts that have set up the OpsLevel GitHub integration. If your organization uses any other git forge for saving service repositories, please go to the next section to use the manual download flow.
If your organization uses GitHub to store service repositories and has the OpsLevel GitHub integration set up, you can create the service repository and add the new service files directly from within OpsLevel’s Service Creation feature.
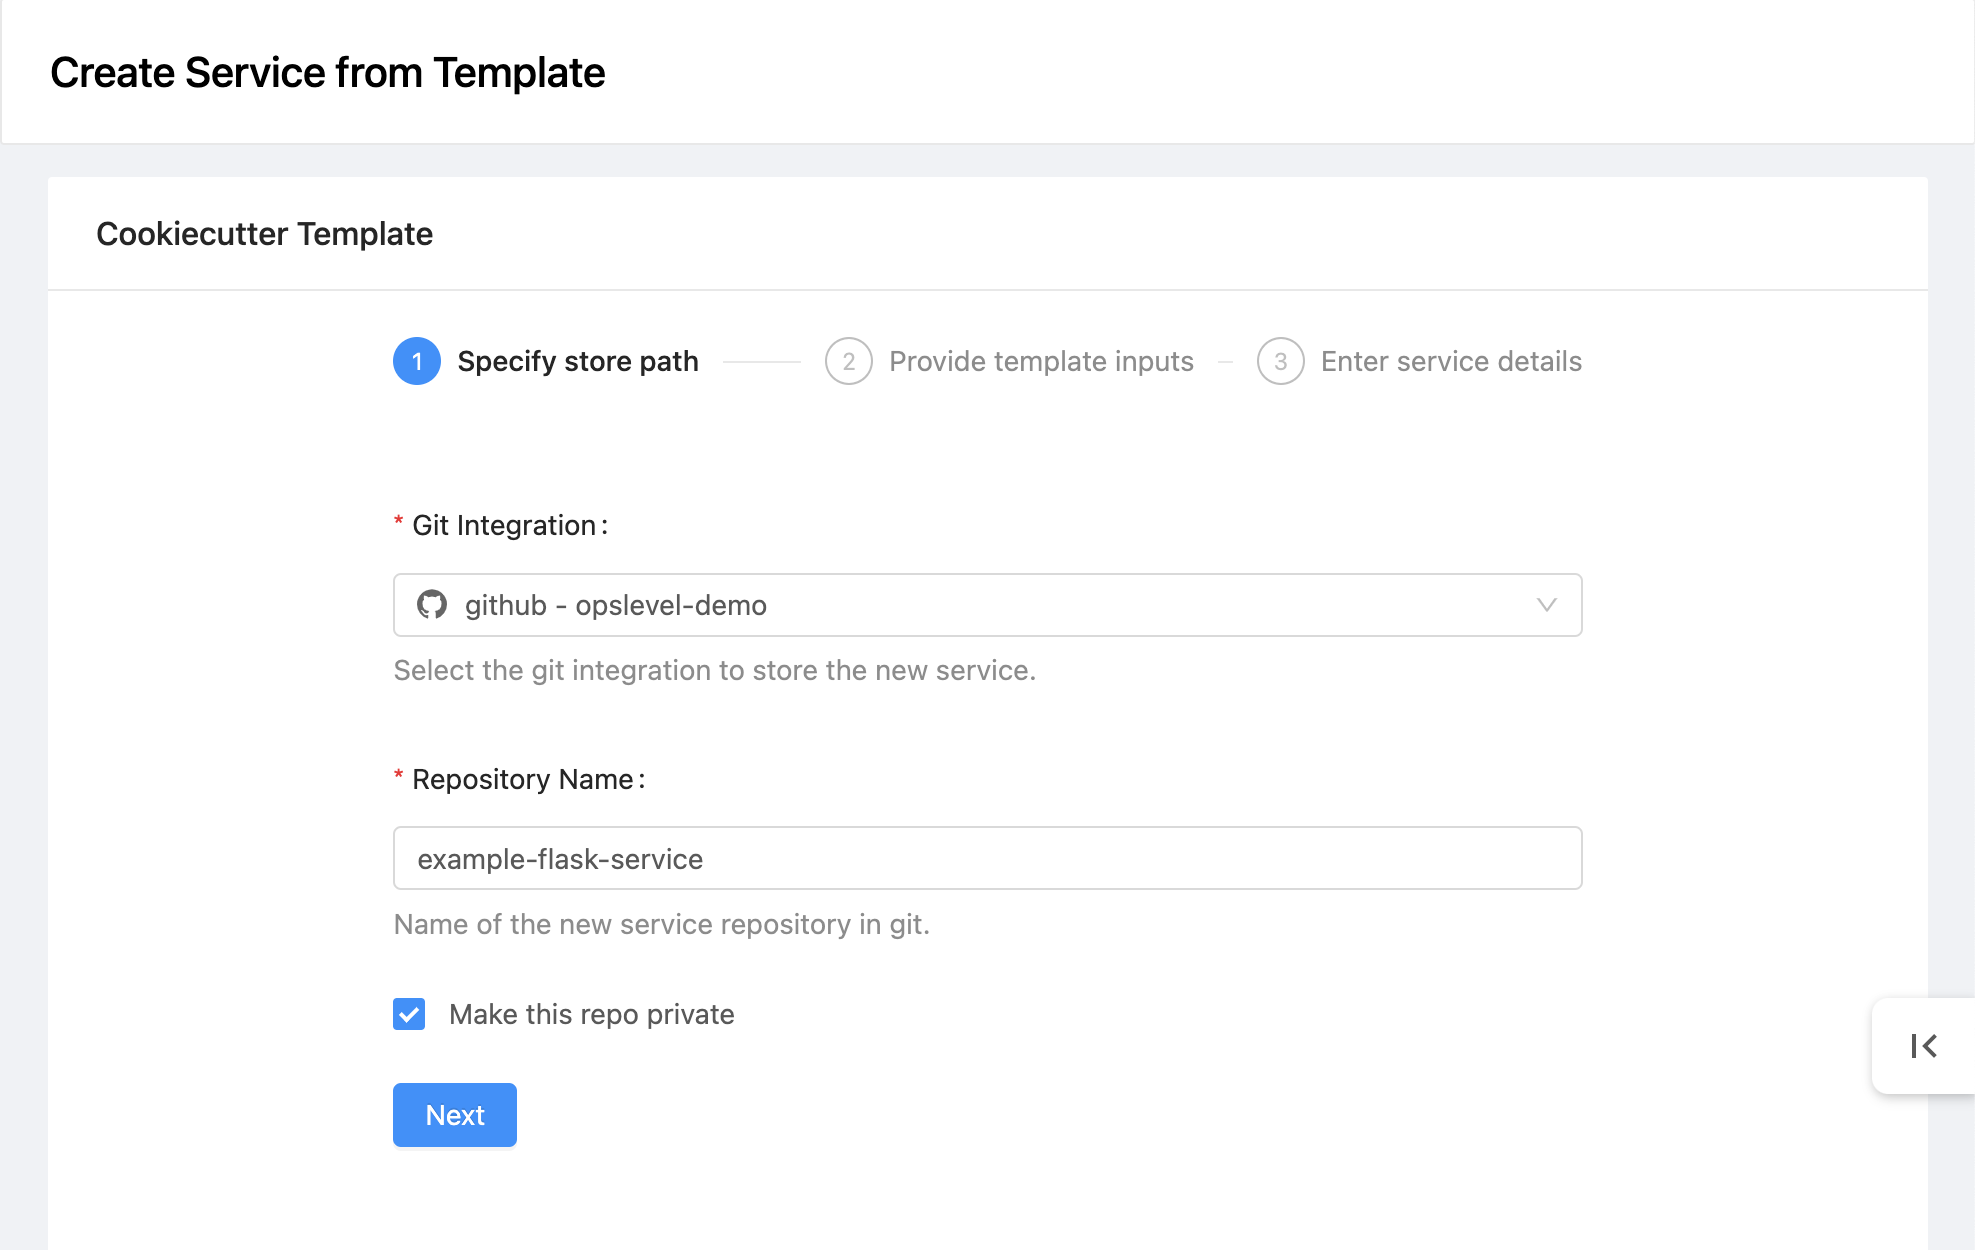
When you have selected “Create New Service” from the Service Templates page (see previous step), you will be presented with a 3-step form. The first step will ask for details about the new service repository:
- Which GitHub integration to write to
- What to name the repository
- Whether the repository should be private or public
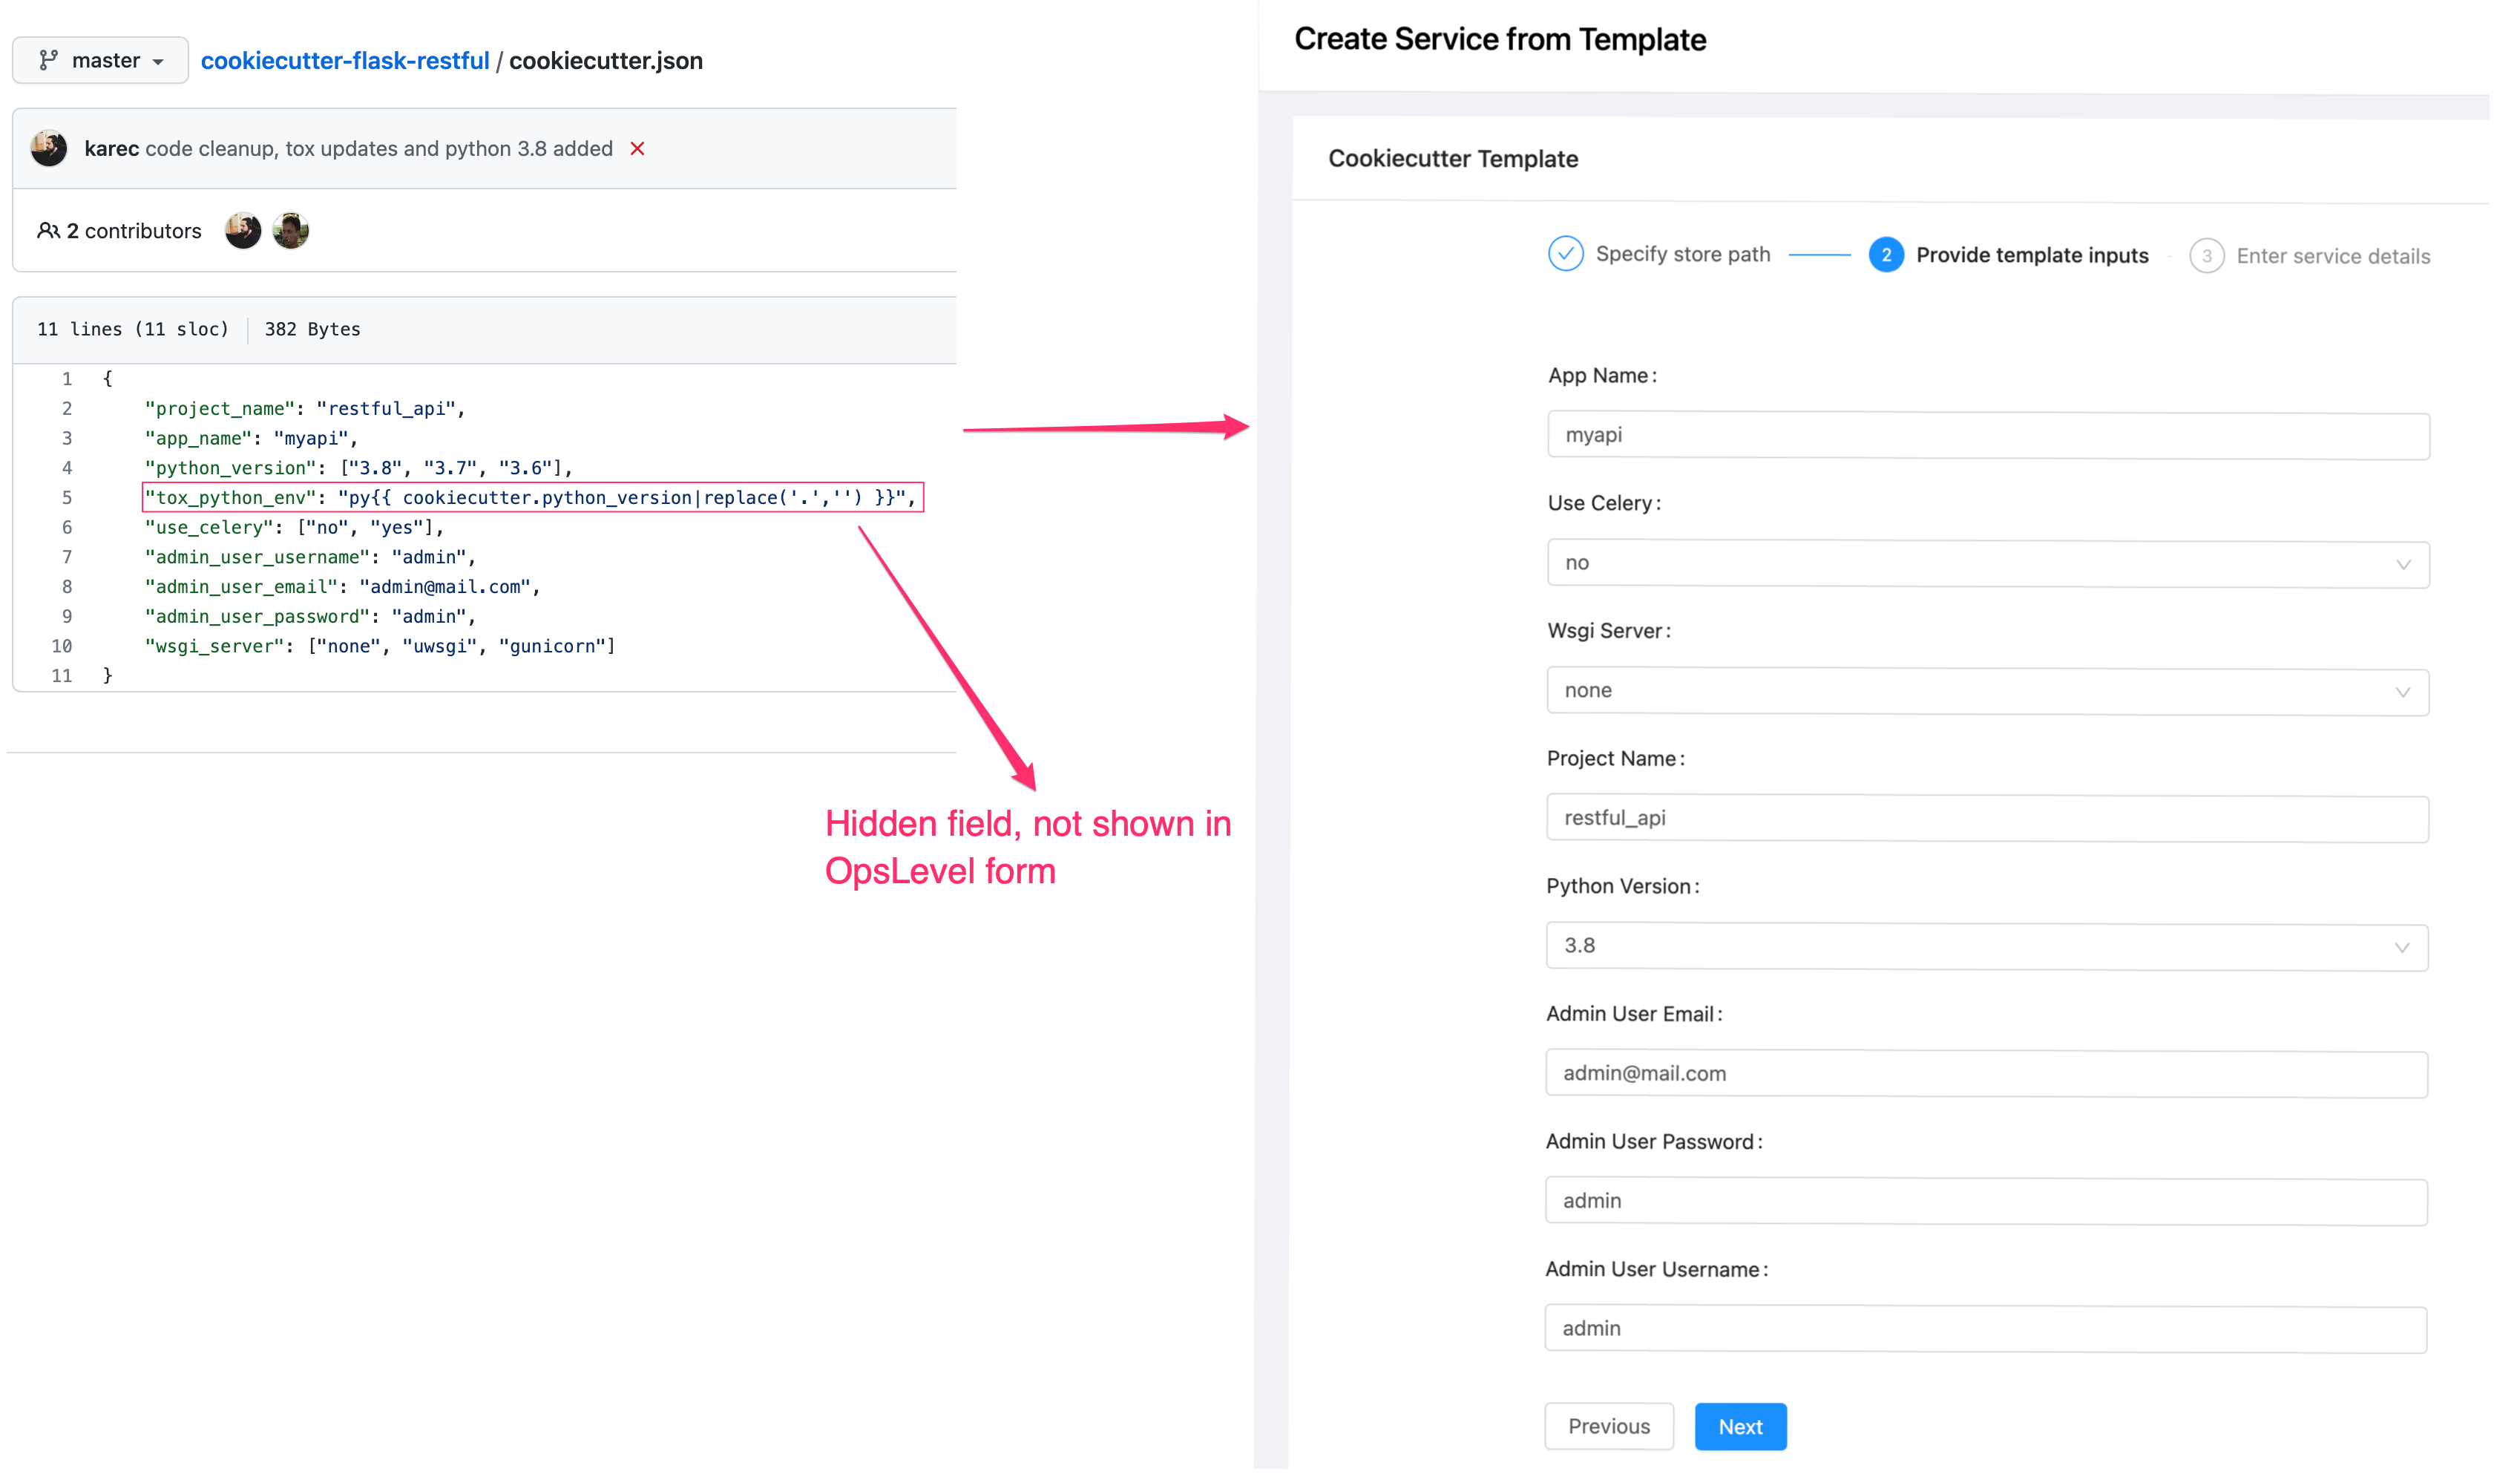
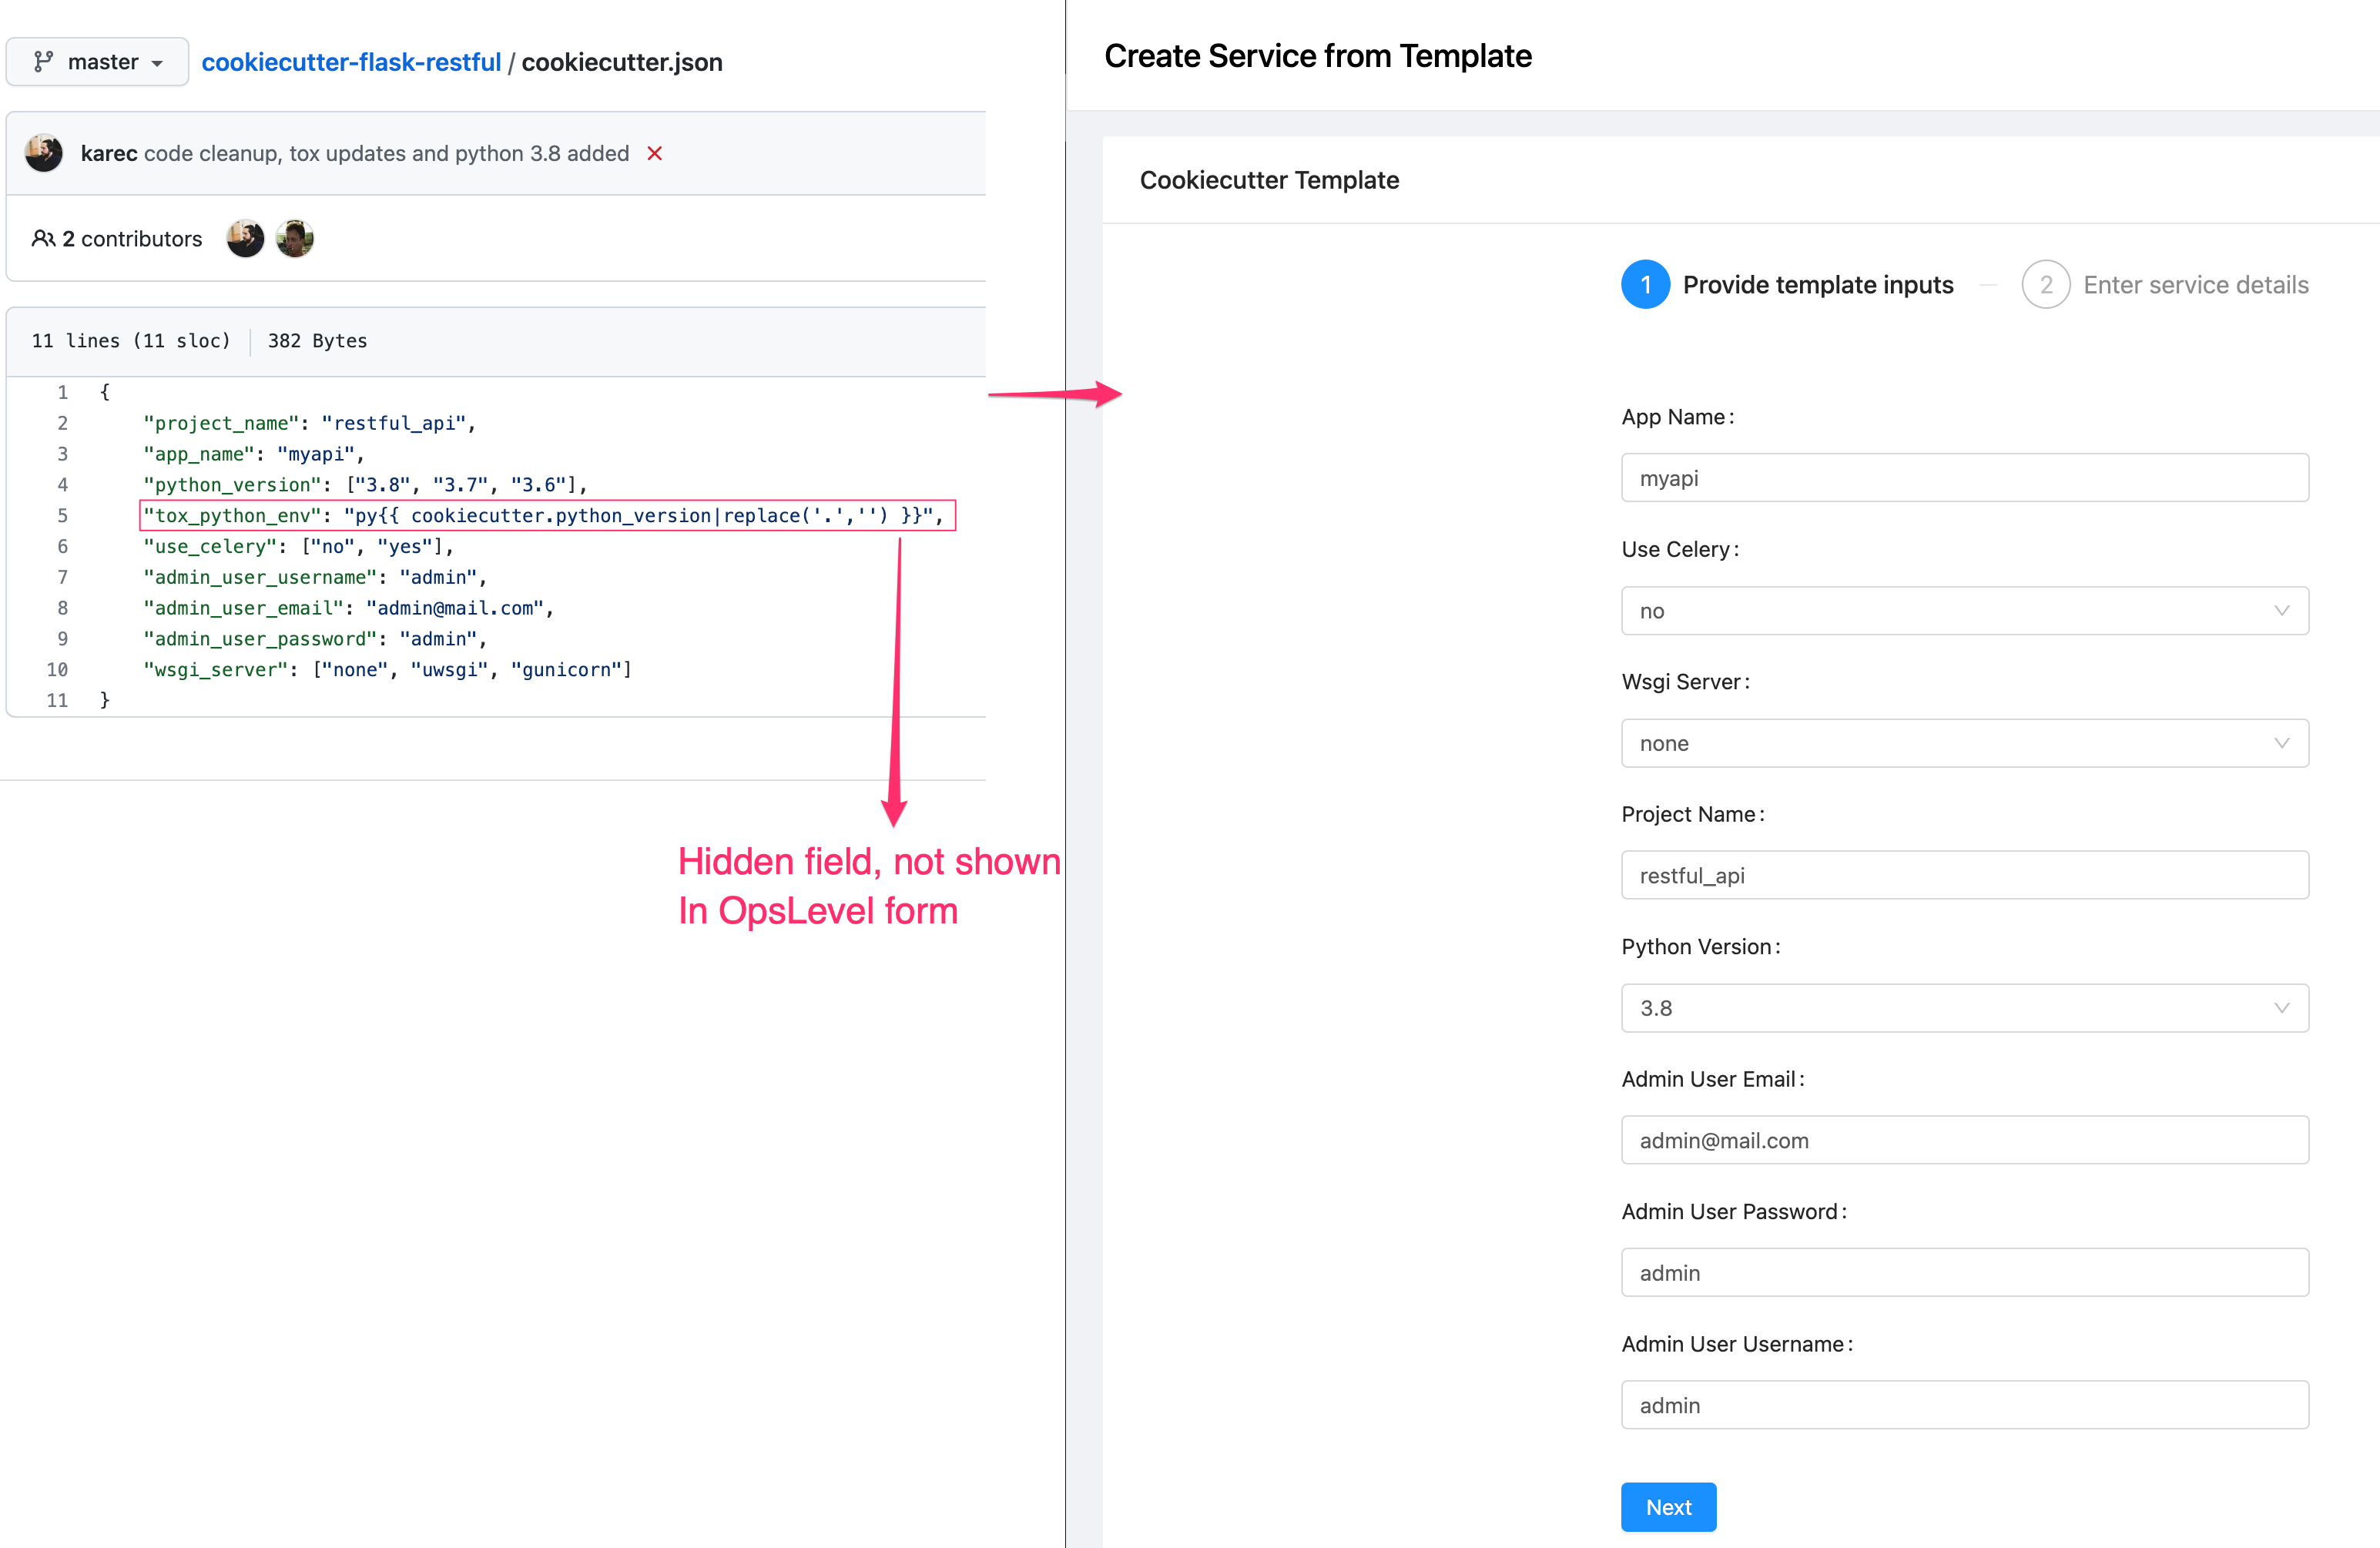
In the next step, you will be prompted for inputs into the template. These inputs are derived from parsing the cookiecutter.json file itself - as you can see in the image below, we translate the cookiecutter.json file into a form. We show the default values for all the input fields. Any inputs where you are to select one of multiple options, we show a dropdown. And if there are any hidden inputs (i.e., for template-internal use), we do not show those.
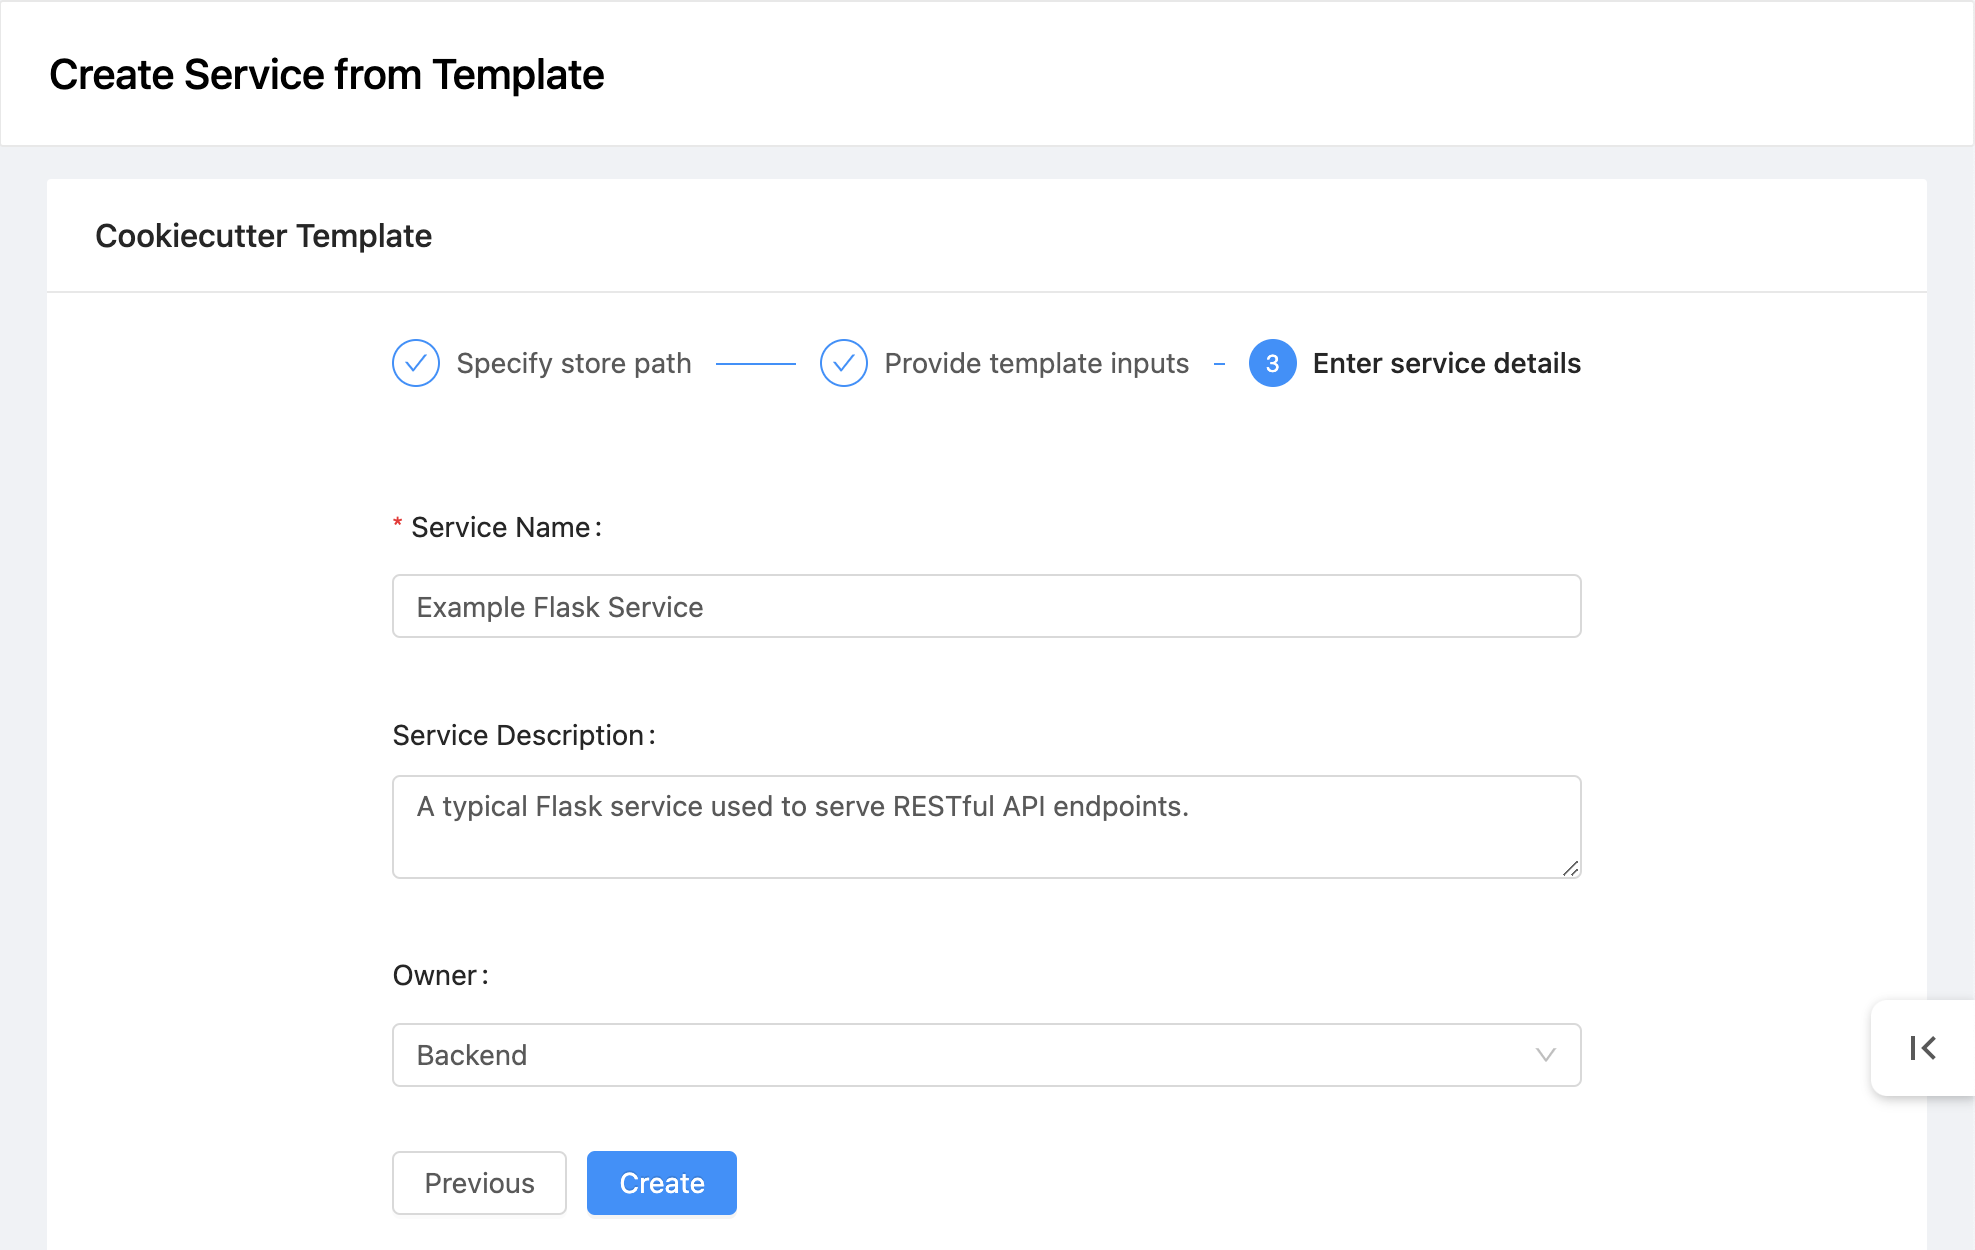
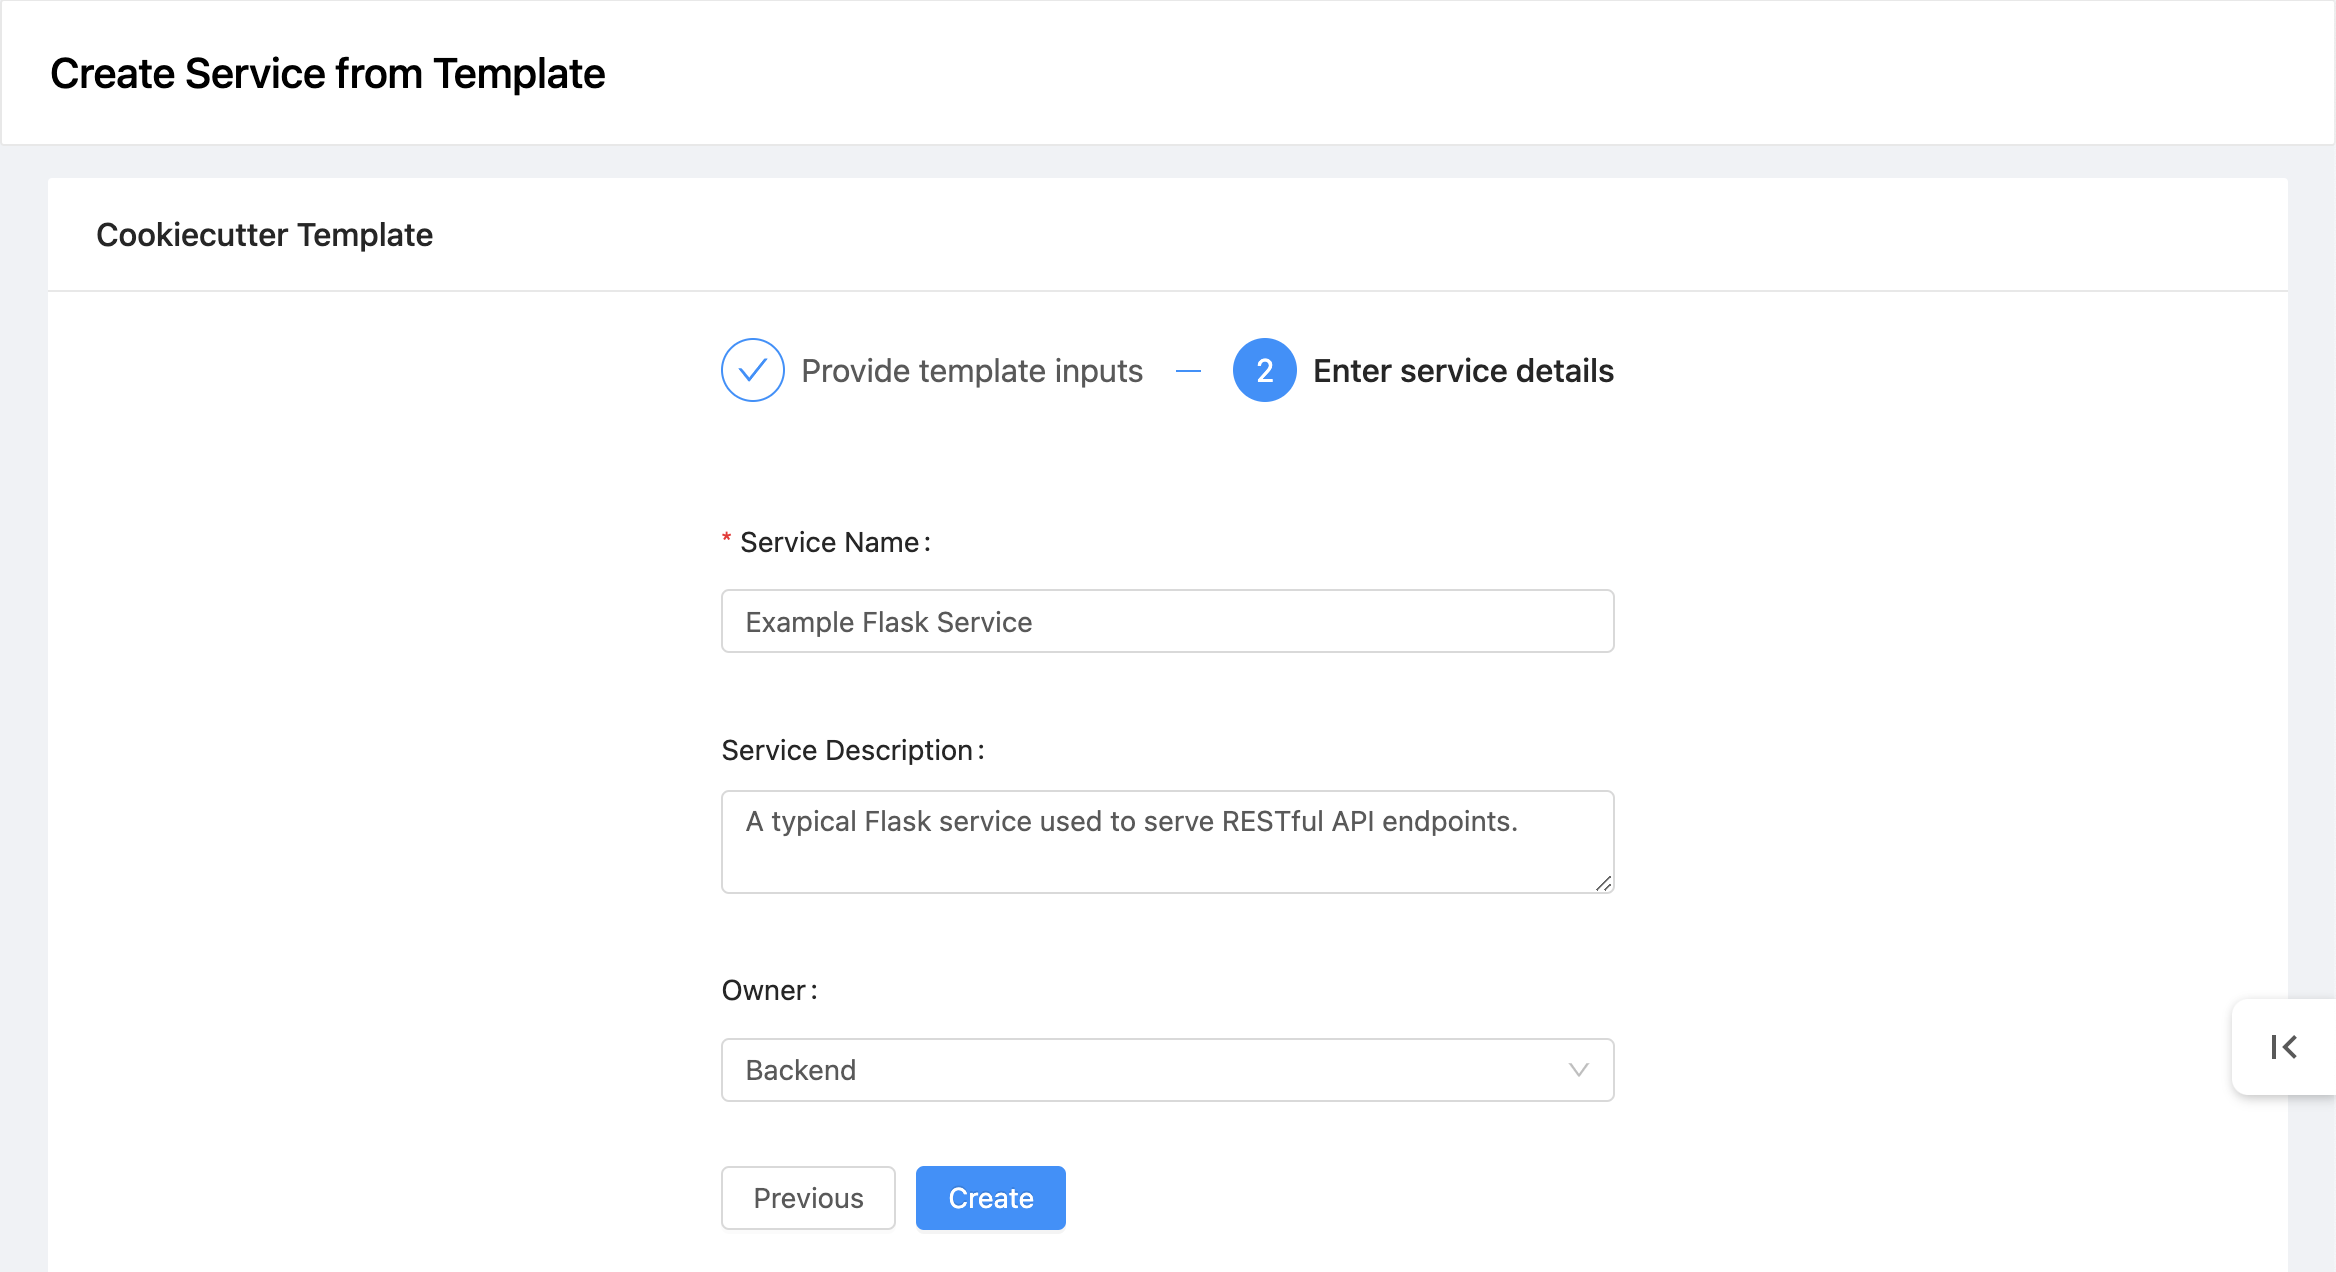
Once you have customized the template variables specific to your new service’s needs, you can move onto the third and final step. This is where you define how the service should appear in OpsLevel - the service name, description and owner.
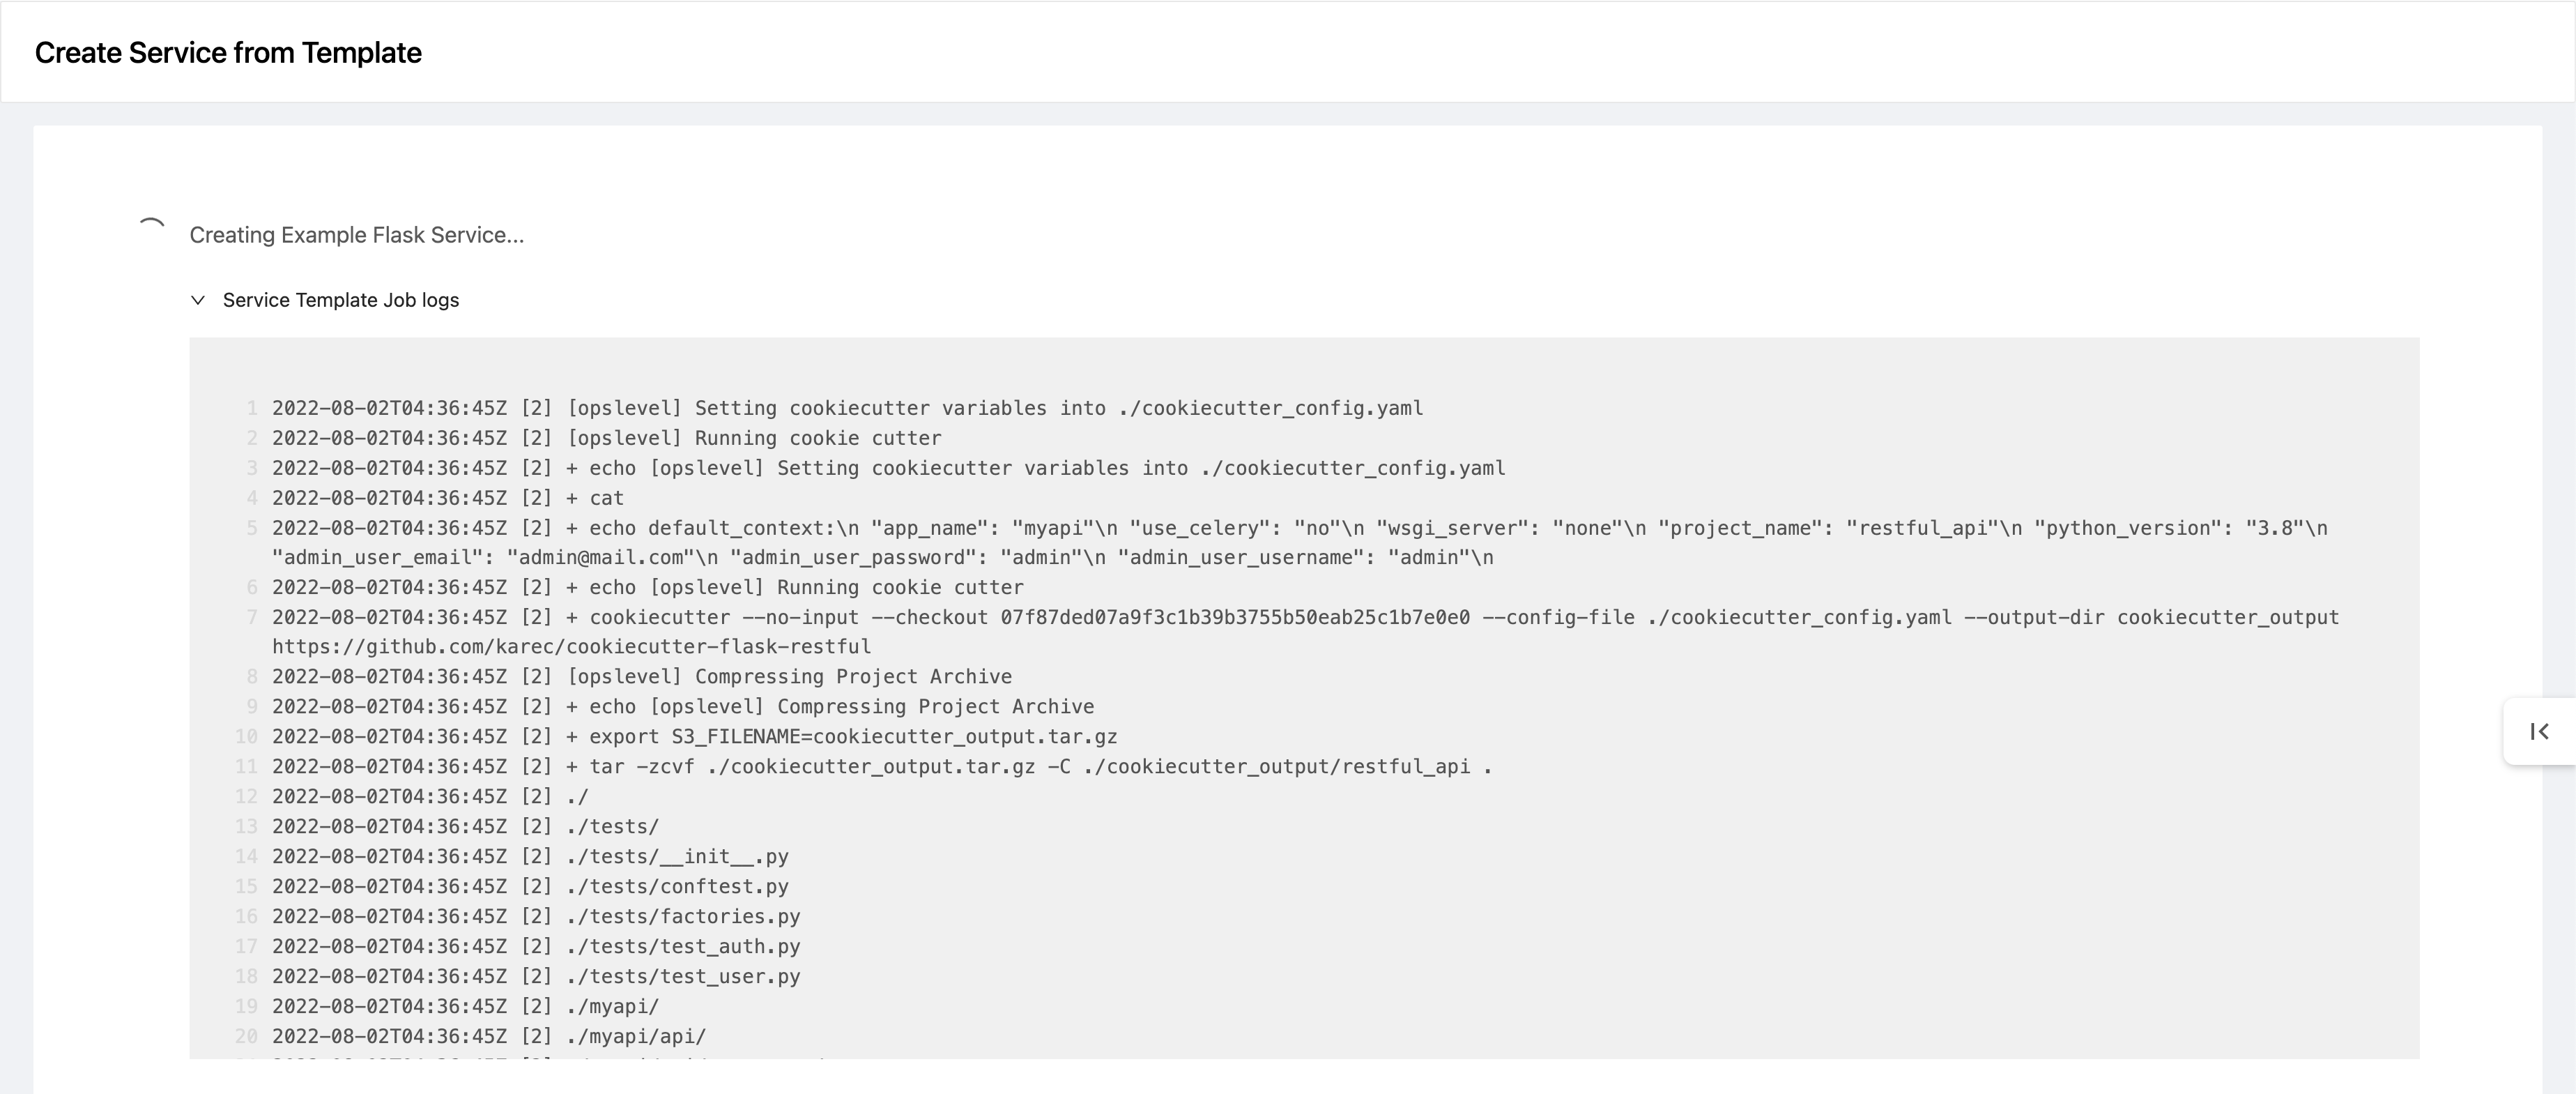
With all the steps completed, the service creation can now begin. You will see a screen showing ongoing progress of the service creation process. As it progresses, you will see the log lines appear from the backend service creation process that is running Cookiecutter.
If there are any issues with generating the service, you will see the screen report a failure to create the new service. The logs should help you troubleshoot the problem. It may be a problem with the template itself, bad input values to the template, or an error in the backend for OpsLevel. If there are any issues with service creation that indicate an issue on our end, please notify your OpsLevel account administrator or contact our support to help you resolve the issue.
If the service creation is successful, you will see the screen reporting success and providing you two buttons.

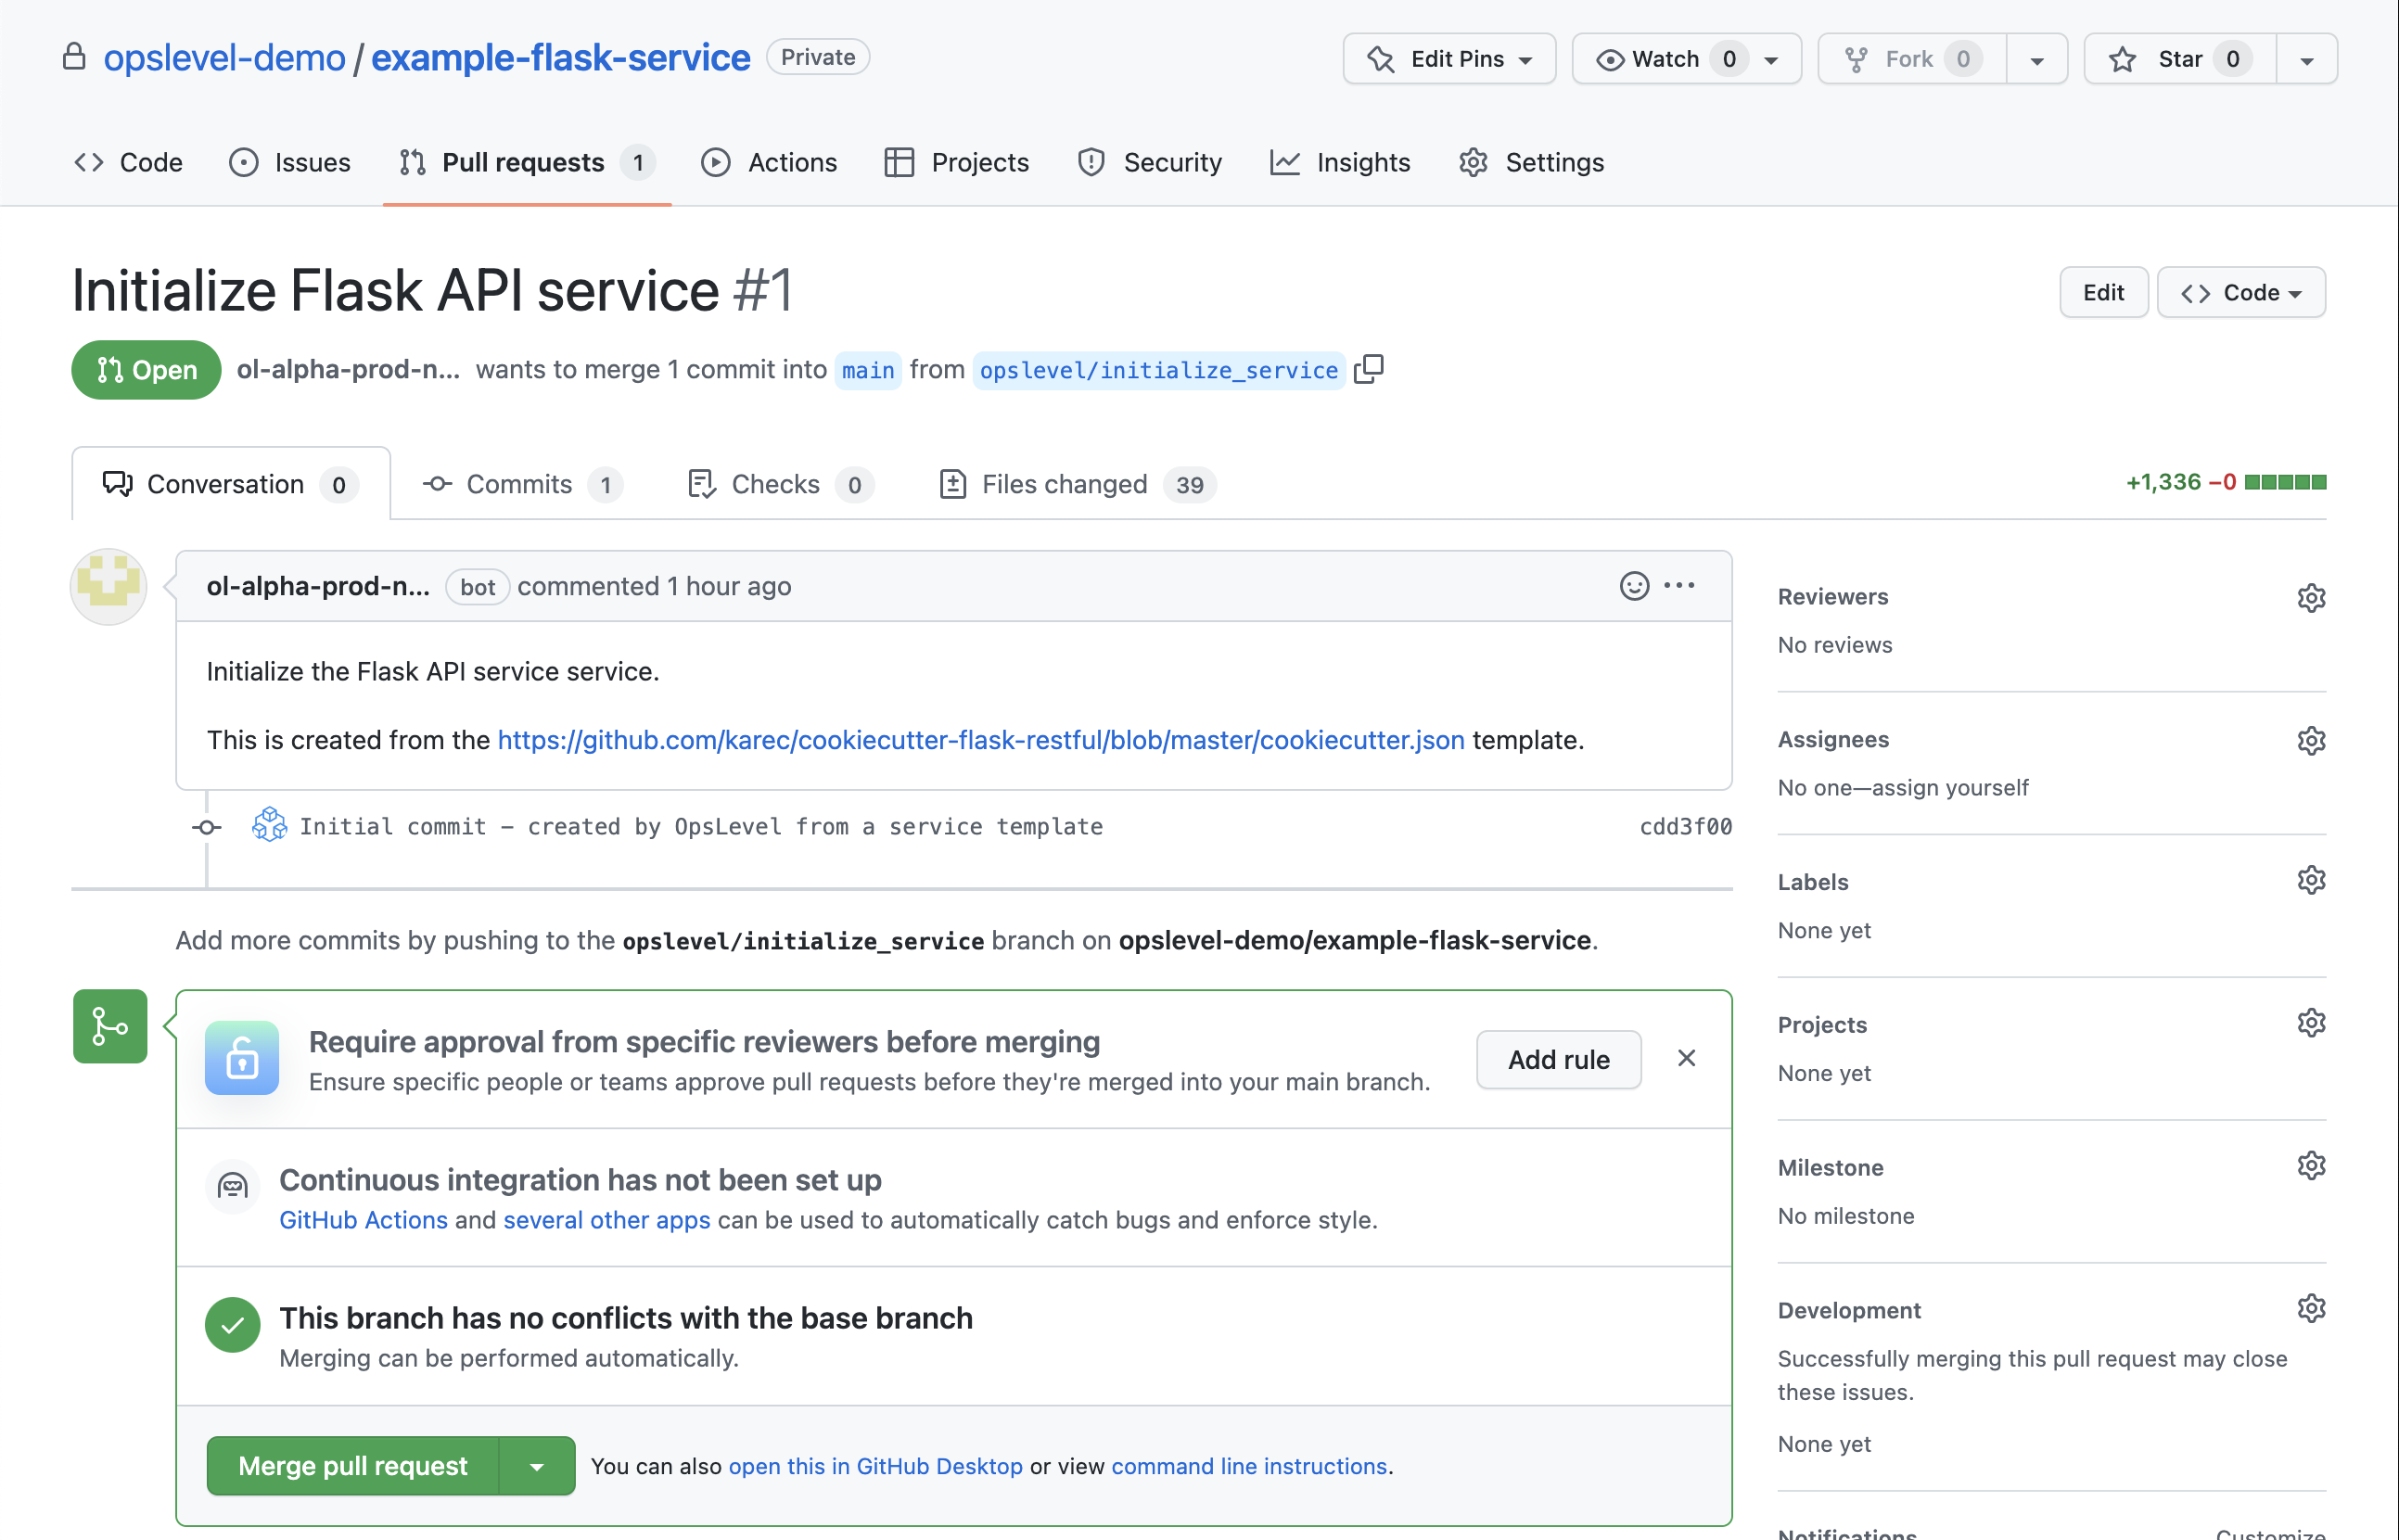
Click “View Pull Request in GitHub” to visit the pull request adding service files to the newly created service repository. As the developer, you can review the initial boilerplate being added for your service, and if required, make some adjustments, and then merge it into your new service repository.
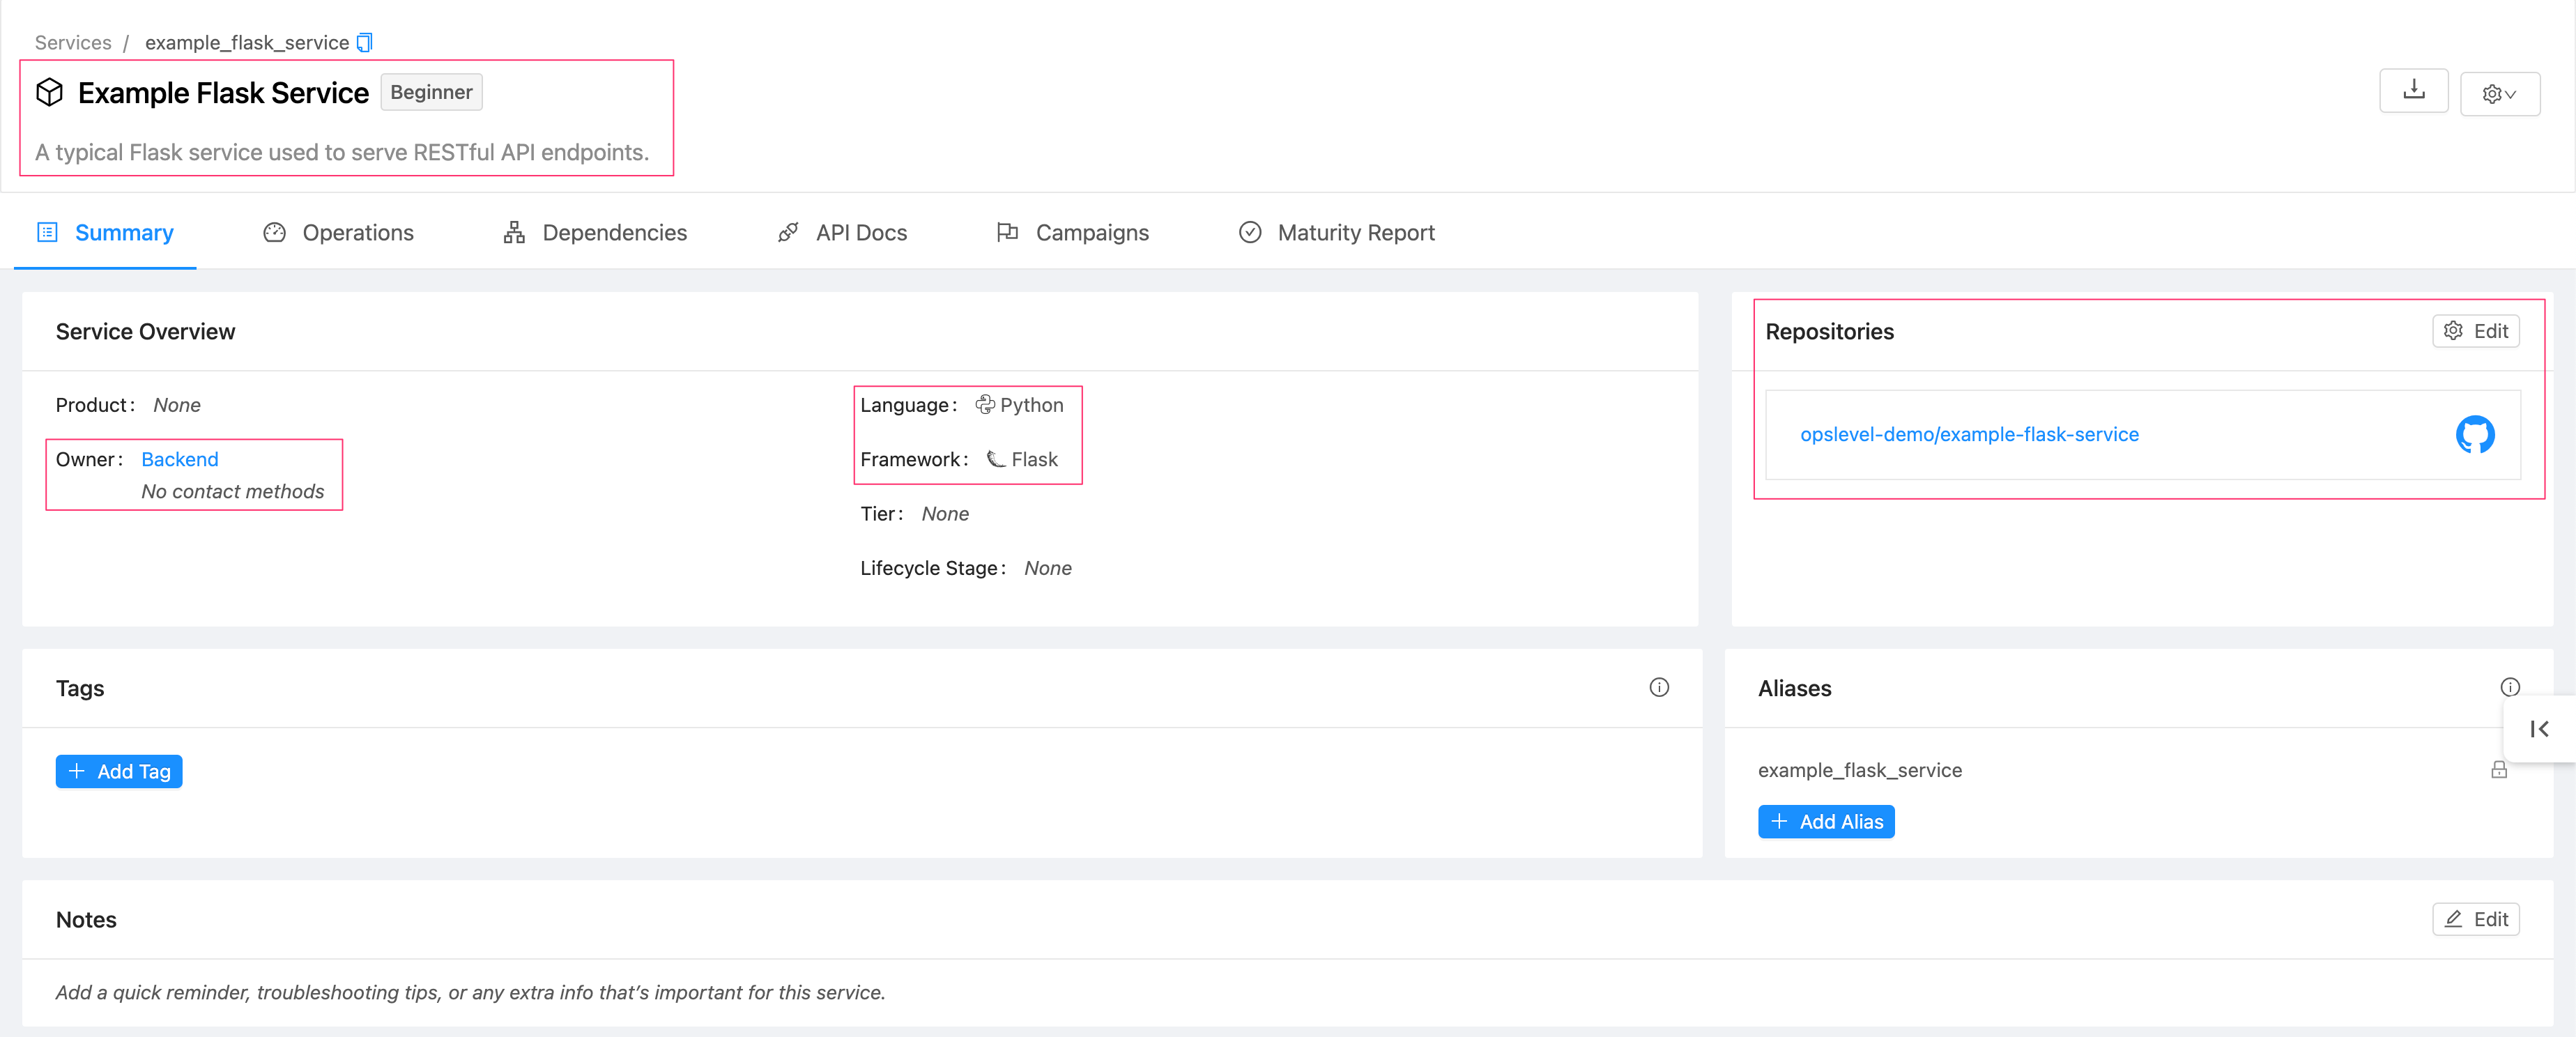
Click “View <\Service Name>” to navigate to the service entry within OpsLevel itself. The service will have all the metadata you provided in the last step of the service creation form, and also include common metadata from the service template itself like language and framework. Also, the newly created repository will be linked to it.
You have now successfully generated the initial boilerplate required for a new service in your organization, with all the metadata stored within the service catalogue in OpsLevel!
Download service files
If your organization uses GitLab or Bitbucket, you can still create new service files using a template. We will support directly writing to GitLab soon, and gradually roll out support for all other git forges. If your organization uses GitHub as the main git forge, please see section above on how to create a new service repository directly in GitHub.
If we don’t yet support directly writing service repositories to your organization’s git forge, the fallback for service creation is to download the service files, then manually create the service repository and upload the files there.
With the download flow, after clicking “Create New Service” from the gallery of Service Templates (see previous step), you will see a two-step form. In the first step, you will be prompted for inputs into the template. These inputs are derived from parsing the cookiecutter.json file itself - as you can see in the image below, we translate the cookiecutter.json file into a form. We show the default values for all the input fields. Any inputs where you are to select one of multiple options, we show a dropdown. And if there are any hidden inputs (i.e., for template-internal use), we do not show those.
Once you have customized the template variables specific to your new service’s needs, you can move onto the second and final step. This is where you define how the service should appear in OpsLevel - the service name, description and owner.
With all the steps completed, the service creation can now begin. You will see a screen showing ongoing progress of the service creation process. As it progresses, you will see the log lines appear from the backend service creation process that is running Cookiecutter.
If there are any issues with generating the service, you will see the screen report a failure to create the new service. The logs should help you troubleshoot the problem. It may be a problem with the template itself, bad input values to the template, or an error in the backend for OpsLevel. If there are any issues with service creation that indicate an issue on our end, please notify your OpsLevel account administrator or contact our support to help you resolve the issue.
If the service creation is successful, you will see the screen reporting success and providing you two buttons. The “Download File” button will trigger a download of the service files in a compressed tarball (*.tar.gz extension). The “Next Steps” dialog on the service completion page will guide you on how to manually setup the service repository.
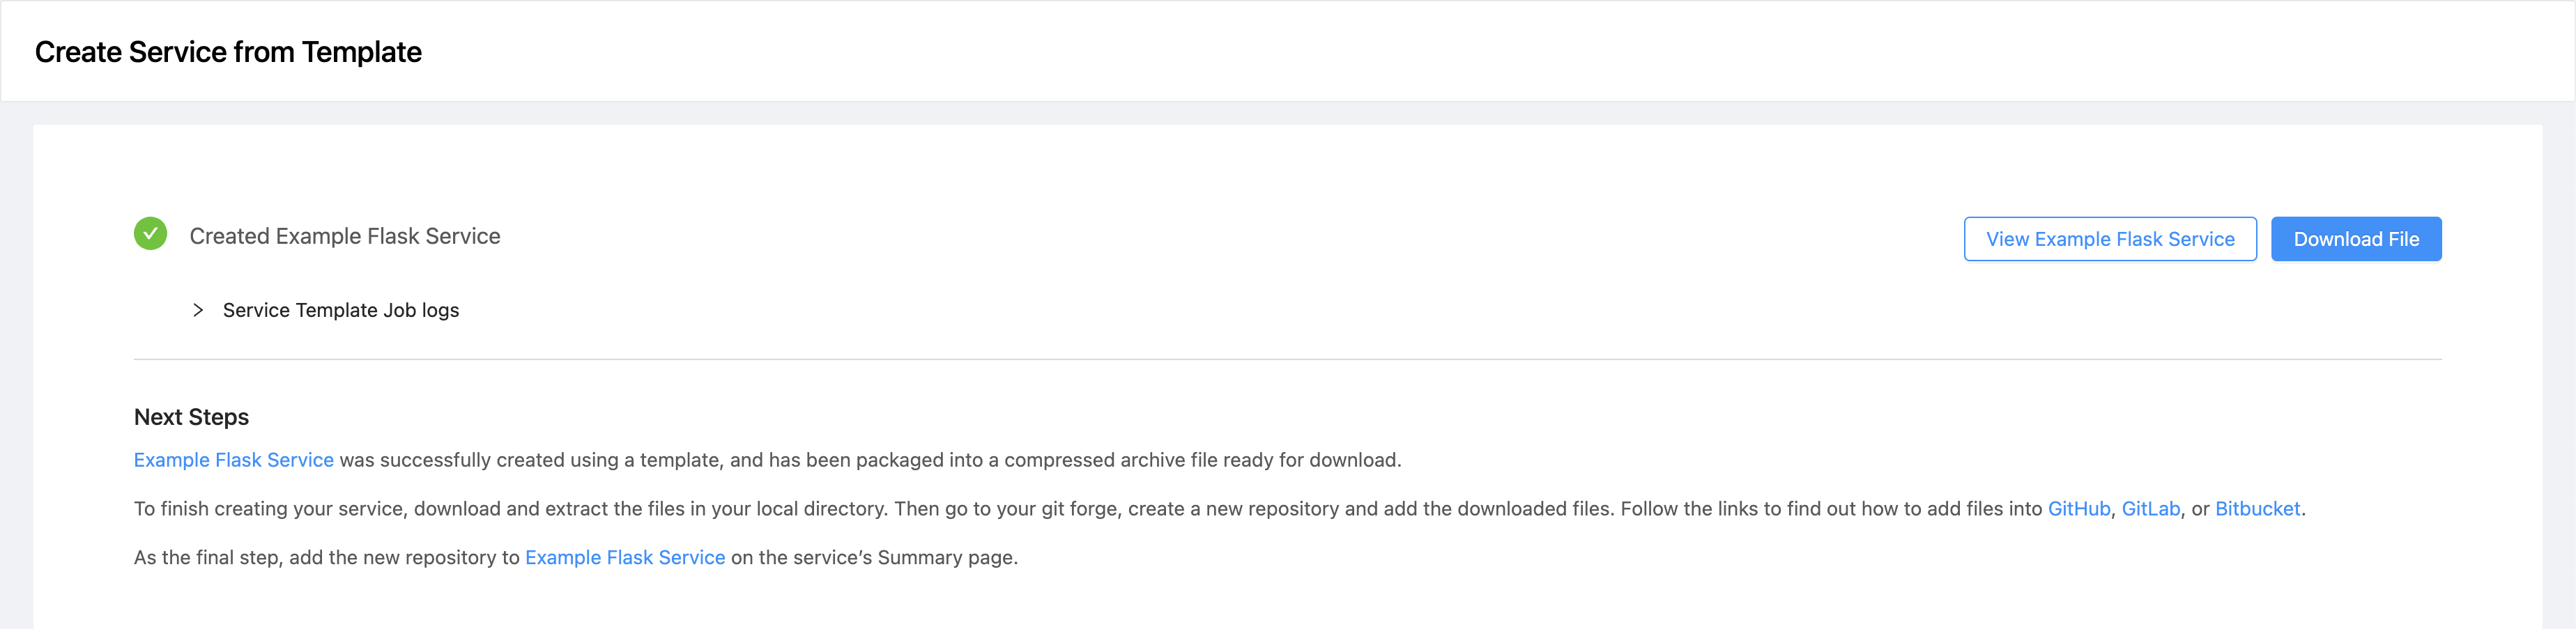
Click “View <\Service Name>” to navigate to the service entry within OpsLevel itself. The service will have all the metadata you provided in the last step of the service creation form, and also include common metadata from the service template itself like language and framework. Also, the “Next Steps” prompt in the service creation completion screen will show up here. It will have the “Download File” option here as well to allow you to download the generated service files. Once you have setup and linked a service repository with this service, this “Next Steps” prompt will no longer show up.
The next steps to create the initial service repository will have to be manually done by you:
- You can create the new service repository in the your organization’s git forge, and create an initial pull/merge request against that repository adding the files downloaded from OpsLevel. Once reviewed, the merge request can be merged in.
- Connect the newly created repository with the new service in OpsLevel
You have now successfully generated the initial boilerplate required for a new service in your organization, with all the metadata stored within OpsLevel!